Managing spaces in Admin Portal

Written By Natalia Povrozniak (Administrator)

Updated at May 16th, 2024

You can manage spaces per building in Admin Portal under Manage > Spaces. Here, you'll have a usual table view with all spaces within a certain building that are currently added to the system. 

Space settings take precedence before settings that are then applied by the booking policy.

There are the following information displayed in the table view:

  • Space Name
  • Description
  • Space Type
  • Status
  • Policy
  • Floor
  • Zone

✅ Here, you can:

  • Search for a certain space
  • Filter the existing ones
    Image
  • Set active or inactive status for one or more spaces. Select one or more spaces with inactive status to activate them. Same works for active spaces: select one or more to move them to inactive status. If you select spaces with different statuses, the SET STATUS button is disabled.
  • Edit space information
  • Add new spaces

❌ But you cannot delete a space from this page. Contact your ICONICS representative for this.
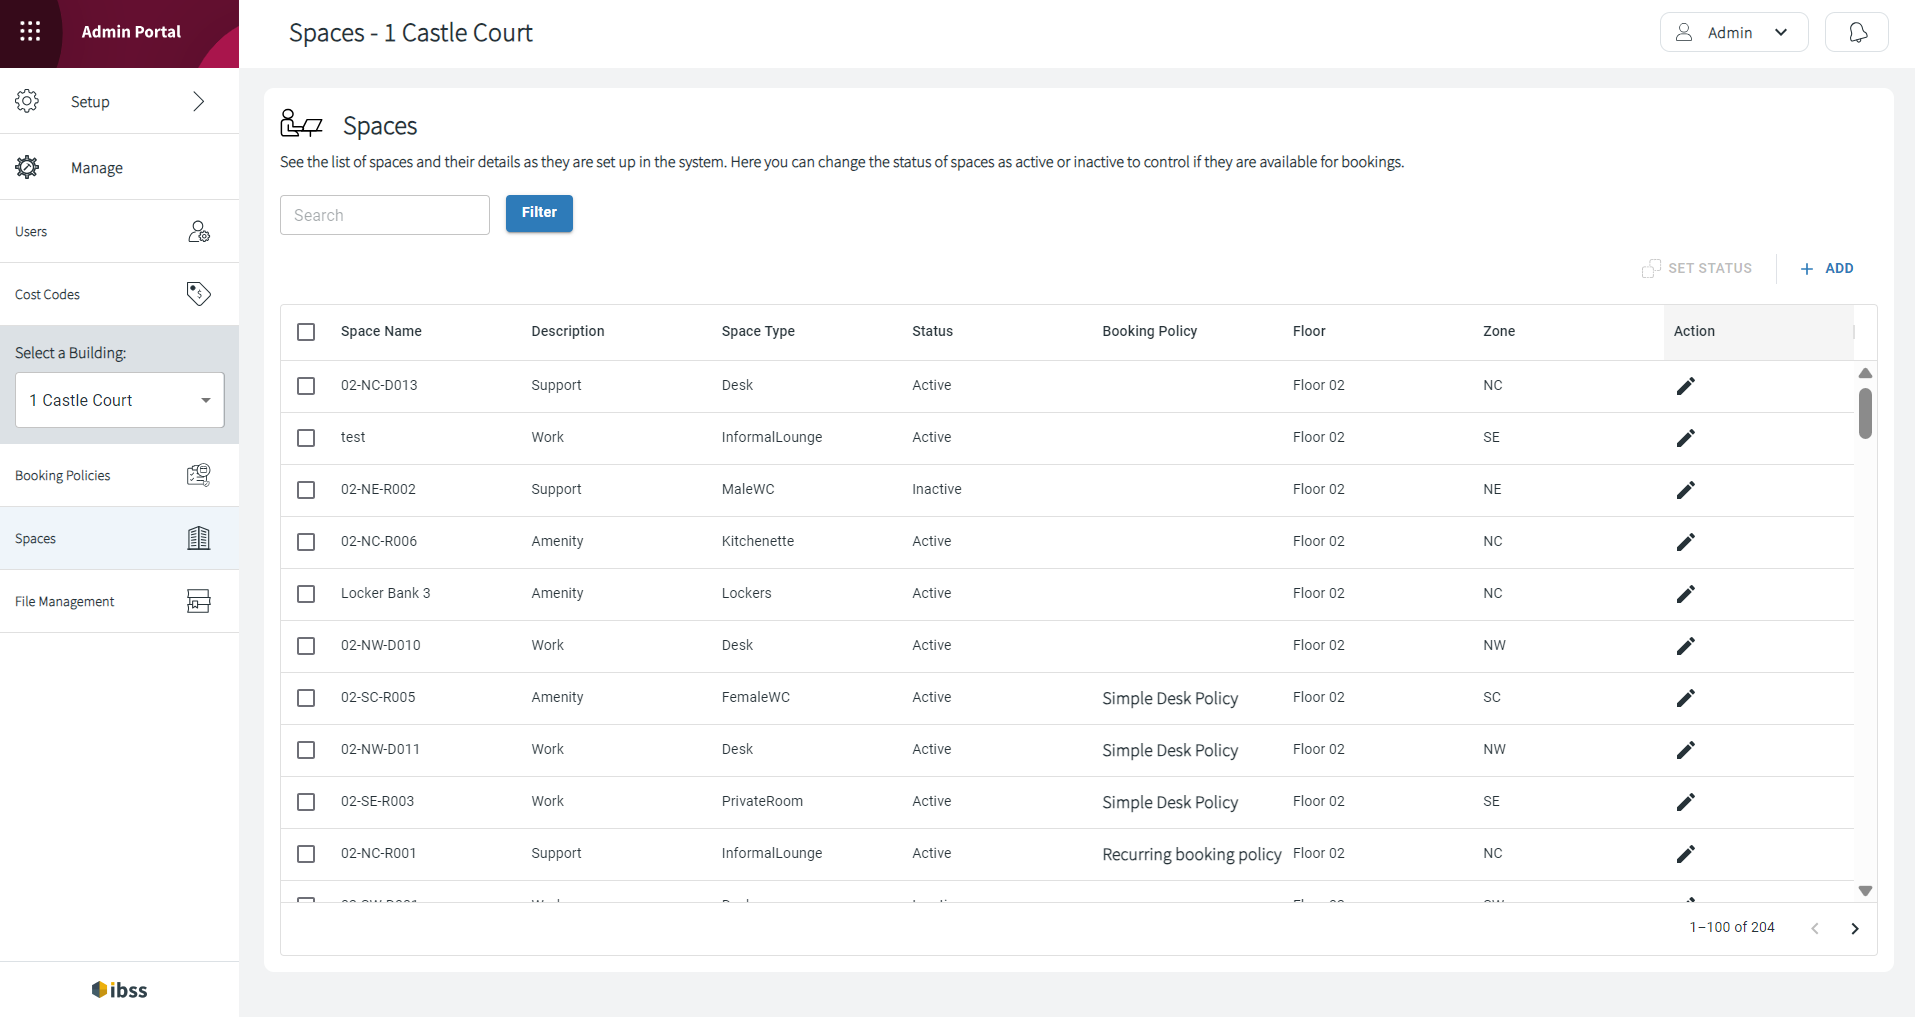
This table is also paginated as in all similar pages across IBSS apps. Read here what this means in practice: Pagination on the table-view pages.

Adding a space

Adding a space requires providing all relevant information about it to enable its searchability and analytics. Fill in the following fields:

  1. (mandatory field is marked with asterisk) *Building. Select a building that is set up for your organisation.
    ⚠️ This cannot be edited later.
  2. *Space ID. Use letters, numbers, or special characters to define the space ID. Accepted special characters are:
    - – _ | + /
    ⚠️ This cannot be edited later.
  3. Active Space toggle. Decide whether to active the space after you create it now.
  4. *Name.
  5. Space Name Label
  6. Space Custom Information. Add relevant and sufficient information about the space to help workplace users during booking of this space. This information is then reflected on the booking confirmation page in Flex and OneLens.
  7. *Booking Policy. A space cannot be saved without a booking policy.
    Make sure that the associated booking policy also includes all essential details about policy rules in the Policy Description field. Read more about booking policies here: Understanding Booking Policies: Guidelines for Efficient Space Bookings and Usage
  8. Space Image. Click Add/Select Image to select or upload an image for your space.
  9. Space Type section has almost all fields set as mandatory: *Space Class, *Space Type, Space Type Label, *Work type, *Capacity.
  10. Location: *Floor, Zones, X-Coordinates, Y-Coordinates.
  11. Properties and Thresholds: *Bookable Setting, Signs of Life Thresholds Min, Digital Sign Type, Occupancy Type, Sensor Type.
  12. Environmental: Environmental Zone, Sound Range, Temperature Range.

Click Create to save your space.

Editing a space will happen in this same view where the Building and Space ID fields will be unavailable for editing.