

Applies to app version 2023.02 with the following features added in the next releases:
- 2024.01 Default Cost Codes
- 2024.01 Delegate Permissions and Delegate Access
- 2024.02 New Visitor Details page
- 2024.02 Default Filter under Search Results
- 2025.03 Background Processes page to view own export and import requests
- 2026.01
- Schedule Notification option to receive notifications related to your in-office days
- Work location setting to notify colleagues about your in-office days
In Settings you can customize notifications, workplace preferences, and other settings for your account for the system to tailor your experience to your preferences.
⚠️ Remember to save all your settings separately.
System Notifications
This section allows you to define which personal notifications you will receive. It is broken down into 4 sections:
- Visitor Notification
- Task Notification
- Booking Notification
- Schedule Notification
- Announcements
Visitor Notification
Examples of these are:
- When an invited visitor has been approved
- When an invited visitor has checked in at the reception or arrived

Task Notification
Examples of these are:
- When a new task has been raised or assigned to you (for resolvers)
- When a task you have raised has been set in-progress (for general users)
- When a task you have raised has been completed (for general users)
Booking Notification
Examples of these are:
- When you create a new booking, confirming the date and time
- When a booking is ready to check in
- When a booking is about to be cancelled due to policy settings
Schedule Notification
For example:
- When you have a planned in-office day and haven't booked any space in your primary building.
Announcements
This section allows you to define which building notifications you will receive. These notifications are sent by your business' facility management team. Some examples may include:
- Details of any upcoming events
- Details of any health and safety procedures
- Details of travel advice or any building related issues
You may select for what buildings you wish to receive building notifications if your company has a portfolio of many different buildings.
Workplace Preferences
The Workplace section allows you to define preferences for your workplace and streamline space search based on your preferences.
Building
- Your default building: what building is loaded by default in IBSS applications
- Your preferred floor for the selected building: what floor is used automatically in searches in IBSS applications
- Your preferred zone.

Working Day
Your working start and end times. These times will be used by default when searching for a space.

Work Location
Set your typical in-office days for others to see and plan collaboration activities accordingly. You can always change this setting for the current day on the home page in the top right corner. Here you can:
- Select days on which you are working.
- Define your usual location on those days.
- Define several parts of day if your location changes within one weekday.

Search Results
- Select whether you want the space search results to be shown in a list view or map view.
- If you have access to OneLens, you can select the Default Filter that you want to be used for your building on the Booking Dashboard and Booking List pages.

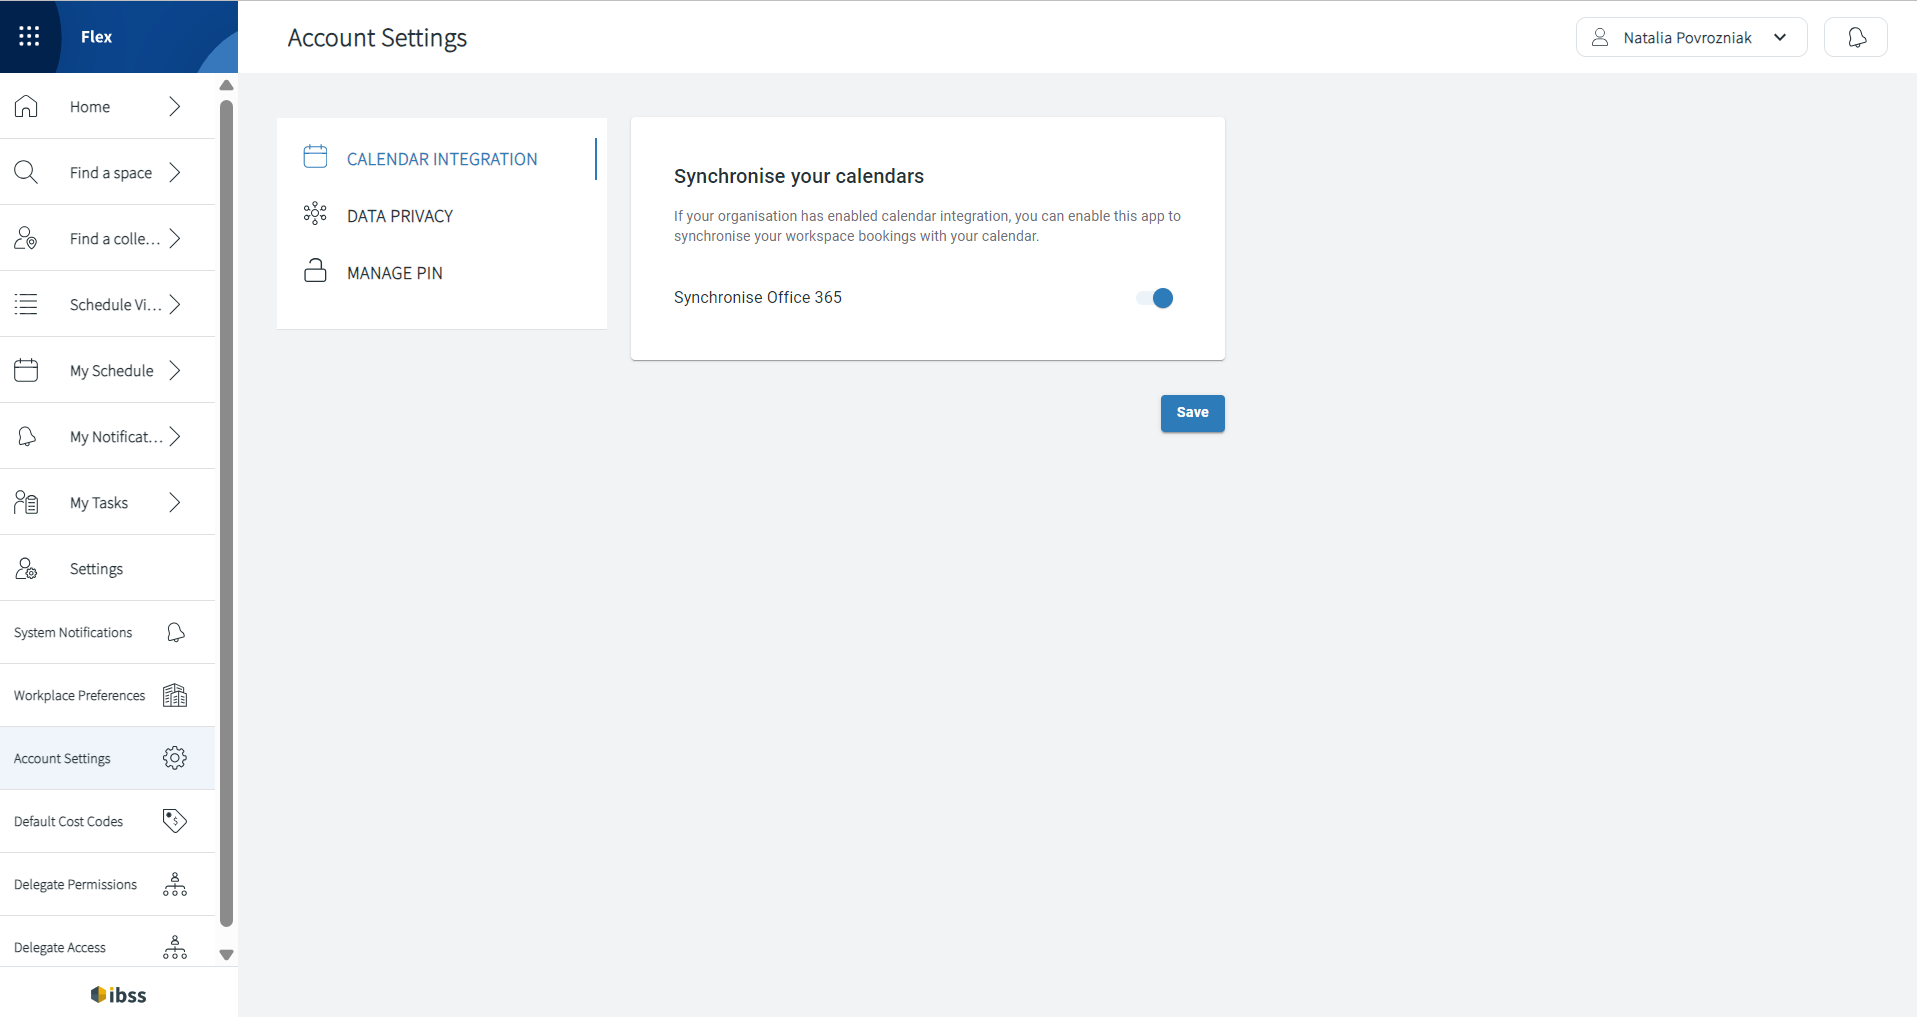
Account Settings
The account settings section allows you to define core account preferences, for example:
Calendar Integration
Allows to view IBSS bookings in O365 if this is set by your organisation.
Data Privacy
You can allow colleagues to search for your booked location(s) in IBSS apps or stay anonymous.
Manage PIN
Set or change the PIN that you use to log in to the Inspire Kiosk application. Read more in this article: Setting up a user PIN in Flex to check in on Inspire tablets.
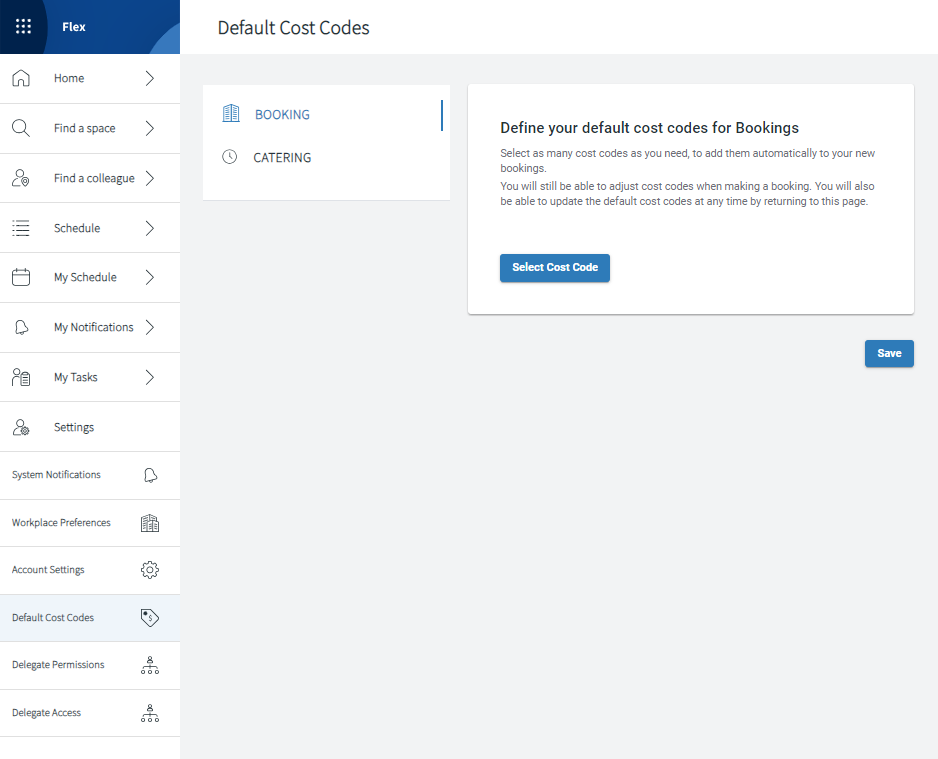
Default Cost Codes
Your organisation chooses to use cost codes for bookings and catering orders or not. If they use cost codes, these may be free-form and predefined ones.
There are no default cost codes for free-form type of cost codes.
If your organisation is using predefined cost codes, you'll see two sections where you need to select one or more default cost codes to use the most frequently.
Note: You can always change the default cost code to a different one when making a booking or adding catering orders.
To define your default cost code(s) for your future space bookings, do the following:
- In Flex under Settings > Default Cost Codes > BOOKING, click Select Cost Code.
- Select one or more needed cost codes to be your default ones for space bookings.
- Use one arrow to move it to the right.
Or use the double arrow to move all cost codes to the right and assign them as your default ones. - Set apportioning for the cost codes. The total amount must equal 100%. You can define any apportioning in integer numbers for your default cost codes. You can change apportioning later during bookings.
- Click Add to confirm.
To define your default cost code(s) for your future catering orders, complete the same steps under CATERING section as in BOOKING.
Delegate Permissions and Delegate Access
Delegate function to book on your behalf
Available with app version 2024.01 onwards.
With the release 2024.03, we've added the following:
- New Delegate Bookings page to view bookings that a delegate has made or is allowed to edit.
- In case of several delegates for one primary user, they all can see active and future bookings that are made for that one primary user by other delegates.
To allow other users to book or add visitors on behalf of other user without handling the AAD role permissions, the IBSS system offers more flexibility with the Delegate functionality.
How it works
There are three roles involved in the Delegate functionality:
- An admin of an organisation
- Primary user
- One or more delegates
To enable the functionality:
- The organisational admin enables this function for the primary user in Admin Portal first. See more here: Granting Delegate Permissions.
- Primary user appoints their colleagues as delegates in Flex under Settings > Delegate Permissions.
- Delegates will view their appointed permissions in Flex under Settings > Delegate Access.
✅ After appointing one or more of the delegates, they are able to:
- Book spaces on behalf of the primary user.
- Invite visitors on behalf of the primary user.
- View or edit those bookings or invitations made by themselves or by other delegates.
- View or edit bookings where the primary user is invited to.
- Check the primary user in or out of the bookings that they or other delegates have created.
❌ Delegates cannot:
- View or edit space bookings that the primary user has created by themselves for themselves.
- View and book spaces that they have no access to.
As a Primary user
You can:
- Grant delegate permissions to one or more users in your organisation.
- Have your schedule organised by your delegate(s).
Grant Delegate Permissions
In Flex under Settings > Delegate Permissions, you can manage delegate permissions for employees to act on your behalf:
- View the list of your delegates.
- Assign delegate users.
- Remove delegate users who were assigned previously (by you or your admin).

⚠️ Make sure that the level of permissions of who you choose to be your delegate is the same or higher than yours:
- Your delegate has to be allowed to view and book spaces that you are allowed to view and book.
- Your delegate should take into account their elevated booking permissions if they are allowed to book more spaces than you are. When the delegate user is searching for a space, the spaces that are returned are all the spaces that user has access to. This means that you won't see their bookings on your behalf if they book spaces for you that aren't defined for your role.
For example:
| Use case | Required permissions |
|---|---|
|
User A has access to zone A only.
User A delegates to user B who doesn't have access to zone A. |
User B will be able to only search for spaces where they have access to. They cannot book spaces in zone A. |
|
User A has access to zone A only.
User B has access to zone A and B.
User A delegates to user B. |
User B will see all spaces in zones A and B when trying to book a space. When booking for user A, they must know that they need to book in zone A only. |
To add a colleague as your delegate:
- On the right, search for the employee who you want to grant delegate permissions to.
- Select the checkbox next to their name to add and save in delegates' list.
Note: You can add one or more persons as your delegates. Selected users will be remembered between searches. - Save your selection.
Your delegates will now have a separate DELEGATED BY tab on the popup that opens when they select the Book for Someone Else? option on the Single Booking page.

As a Delegate
✅ You can:
- View the permissions that you've been granted by a primary user or the organisation's admin.
- Book on behalf of your primary user.
If you're booking from the Advanced Booking page, you'll see more options in the Who are you booking for? section > Booking Owner dropdown. - Invite visitors on behalf of your primary user.
- View and edit bookings and visitor invitations that you or other delegates made for your primary user.
❌ You cannot:
- View or edit space bookings that your primary user have created by themselves for themselves.
- View and book spaces that you don't have access to.
- Remove delegate access permission that was granted to you. Only your admin can do this for you or the person who has granted this permission to you in the first place.
View your Delegate Access
In Flex under Settings > Delegate Access, you can view the list of colleagues who have granted their delegate permissions to you. With these permissions, you can make bookings and invite visitors on behalf of them.
⚠️ Make sure that you respect the level of permissions of who you book for, meaning that you book only those spaces within the zones where your delegator is also allowed to book. Otherwise, they won't see the booking that you've made on behalf of them.

Make bookings on behalf of your primary user
When making a booking, you have an option to indicate on behalf of which user you'd like to act:
- On the Simple Booking page, indicate this on the booking editing screen.

- On the Advanced Booking page, this is the first thing to indicate: Who are you booking for?

View bookings made for your primary user
If you are a delegate for a primary user, you'll have the additional Delegate Bookings page to view bookings that you or other delegates have made for them. Here you can:
- Select the date to view bookings.
- Select one specific primary user if you have several assigned.
- Use all typical actions for bookings such as editing, cancelling, checking in or out.

👋 Share your feedback with us about this documentation. Highlight a word or a whole paragraph and click the plus icon that appears. We keep improving this knowledge base based on your comments.
Background Processes
Available in 2025.03 app version onwards.
If you have OneLens permissions to import or export data sheets (ONELENS360.OperationServices.Import or ONELENS360.OperationServices.Export), you will have the Background Processes page available in Flex to view own export or import requests.

Here's what you can do on this page:
- Filter by time period: Today, This Week, or Last Week.
- View only import or export requests that you've made.
- Filter by status and building.