
Applies to app version 2023.02 onwards.
👋 Share your feedback with us about this documentation. Highlight a word or a whole paragraph and click the plus icon that appears. We keep improving this knowledge base based on your comments.
The Catering section of the OneLens 360 app provides a central location for the Catering Manager to create and manage room service and pre-bookable menus for a building. There are the following pages in this section:
- Catering Orders
- Pantry Timeline
- Catering Items
- Catering Menus
- Order Policies
- Dietary Terms
- Catering Suppliers
How it works
We recommend setting up catering for your organisation strictly in the following order because every next item depends on the setting of the previous one:
- Dietary Terms
- Catering Suppliers
- Order Policies
- Catering Items
- Catering Menus
- Catering Orders
- Pantry Timeline as another option to view catering orders
In this way, you will have set up menu items bookable by others, defined menu policies to secure preparation time, and selected other important settings to then be able to manage orders that are created.
Catering orders are assigned to and managed by the person who is defined in the booking policy as a Catering Manager for all spaces that the said booking policy is applied to. Read more about assigning a Catering Manager here: Catering Manager and Floor Manager roles
Dietary Terms
Dietary terms
Feature available in app version 2023.02 onwards.
Dietary terms are the first thing you need in order to have catering management set up for your organisation. This is to make sure that everyone who will later order from your menus can filter out food according to their dietary restrictions or preferences.
For more guidance about allergens, refer to this article: https://www.food.gov.uk/sites/default/files/media/document/14-Allergens%2016Nov21.pdf
👋 Share your feedback with us about this documentation. Highlight a word or a whole paragraph and click the plus icon that appears. We keep improving this knowledge base based on your comments.
For dietary restrictions, decide the ones that your organisation should have indicated in menus, and then add them. This can be a vegetarian, vegan, kosher, gluten-free, or any other dietary term. By default, we offer the following:
| Dietary Terms |
|
 |
| Allergens |
|
 |
On the Dietary Terms page, you can see 25 rows per page of the terms that your organisation has created. You can move forward or backward through the pages of existing records. Also, you can do the following:
- Search for a specific dietary term
- Filter existing terms by type: Allergen or Dietary
- Delete or edit the selected terms
- Add a new record for dietary terms

To add a dietary term, indicate the following:
- Name that will be understandable by all users within your organisation who will be using catering service.
- Type: Allergen or Dietary.
- Add image or icon to be displayed on menus.
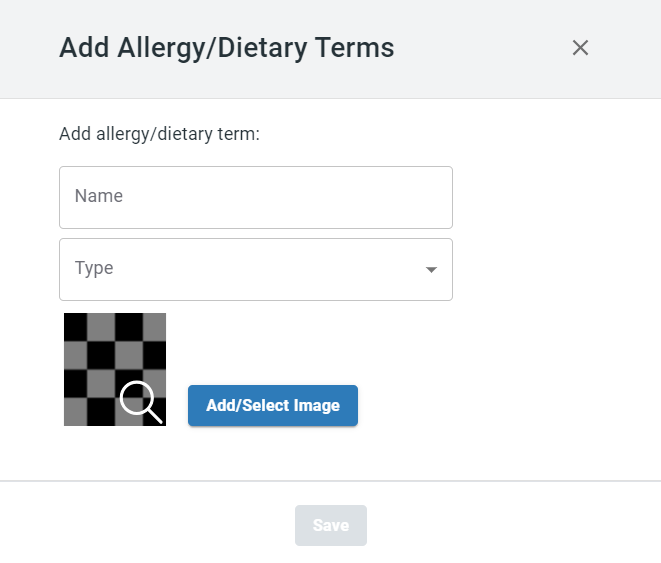
Click Save to add this dietary or allergy term and use it for menu items.
Catering Suppliers
Catering Suppliers
Feature available in app version 2023.02 onwards.
To be able to create menu items and then menus, you need to have at least one supplier in the system. Later, you can sort catering orders by supplier.
👋 Share your feedback with us about this documentation. Highlight a word or a whole paragraph and click the plus icon that appears. We keep improving this knowledge base based on your comments.
On the Catering Suppliers page, you can add new suppliers and view the list of existing ones associated with providing the catering service within your organisation. The list of suppliers has the following columns:
- Supplier name
- Description
- Lead Time
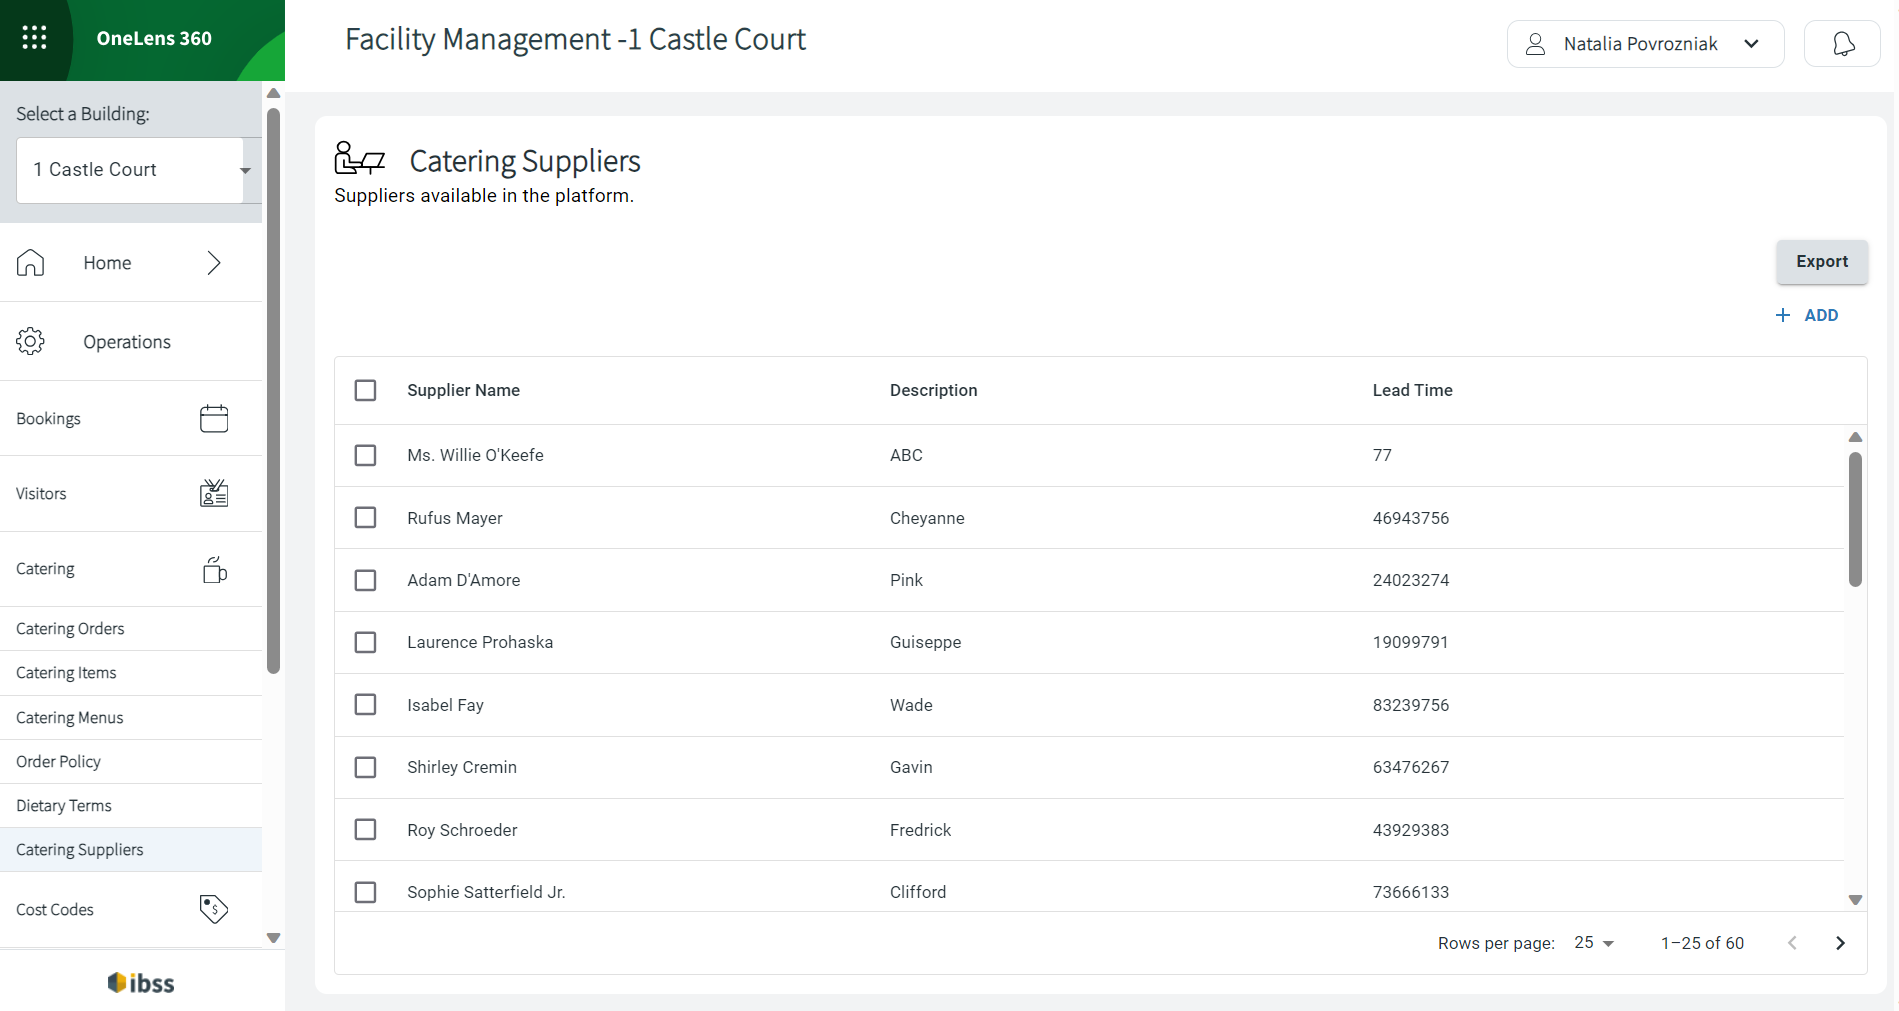
You can sort any column in ascending or descending order in the suppliers table, import or export lists, add a new supplier record, or edit the existing one.
To view supplier details, click the row or select the Edit button next to it. The Supplier Details page opens.
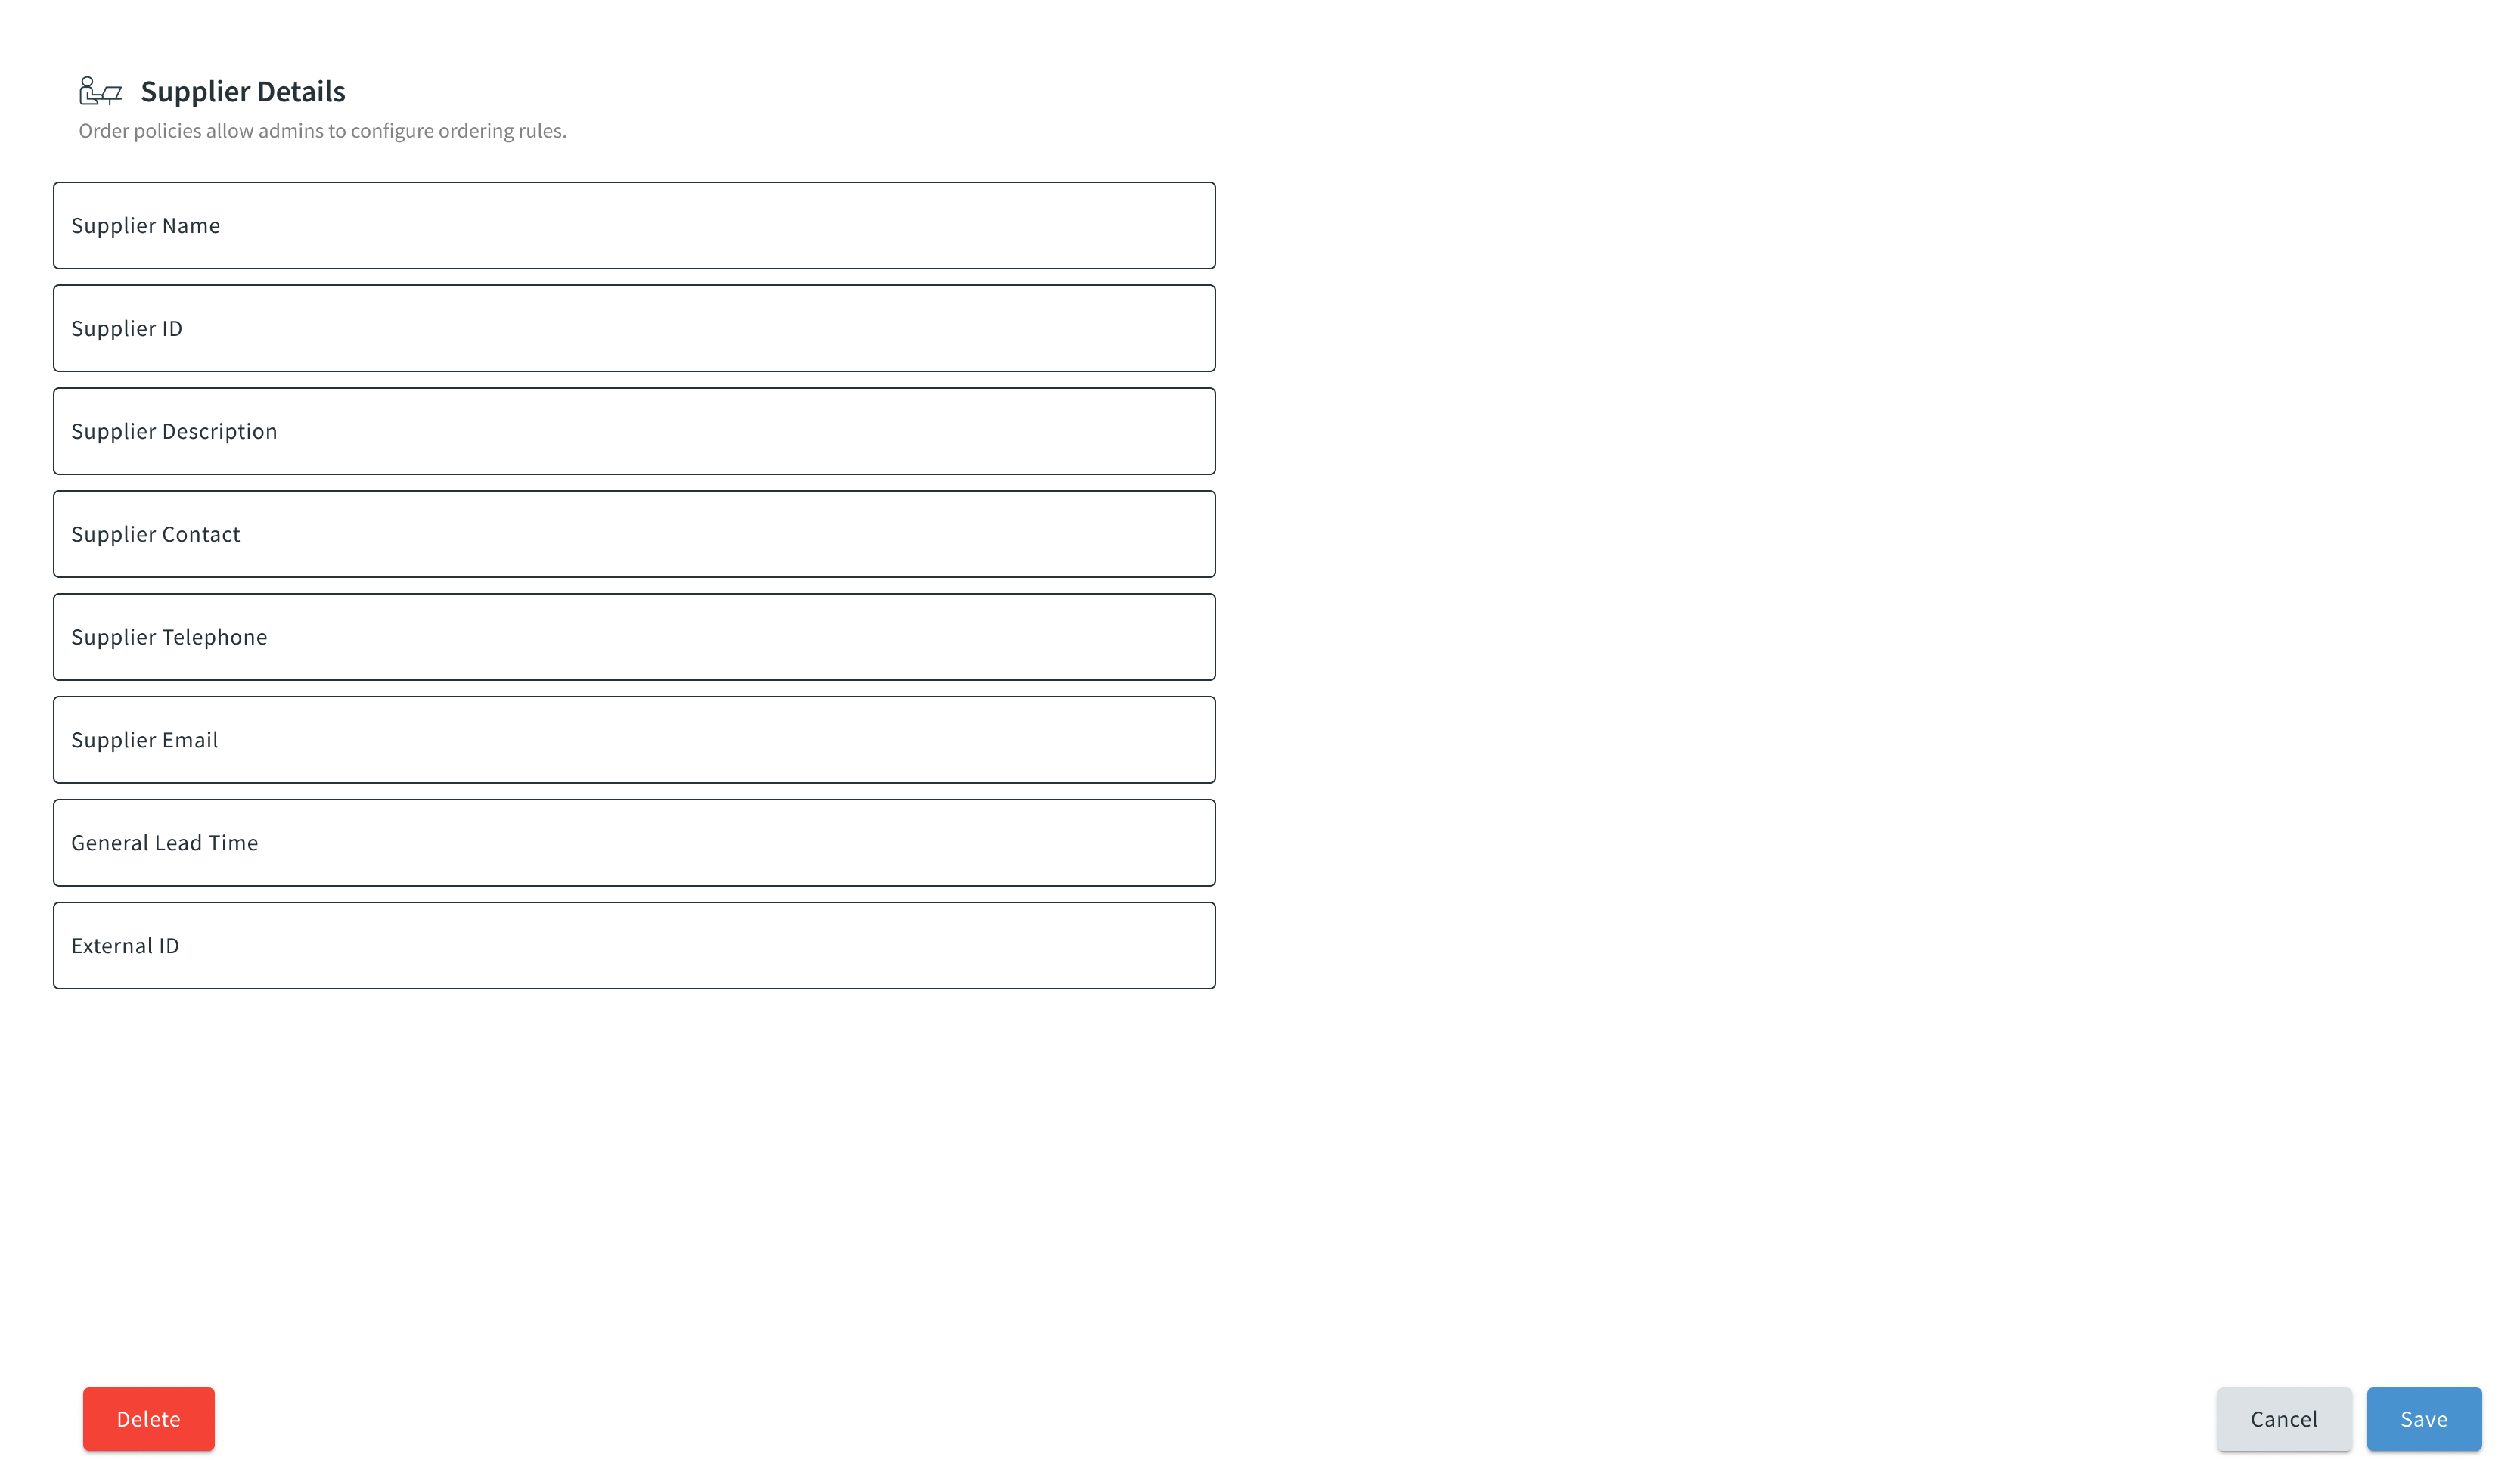
You can edit the fields and save your actions, cancel your changes, or delete this supplier entirely.
Order Policies
Order Policies
Feature available in app version 2023.02 onwards.
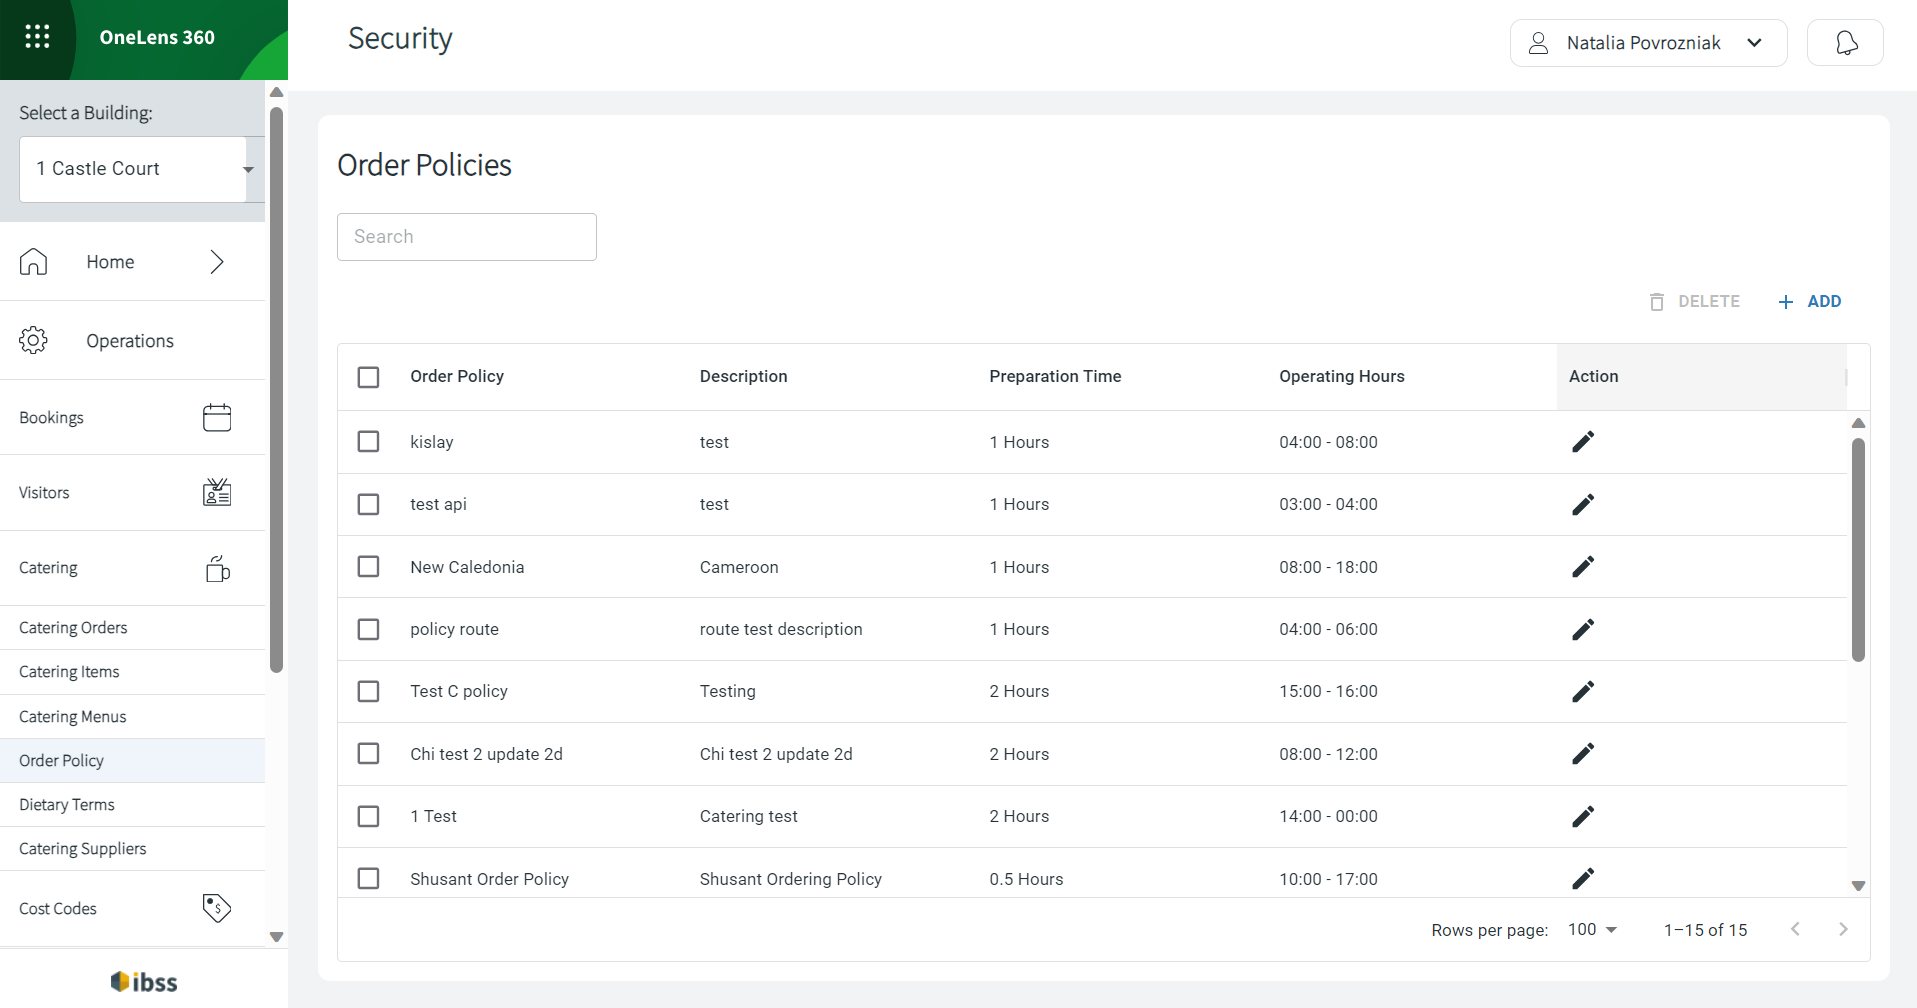
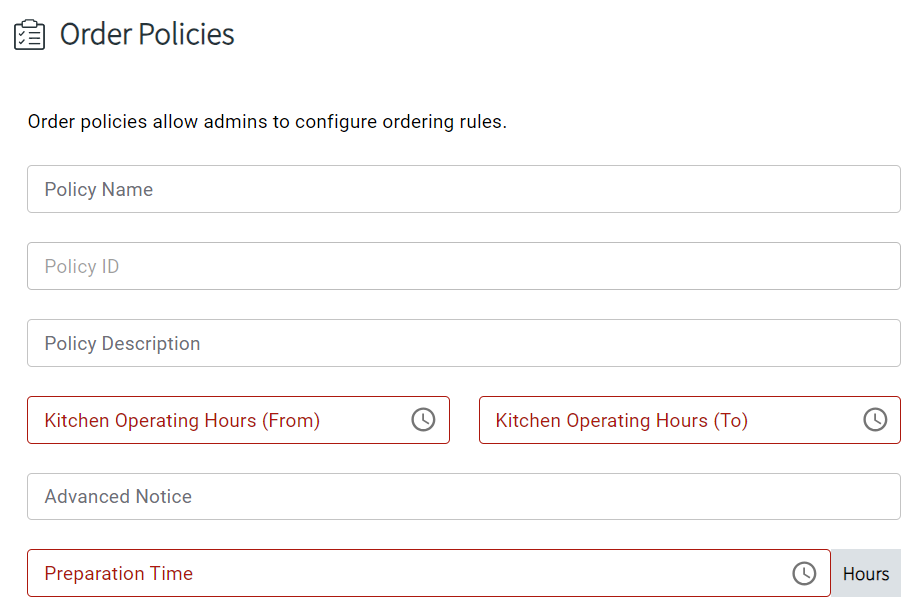
Adding an order policy
- Fill in the fields in the popup window.
| Current local time |
Booking time | Food slot | Preparation time | Kitchen time | Result |
|---|---|---|---|---|---|
| 10:30 | any after 11:00 | any | 30 minutes | 09:00 - 16:00 | Can place an order after 11:00 but before 15:30 to allow for preparation |
| 10:25 | 10:00 - 11:30 | 11:00 - 11:30 | 30 minutes | 09:00 - 16:00 | Can place an order to be delivered after 11:00 |
| 10:35 | 09:00 - 16:00 | ||||
| 10:35 | 10:00 - 11:00 | 10:00 - 11:00 | 30 minutes | 09:00 - 16:00 | Can't place an order as there's not enough time for preparation |
| 10:00 - 11:30 | 11:00 - 11:30 | 1 hour | 09:00 - 16:00 | Can place an order | |
| 12:00 - 13:30 | 12:30 - 13:00 | 1 hour | 09:00 - 16:00 | Can please an order for 12:30 due to food slot limitation | |
| 12:00 - 13:30 | 12:00 - 13:00 | 1 hour | 09:00 - 16:00 | Can place order for 12:00 | |
| 16:00 - 17:30 | 16:00 - 17:30 | 1 hour | 09:00 - 16:00 | Can place order for 16:00 at the latest | |
| 16:30 - 17:30 | 1 hour | 09:00 - 16:00 | Can't place an order outside kitchen/building working time | ||
| 10:00 on November 21 | 09:00 - 12:00 on November 23 | 10:00 - 12:00 | 48 hours | 09:00 - 16:00 | Can place an order, but only for delivery after 10:00 |
| 11:00 on November 21 | 48 hours | 09:00 - 16:00 | Can't place an order as there are only 47 hours left until expected food delivery | ||
| 13:00 on November 21 | 08:00 - 09:00 on November 24 | 08:00 - 09:00 | 48 hours | 09:00 - 16:00 | Can't place an order outside kitchen/building working time |
Deleting an order policy
To delete an order policy, first reassign a catering item attached to it. Do this in the popup that lists all related items that need to be sorted.
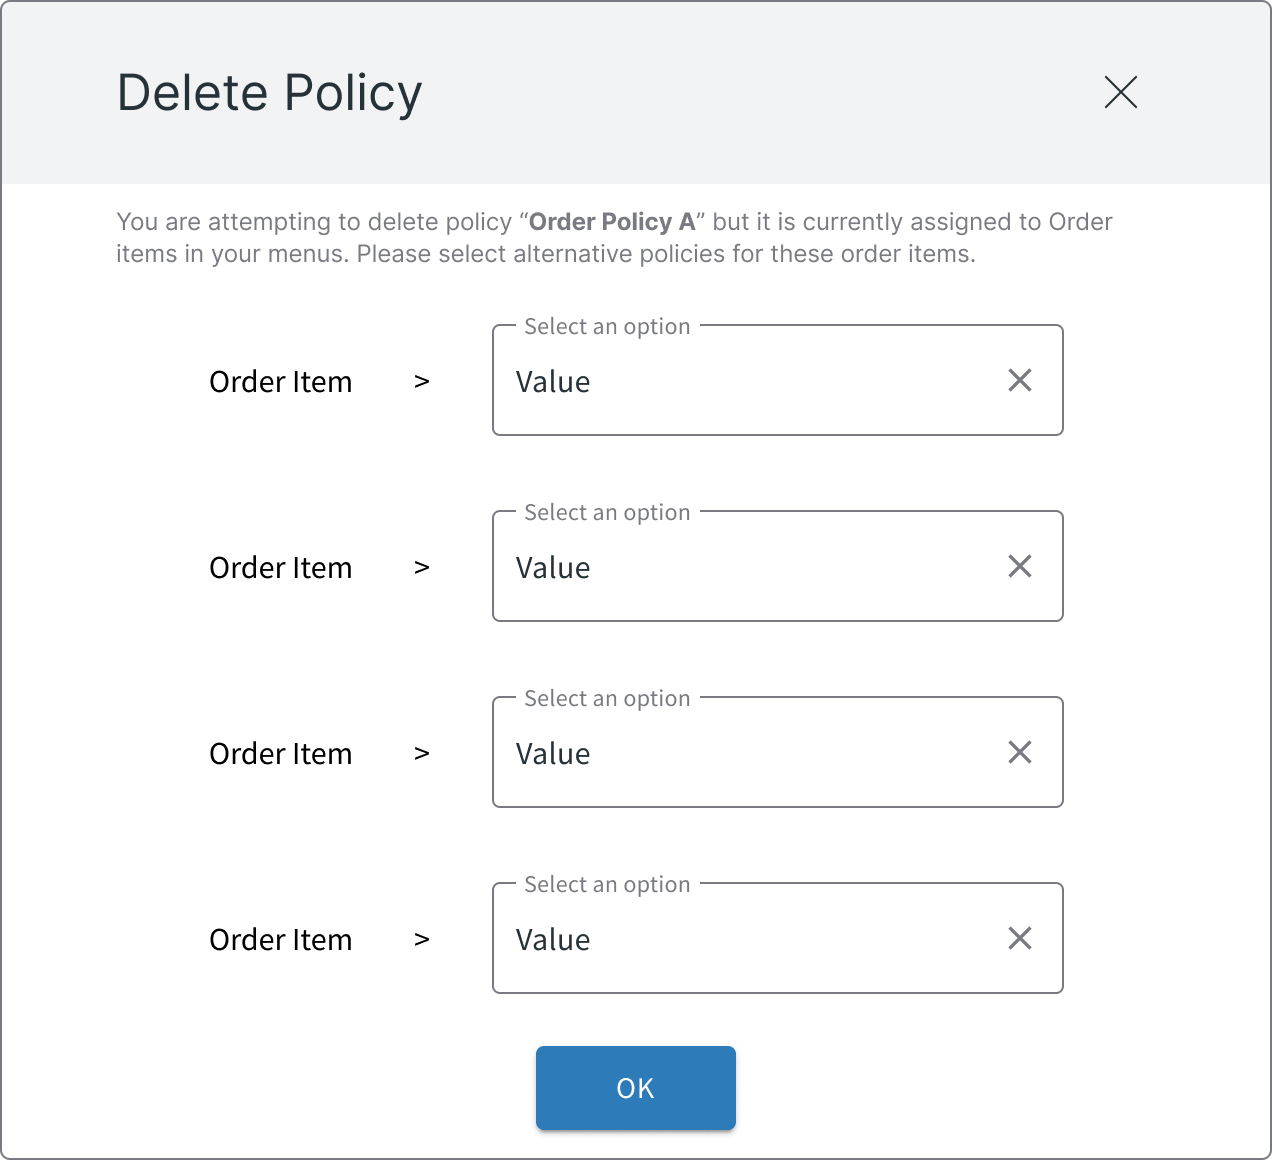
Click OK to confirm reassigning the order items, and then confirm all changes and deleting the order policy.
Catering Items
Catering Items
Feature available in app version 2023.02 onwards.
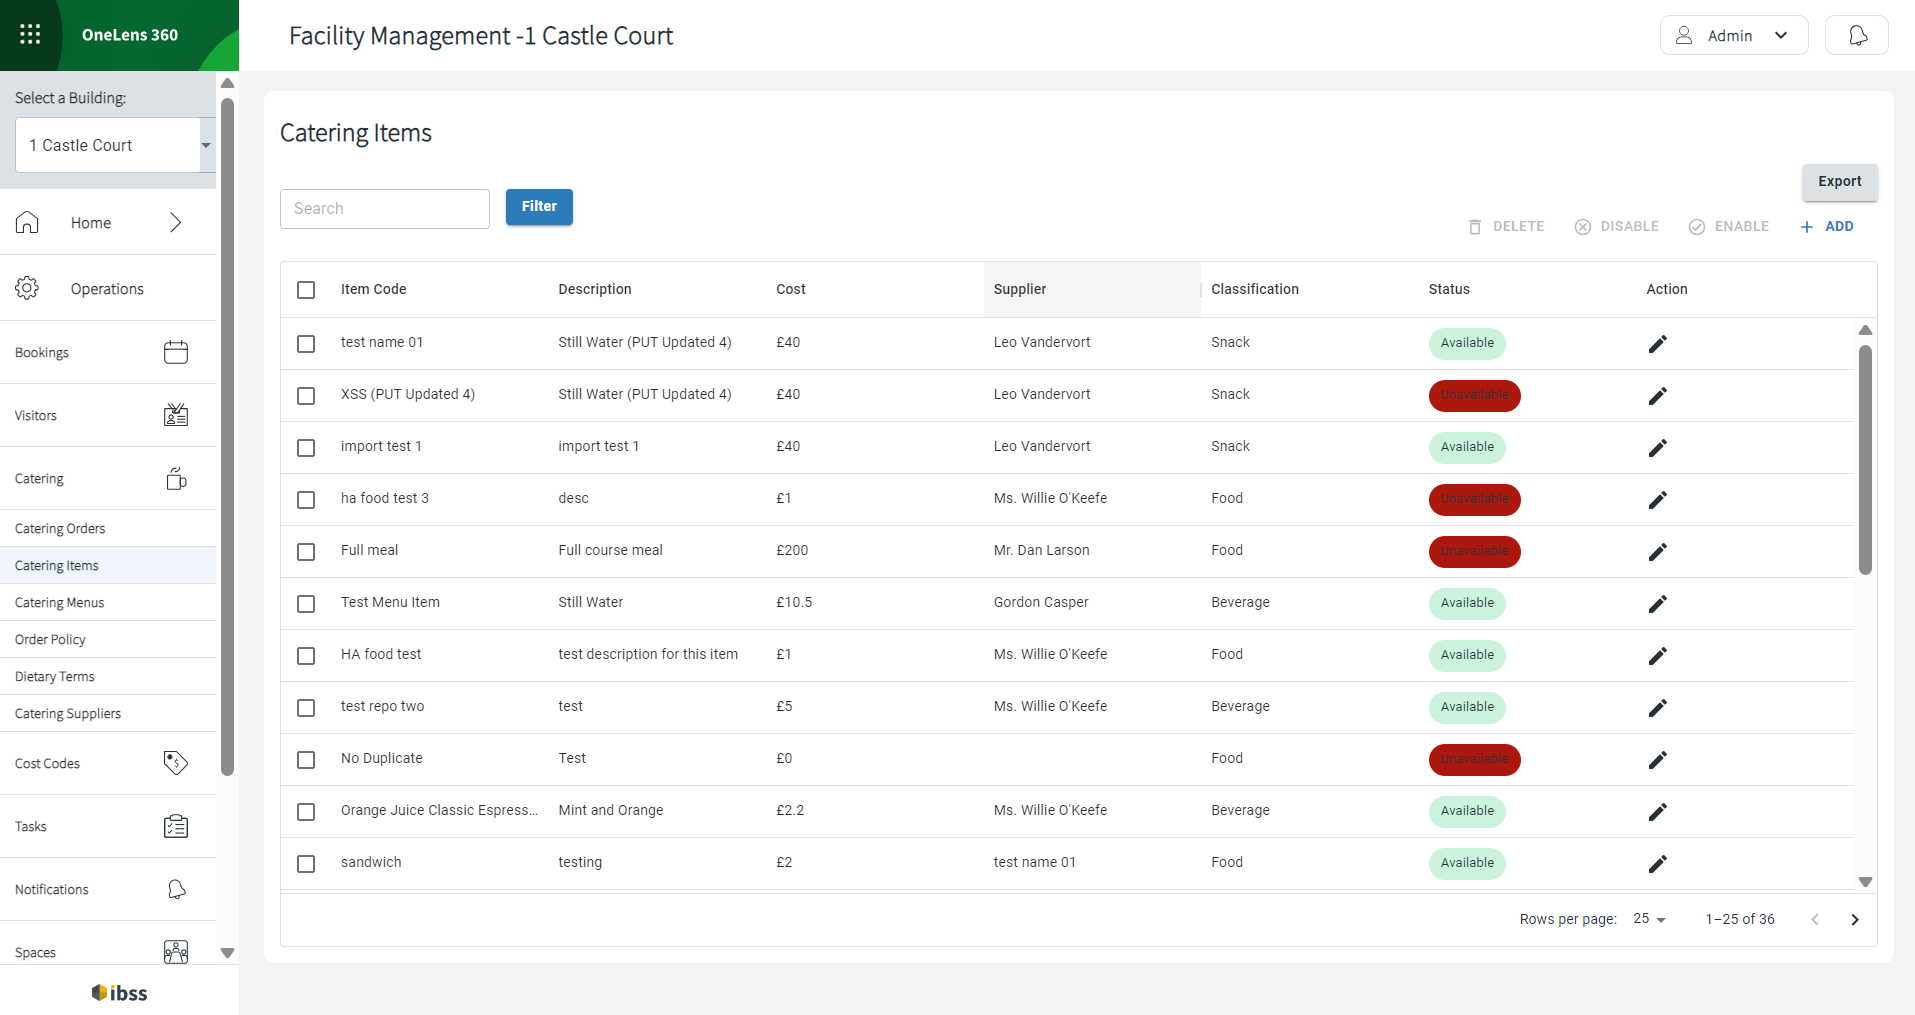
In Catering Items, you see a list of available catering menu items that you use when building a menu.
👋 Share your feedback with us about this documentation. Highlight a word or a whole paragraph and click the plus icon that appears. We keep improving this knowledge base based on your comments.
See the following columns in the Catering Items table:
- Item Code
- Description
- Cost
- Supplier
- Classification – type of item (beverage, snack, or food)
- Status - available or not
- Action
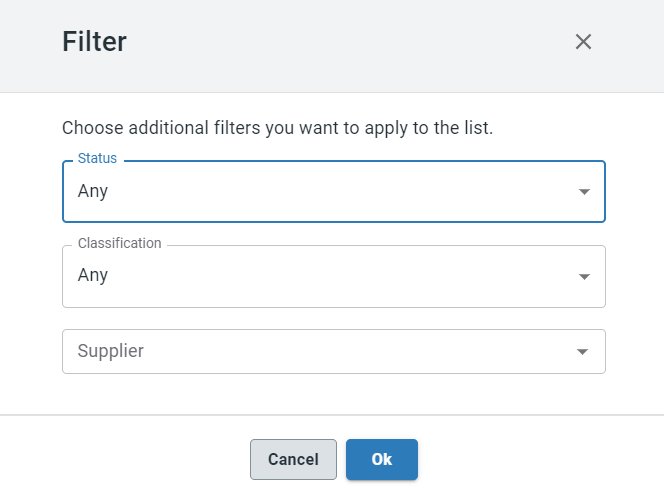
You can edit, add new menu items, enable or disable them. Also, you can search for an item by its name or description or filter them by status, classification, and supplier.
Adding a catering item
Add a new catering menu item directly in this view by clicking the +ADD button at the top right of the Catering Items page. A Catering Menu Items Details window opens for you to enter relevant details where certain fields are mandatory to fill in.

- (mandatory) Classification - whether this is beverage, food, or snack for it to appear later in menu selection.
- (mandatory) Name
- (mandatory) Description
- Nutritional Information
- (mandatory) Order Policy
- Supplier
- The Enabled toggle. Turn it on to enable the entire Catering Item, make it visible for others in the menus that use this item.
- Cost to the end user.
- Retail price for tracking any external catering vendor prices.
- (mandatory) Add/Select Image
After you've entered details for the catering item, click Save, and you will be prompted to indicate Allergens and/or Dietary type for this catering item.
Note: If you don't indicate allergens or dietary type for the item, you will be returned to editing the item.
Saved items can be now used to build a menu.
Editing a catering item
To edit a menu item, click the pencil icon in the Action column on the main Catering Items page. You will be able to edit data in the same fields as when you did to create an item.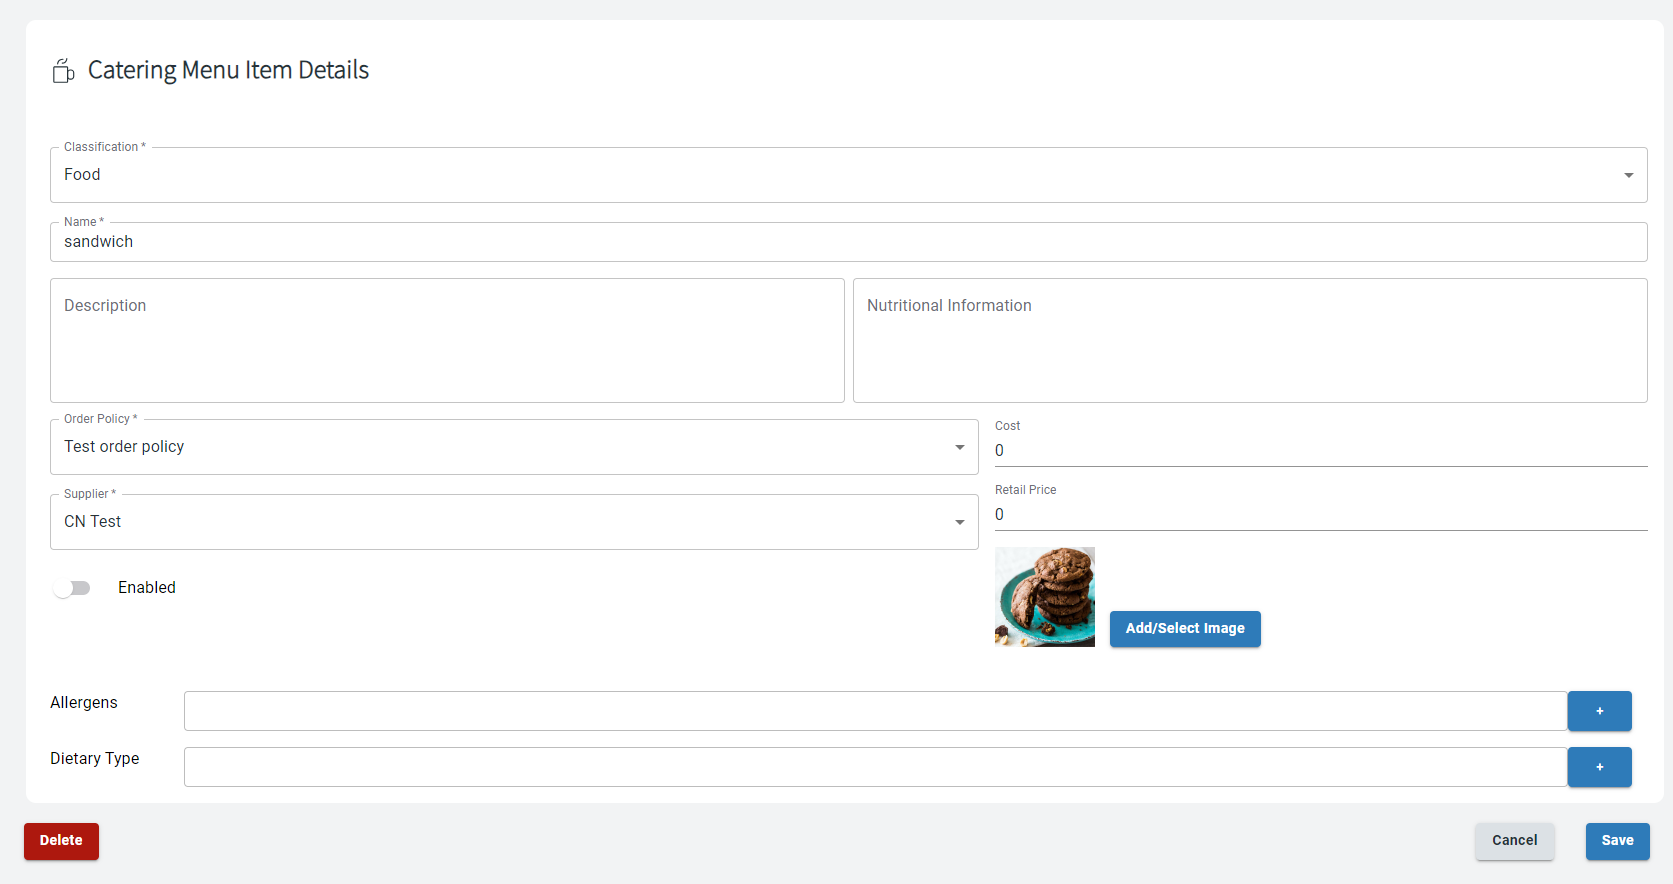
Catering Menu
Catering Menu
Feature available in app version 2023.02 onwards.
Catering menu is a set of catering items that is shown to the end user given the time of the order and notice period for catering items that is set by the order policy. It means that the user will only see those items on the menu that are available and can be prepared for their space booking, and there's sufficient time allowed for kitchen operation time and food or drink preparation time.
👋 Share your feedback with us about this documentation. Highlight a word or a whole paragraph and click the plus icon that appears. We keep improving this knowledge base based on your comments.
Create catering menus for each building separately if your organisation has more than one office building. A menu can then be assigned to the whole building, and there can be a menu defined for one or more spaces.
⚠️ But a space can have one menu only. For now, we recommend not to apply any user role restrictions to the menu until further functionality is introduced.
After you create and confirm the booking, you can add catering and only then you will see what's available on the active menu.
On the Catering Menu page, you can view the list of created menus. From here, you can delete, disable, or add a new menu if you have these permissions enabled for your role.
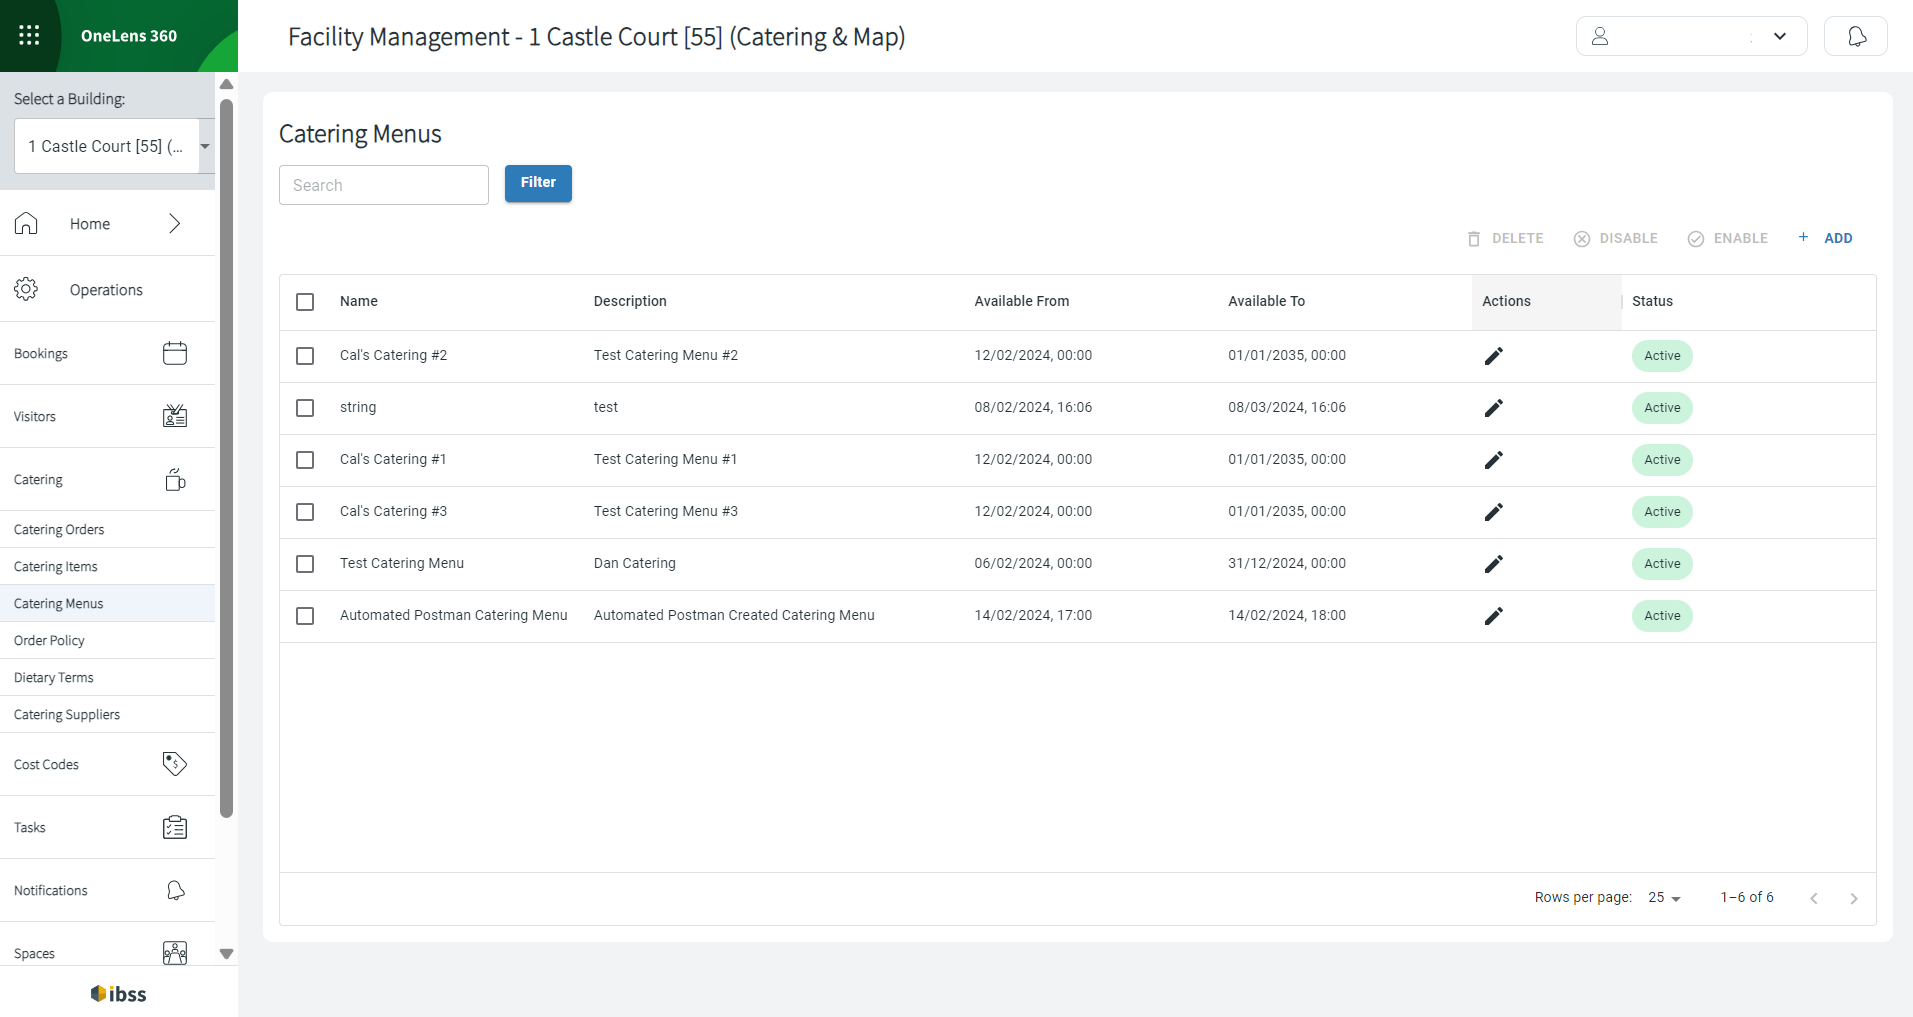
To add a new menu, do the following:
- Click +ADD from the Catering Menus page.
- Fill in the fields in the Menu popup that opens
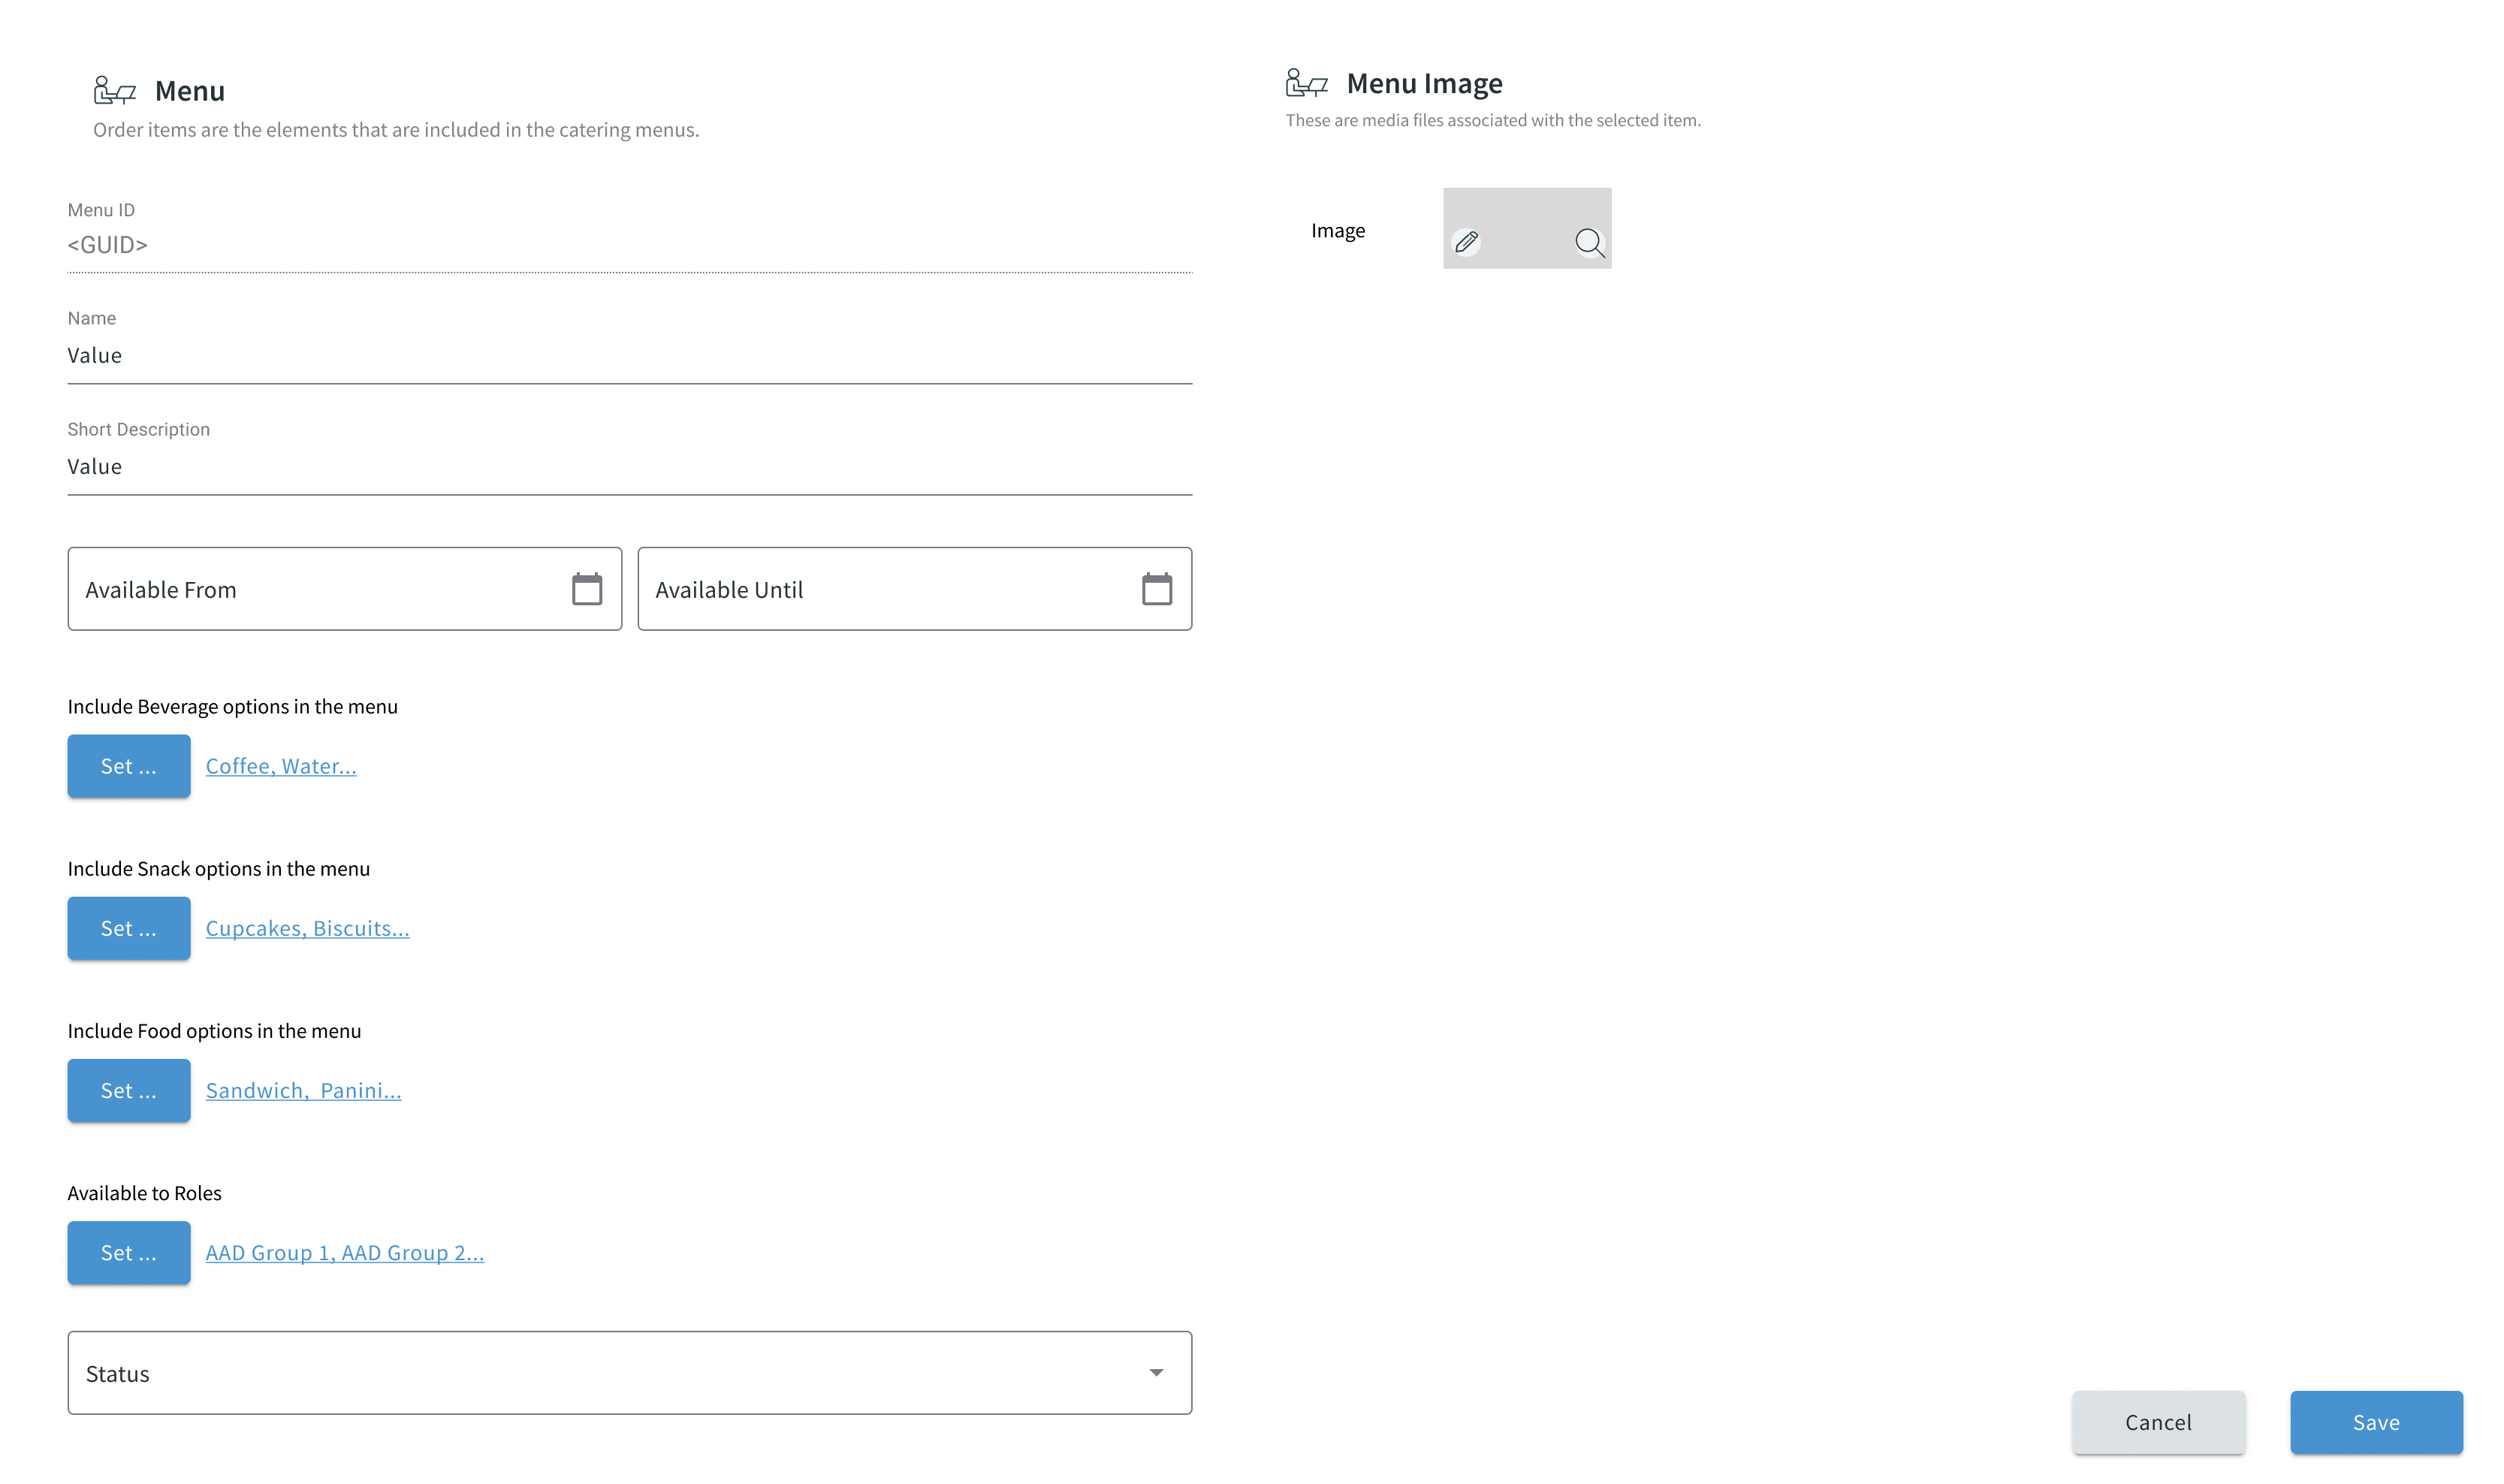
- Indicate Menu ID, Name, Short Description.
- Set the dates for this menu to be available.
Note: Keep end date of the menu far in advance for people who book far in the future to see the active menu. Otherwise you'll need to manually move forward the duration of the active menu. - Add items from the categories Beverage, Snack, Food that were added previously in Catering Items.
- ❌ For now, we recommend not using the Available to Roles setting, or you can allow all users to see the menu. Otherwise, the space booking permission and menu availability permission may conflict and prevent users from being able to make catering orders.
- Set the Status to active or inactive.
Use this option to prepare menus in advance or keep them after they expire to reuse later. - Add a menu image that will be visible when selecting this menu.
- Save or cancel your actions.
Now, depending on what you have set, your menu is stored in OneLens 360 and will be visible to your organisation in Flex on the set dates and if set as active.
Catering Orders
Catering Orders
Applies to app version 2023.02 with the following features added in the next releases:
- 2024.01 Default cost codes
- 2024.02 View switcher
- 2024.03 Support of multiple catering orders per one space booking
👋 Share your feedback with us about this documentation. Highlight a word or a whole paragraph and click the plus icon that appears. We keep improving this knowledge base based on your comments.
In Catering Orders, you can see the list of all orders within the specified date range, for whom this order is, meeting location, date and time of the meeting when the catering service is requested. From here, you can filter by status and task owner, search by name or host, and manage catering orders.

If you change the date for which you want to view catering orders, you can quickly go back to today's orders by clicking the view switcher.

Here, you'll be able to view upcoming and completed orders for today.

Managing catering orders
To manage catering orders, you need to have appropriate permissions. Then on this page, you can do the following:
- Approve an order (if you have appropriate role permissions).
- Set the status for a catering task to In-progress. ⚠️ Changing any status for the order closes the window.
- Mark a catering task as Resolved.
- Cancel a catering task.
Select an order and click the pencil icon to view it, change the status, or edit order details.

Click Edit Order to view more details about the following:
- How many catering orders are bound to one space booking. There can be several of them, and you can manage them individually.

- What food is ordered
- In what quantity
- Host name
- Room location
⚠️ Mind that bookings can be moved across floors and catering orders will be moved along. - When they asked it to be delivered
- When they've asked it to be cleaned up. If this is not indicated, clean-up time will be set to the associated booking end time.
- Billing info according to cost codes
- Internal notes if any, you can add yours
- Cost
When created, a catering order is assigned automatically to the person or group of persons who are defined as Catering Manager in the booking policy. The person who has the appropriate permission approves it and moves on to processing. Read more about Catering Manager role within booking policies here: Catering Manager and Floor Manager roles.

Change order status by opening the order and using the buttons on the bottom left. There are the following catering order statuses:
- Approve or decline
- Cancel it or set as Ready for prep
- Ready (in time), Ready (late), Cancel order - Charge, Cancel order - No charge
- Delivered
- Delivery issue, Cleared up (in time), Cleared up (late)
The status Cleared indicates that the room has been cleaned up and the order is completed.
👋 Share your feedback with us about this documentation. Highlight a word or a whole paragraph and click the plus icon that appears. We keep improving this knowledge base based on your comments.
Pantry Timeline
Pantry Timeline under Catering in OneLens 360
Feature available in app version 2024.02 onwards.
The Pantry Timeline page under Catering shows all catering orders on the selected date and has two views:
-
 Tasks and Bookings with all maintenance space bookings that are meant for catering delivery or clean-up.
 -
 Catering Orders only.

On this page, the responsible team can have another view over the orders and tasks that are coming up or have been completed. Click on the order that is pending approval to edit it or view related information.

👋 Share your feedback with us about this documentation. Highlight a word or a whole paragraph and click the plus icon that appears. We keep improving this knowledge base based on your comments.