Feature available in app version 2023.02 onwards.
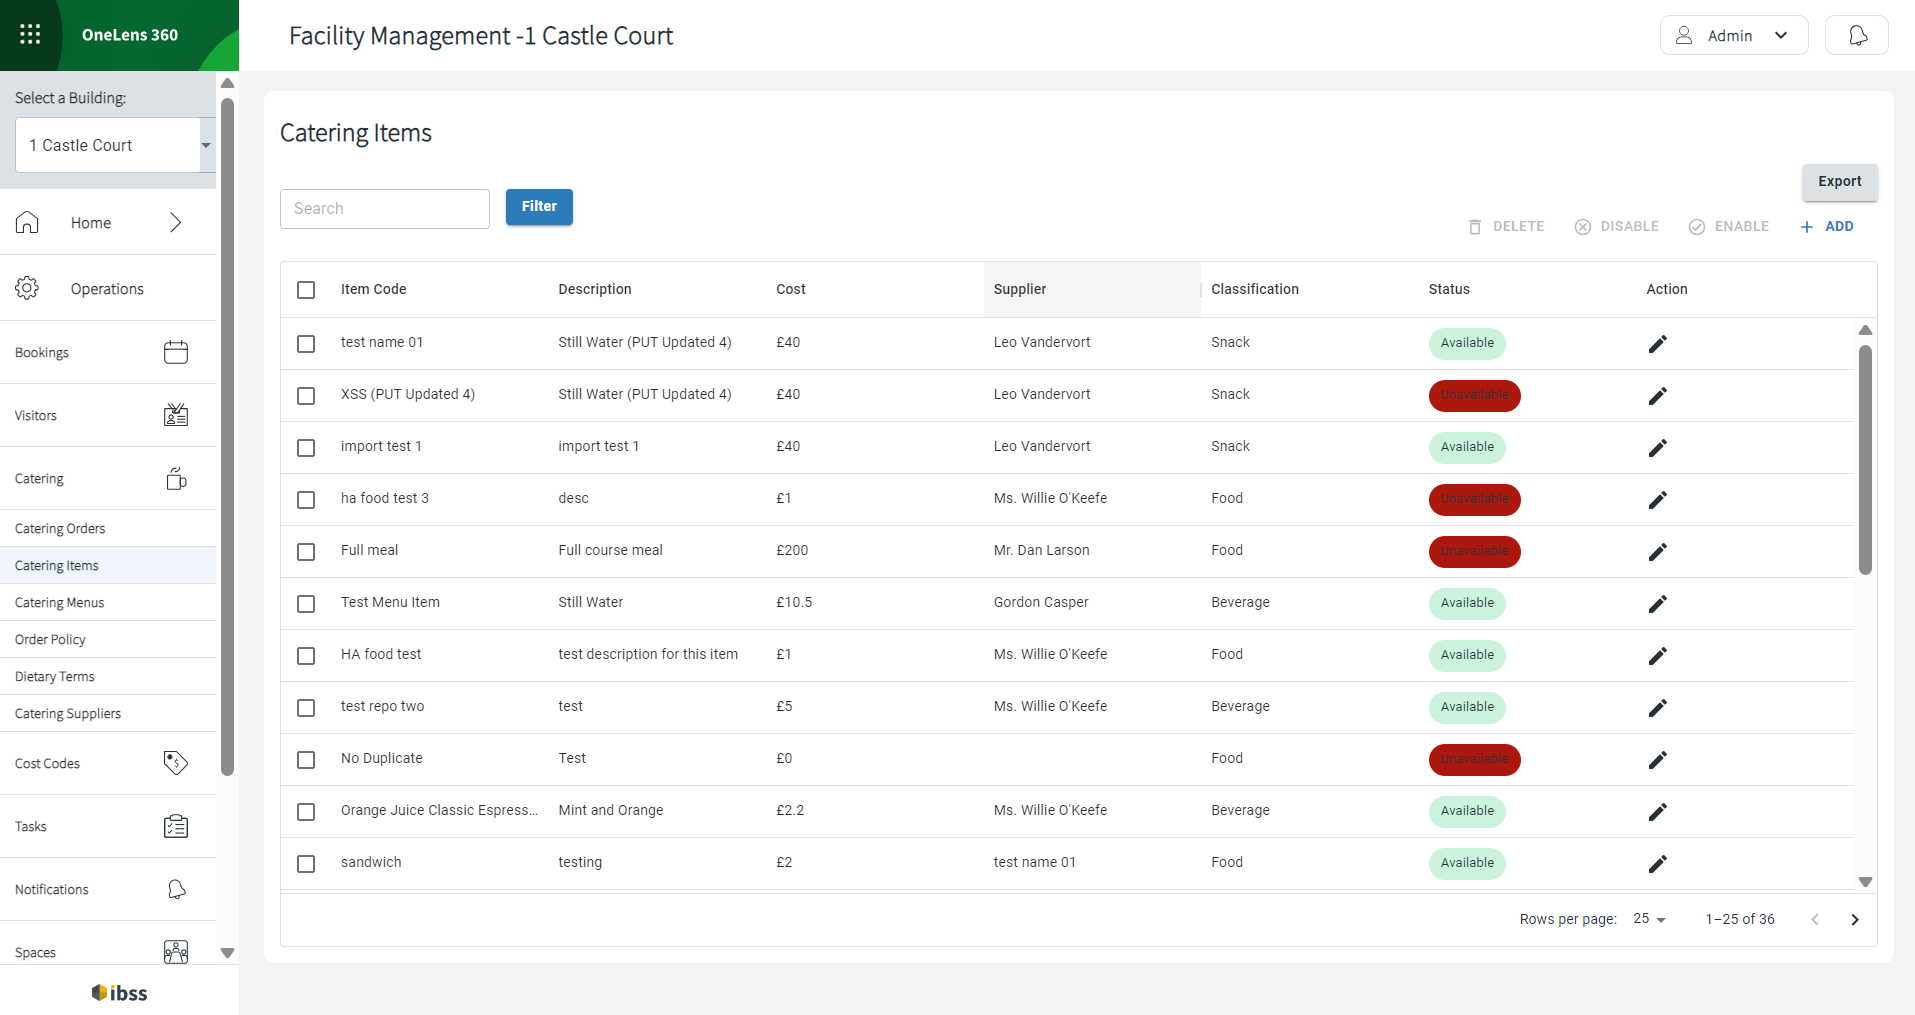
In Catering Items, you see a list of available catering menu items that you use when building a menu.
👋 Share your feedback with us about this documentation. Highlight a word or a whole paragraph and click the plus icon that appears. We keep improving this knowledge base based on your comments.
See the following columns in the Catering Items table:
- Item Code
- Description
- Cost
- Supplier
- Classification – type of item (beverage, snack, or food)
- Status - available or not
- Action
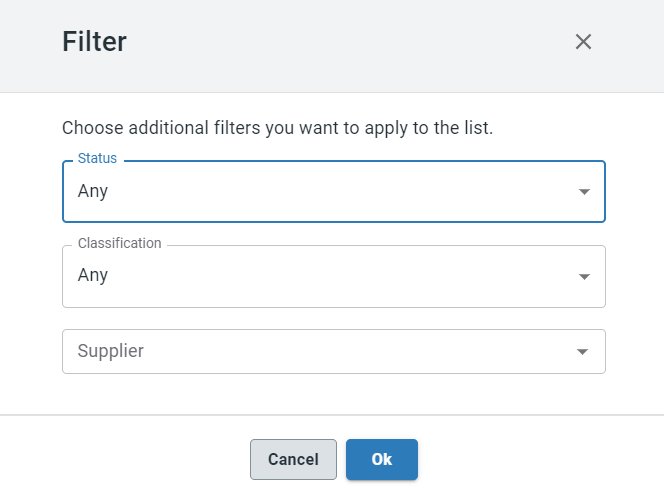
You can edit, add new menu items, enable or disable them. Also, you can search for an item by its name or description or filter them by status, classification, and supplier.
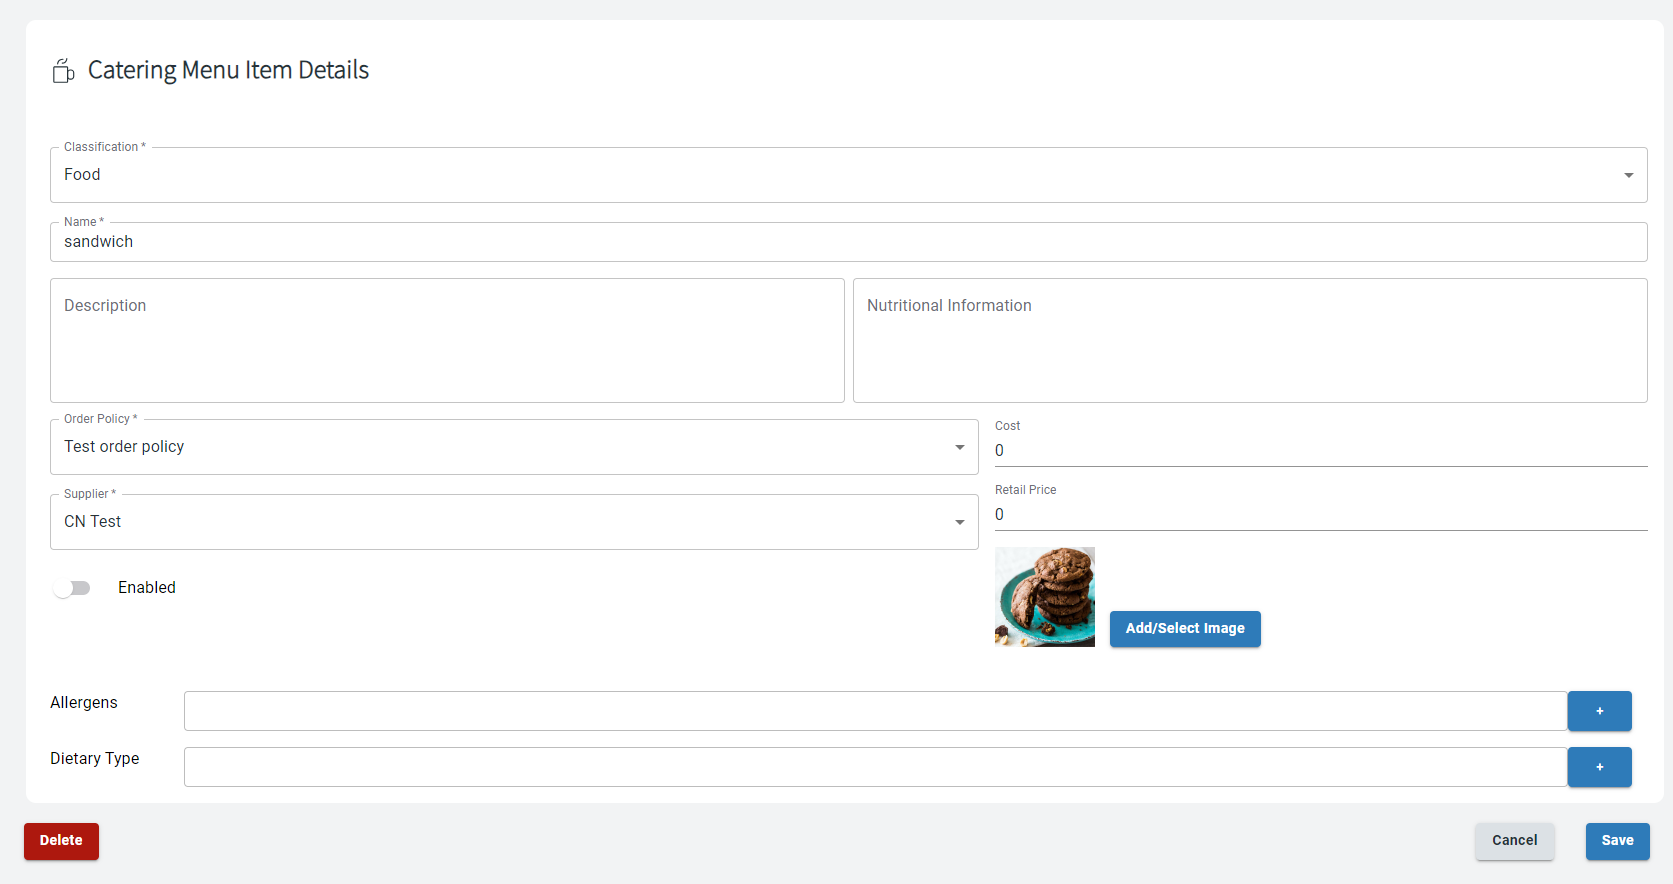
Adding a catering item
Add a new catering menu item directly in this view by clicking the +ADD button at the top right of the Catering Items page. A Catering Menu Items Details window opens for you to enter relevant details where certain fields are mandatory to fill in.

- (mandatory) Classification - whether this is beverage, food, or snack for it to appear later in menu selection.
- (mandatory) Name
- (mandatory) Description
- Nutritional Information
- (mandatory) Order Policy
- Supplier
- The Enabled toggle. Turn it on to enable the entire Catering Item, make it visible for others in the menus that use this item.
- Cost to the end user.
- Retail price for tracking any external catering vendor prices.
- (mandatory) Add/Select Image
After you've entered details for the catering item, click Save, and you will be prompted to indicate Allergens and/or Dietary type for this catering item.
Note: If you don't indicate allergens or dietary type for the item, you will be returned to editing the item.
Saved items can be now used to build a menu.
Editing a catering item
To edit a menu item, click the pencil icon in the Action column on the main Catering Items page. You will be able to edit data in the same fields as when you did to create an item.