
Feature available in app version 2023.02 onwards.
Catering menu is a set of catering items that is shown to the end user given the time of the order and notice period for catering items that is set by the order policy. It means that the user will only see those items on the menu that are available and can be prepared for their space booking, and there's sufficient time allowed for kitchen operation time and food or drink preparation time.
👋 Share your feedback with us about this documentation. Highlight a word or a whole paragraph and click the plus icon that appears. We keep improving this knowledge base based on your comments.
Create catering menus for each building separately if your organisation has more than one office building. A menu can then be assigned to the whole building, and there can be a menu defined for one or more spaces.
⚠️ But a space can have one menu only. For now, we recommend not to apply any user role restrictions to the menu until further functionality is introduced.
After you create and confirm the booking, you can add catering and only then you will see what's available on the active menu.
On the Catering Menu page, you can view the list of created menus. From here, you can delete, disable, or add a new menu if you have these permissions enabled for your role.
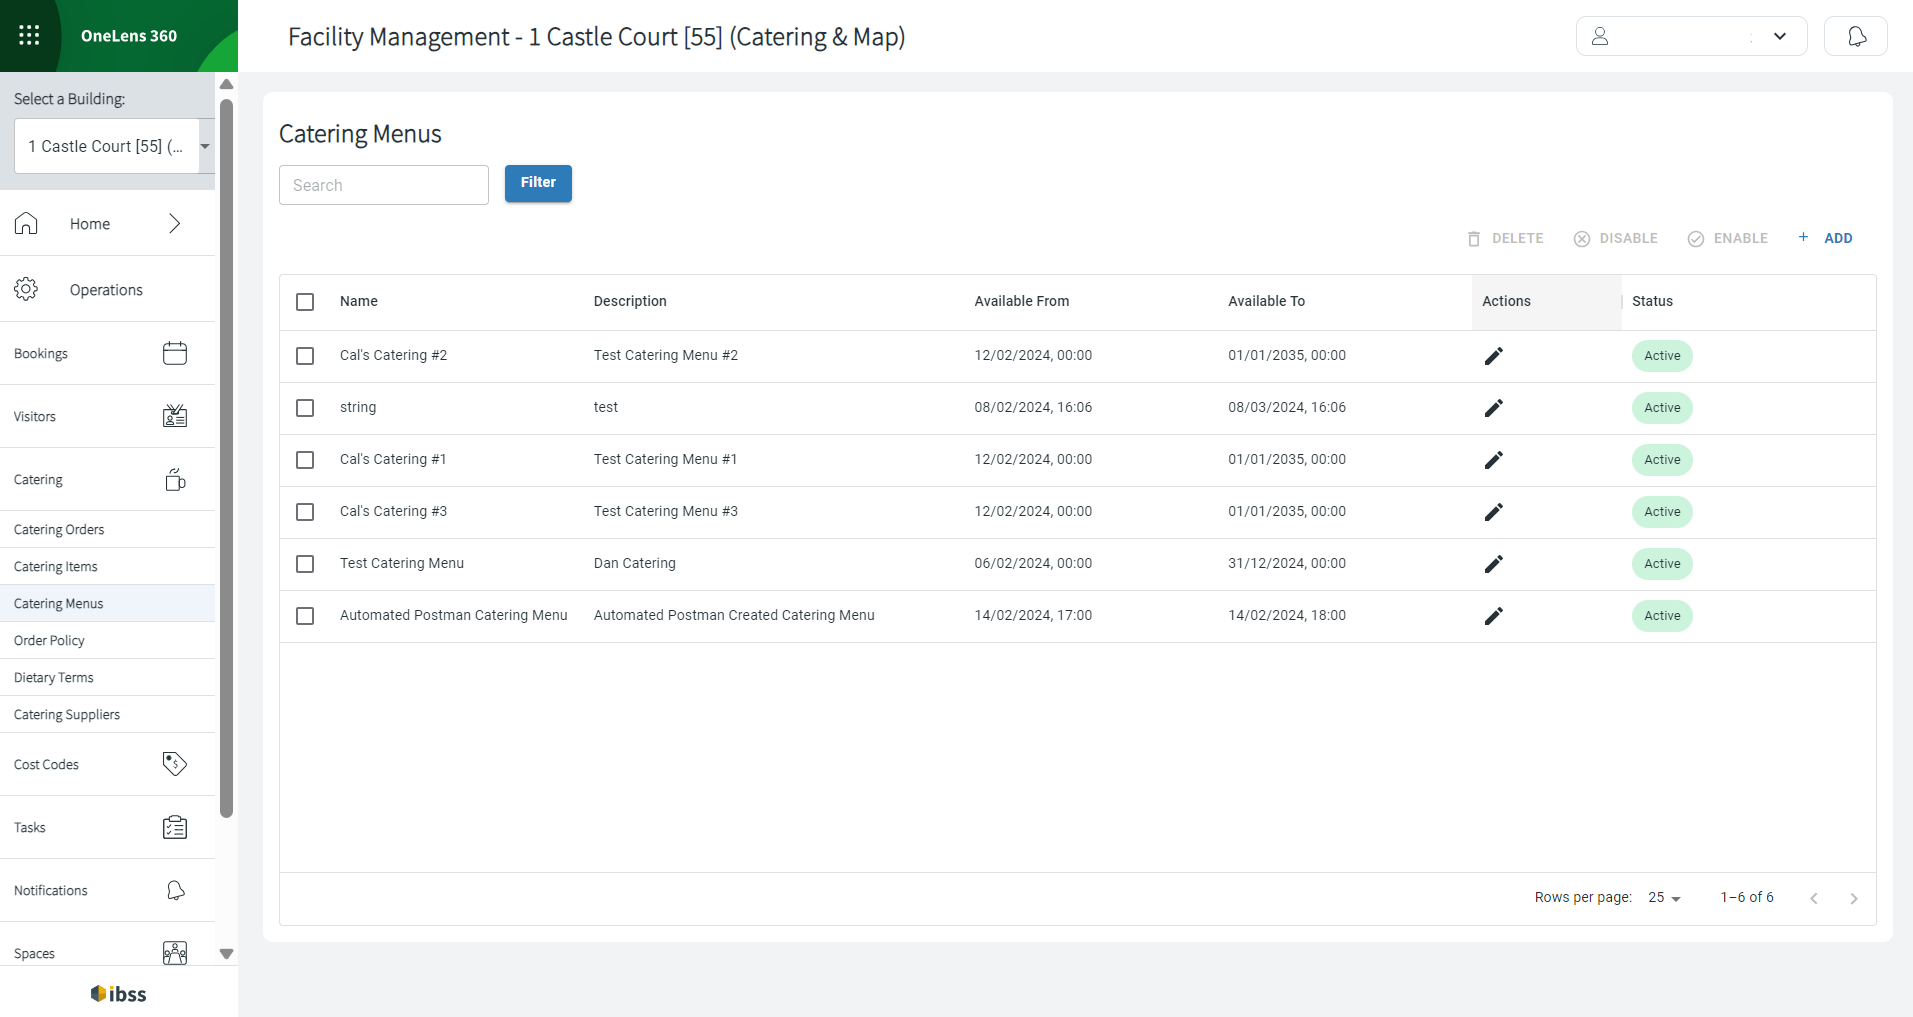
To add a new menu, do the following:
- Click +ADD from the Catering Menus page.
- Fill in the fields in the Menu popup that opens
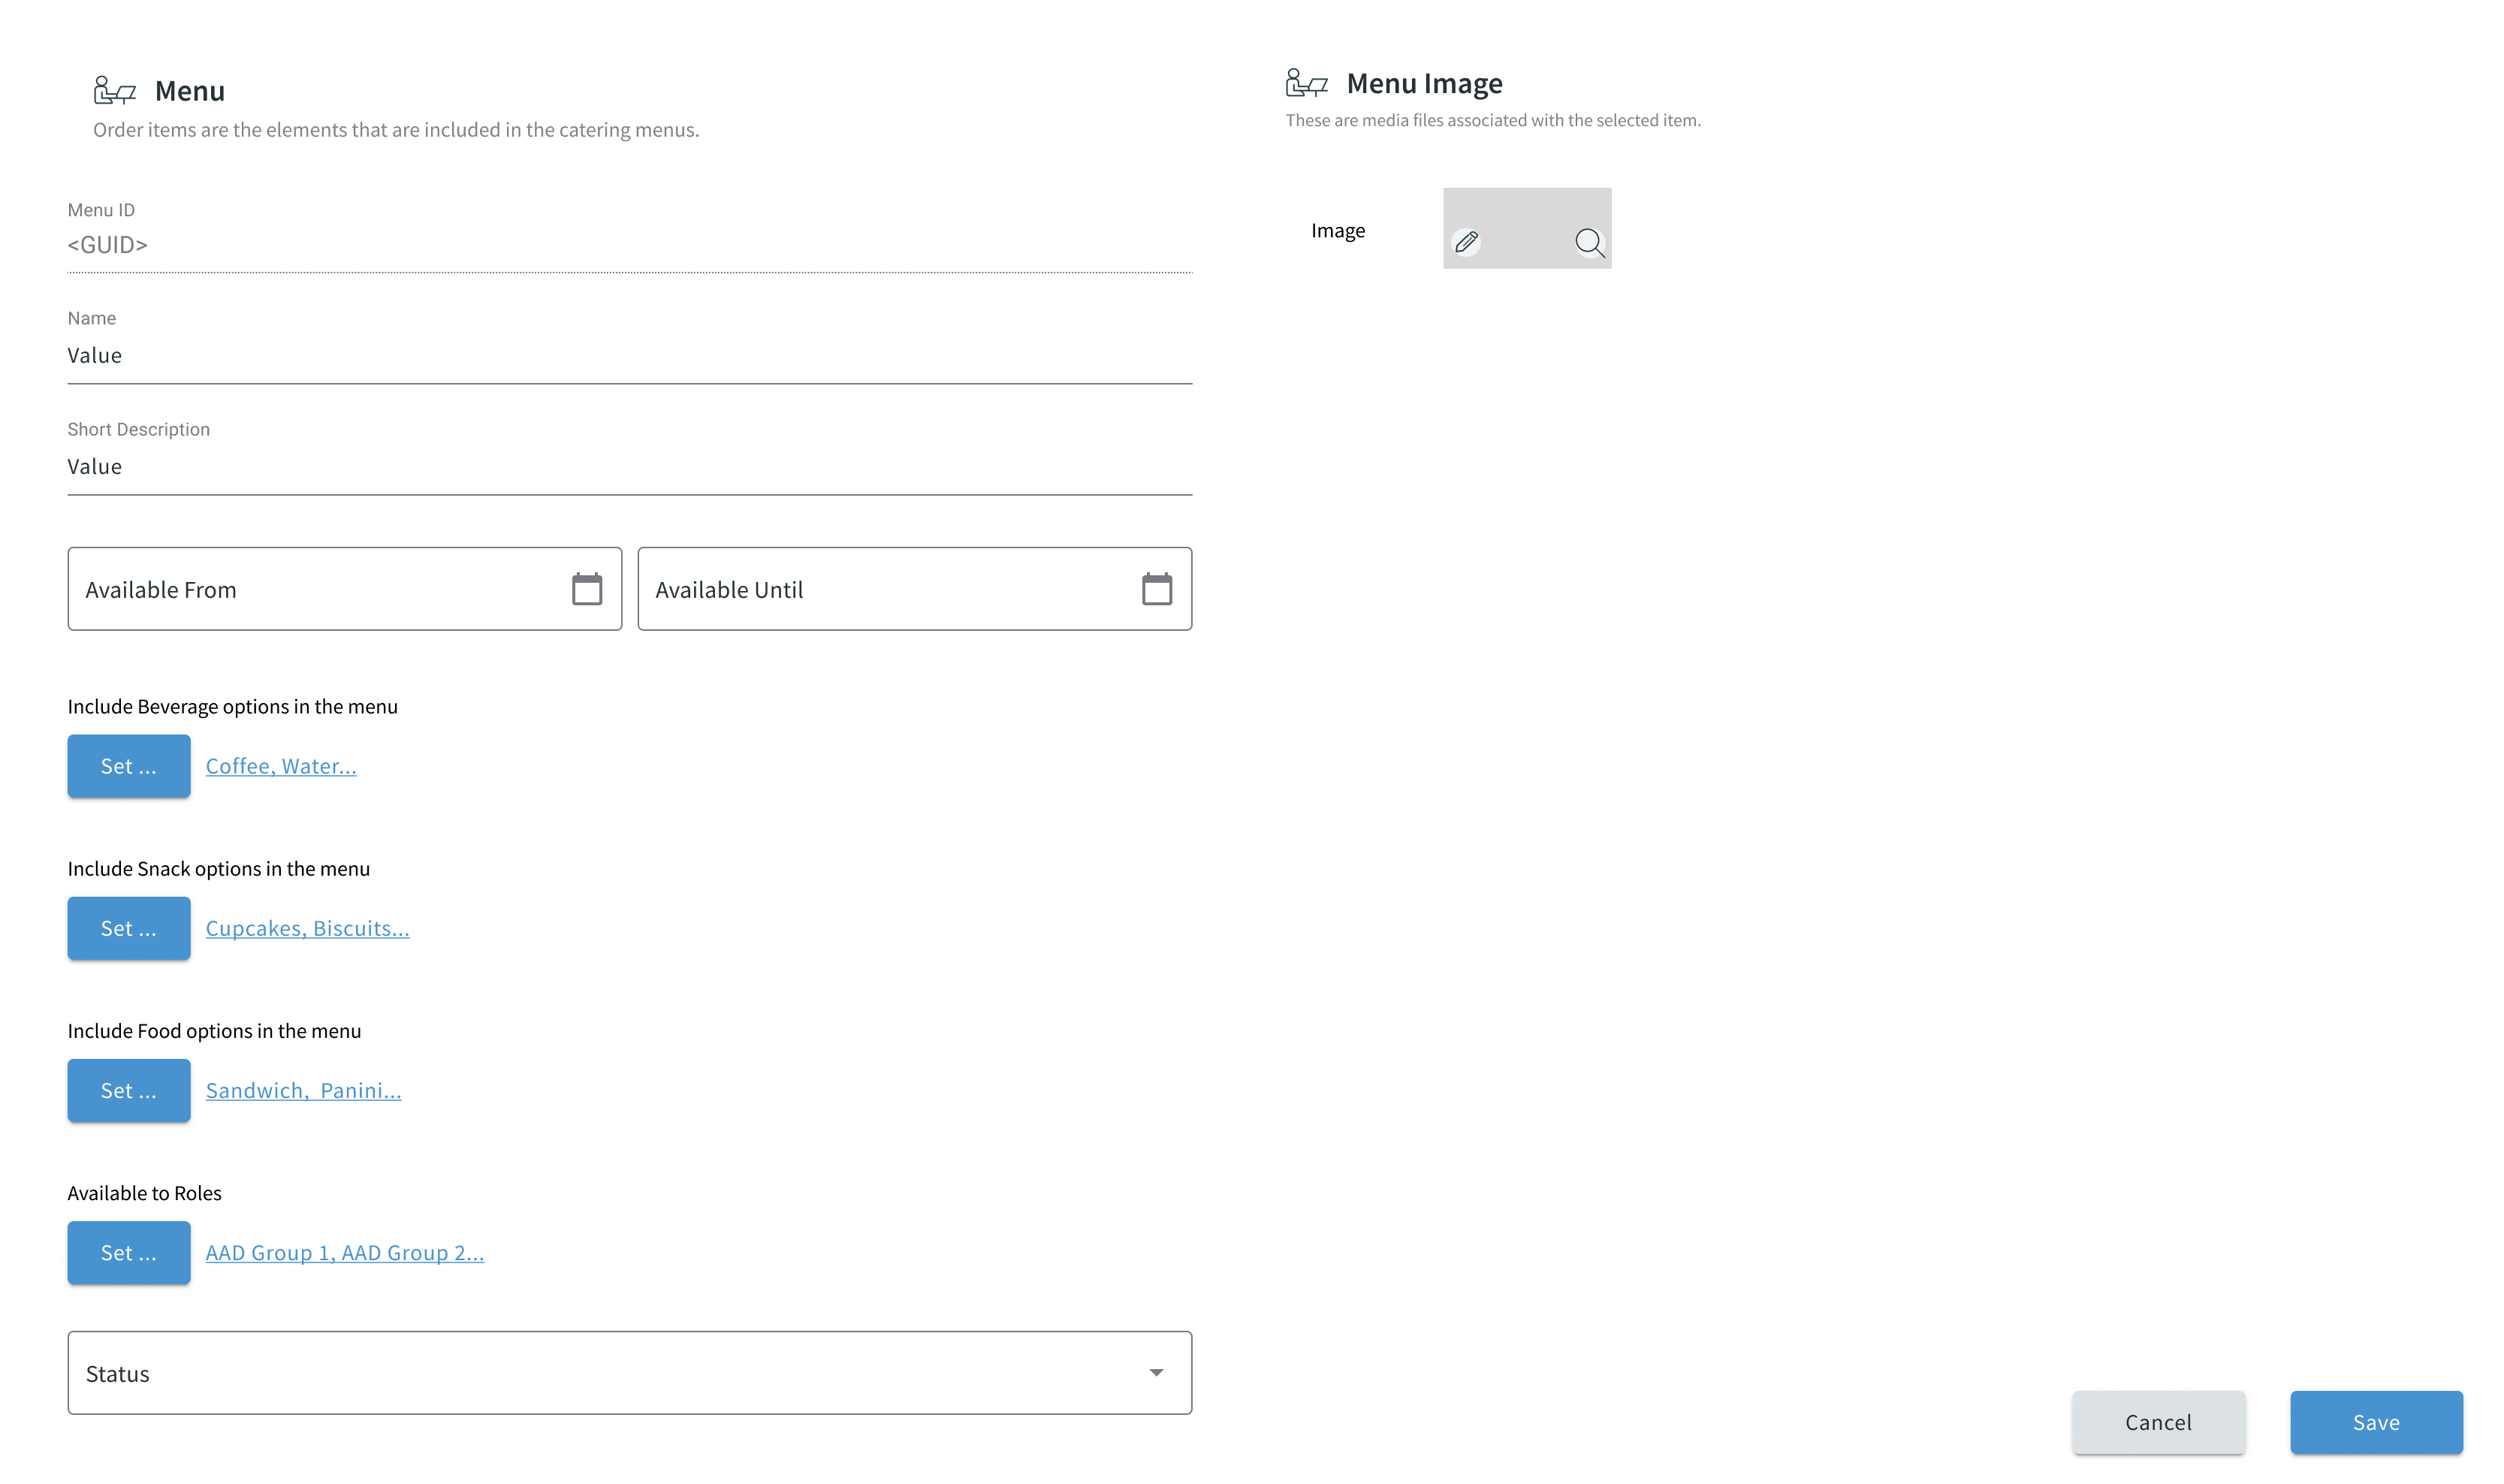
- Indicate Menu ID, Name, Short Description.
- Set the dates for this menu to be available.
Note: Keep end date of the menu far in advance for people who book far in the future to see the active menu. Otherwise you'll need to manually move forward the duration of the active menu. - Add items from the categories Beverage, Snack, Food that were added previously in Catering Items.
- ❌ For now, we recommend not using the Available to Roles setting, or you can allow all users to see the menu. Otherwise, the space booking permission and menu availability permission may conflict and prevent users from being able to make catering orders.
- Set the Status to active or inactive.
Use this option to prepare menus in advance or keep them after they expire to reuse later. - Add a menu image that will be visible when selecting this menu.
- Save or cancel your actions.
Now, depending on what you have set, your menu is stored in OneLens 360 and will be visible to your organisation in Flex on the set dates and if set as active.