

Applies to app version 2023.02 onwards with the following items added with later releases:
- 2024.03:
- New Delegate Bookings page for delegates.
- Visitors can now add their Visitor Pass from the visit invitation to their Apple Wallet or Google Wallet.
- New icon that marks bookings that are part of a series on the Bookings page.
- Pages renamed:
- My Schedule > Schedule
- Bookings > My Bookings
- Visitors > My Visitors
The Schedule section hosts all space bookings and visitor invitations that you made. Here, you can view existing records and edit or cancel them.
The Schedule section has the following pages:
- My Bookings
- My Visitors
- Bookings for Others
- Delegate Bookings
My Bookings
My Bookings in Flex
On the My Bookings page, you can:
- Edit existing bookings
- Cancel bookings
- Check in or out of bookings
Note: Checking in to a booking via Flex is security controlled by your organisation. Due to the business policy, it may not be possible to check in to bookings remotely in Flex.
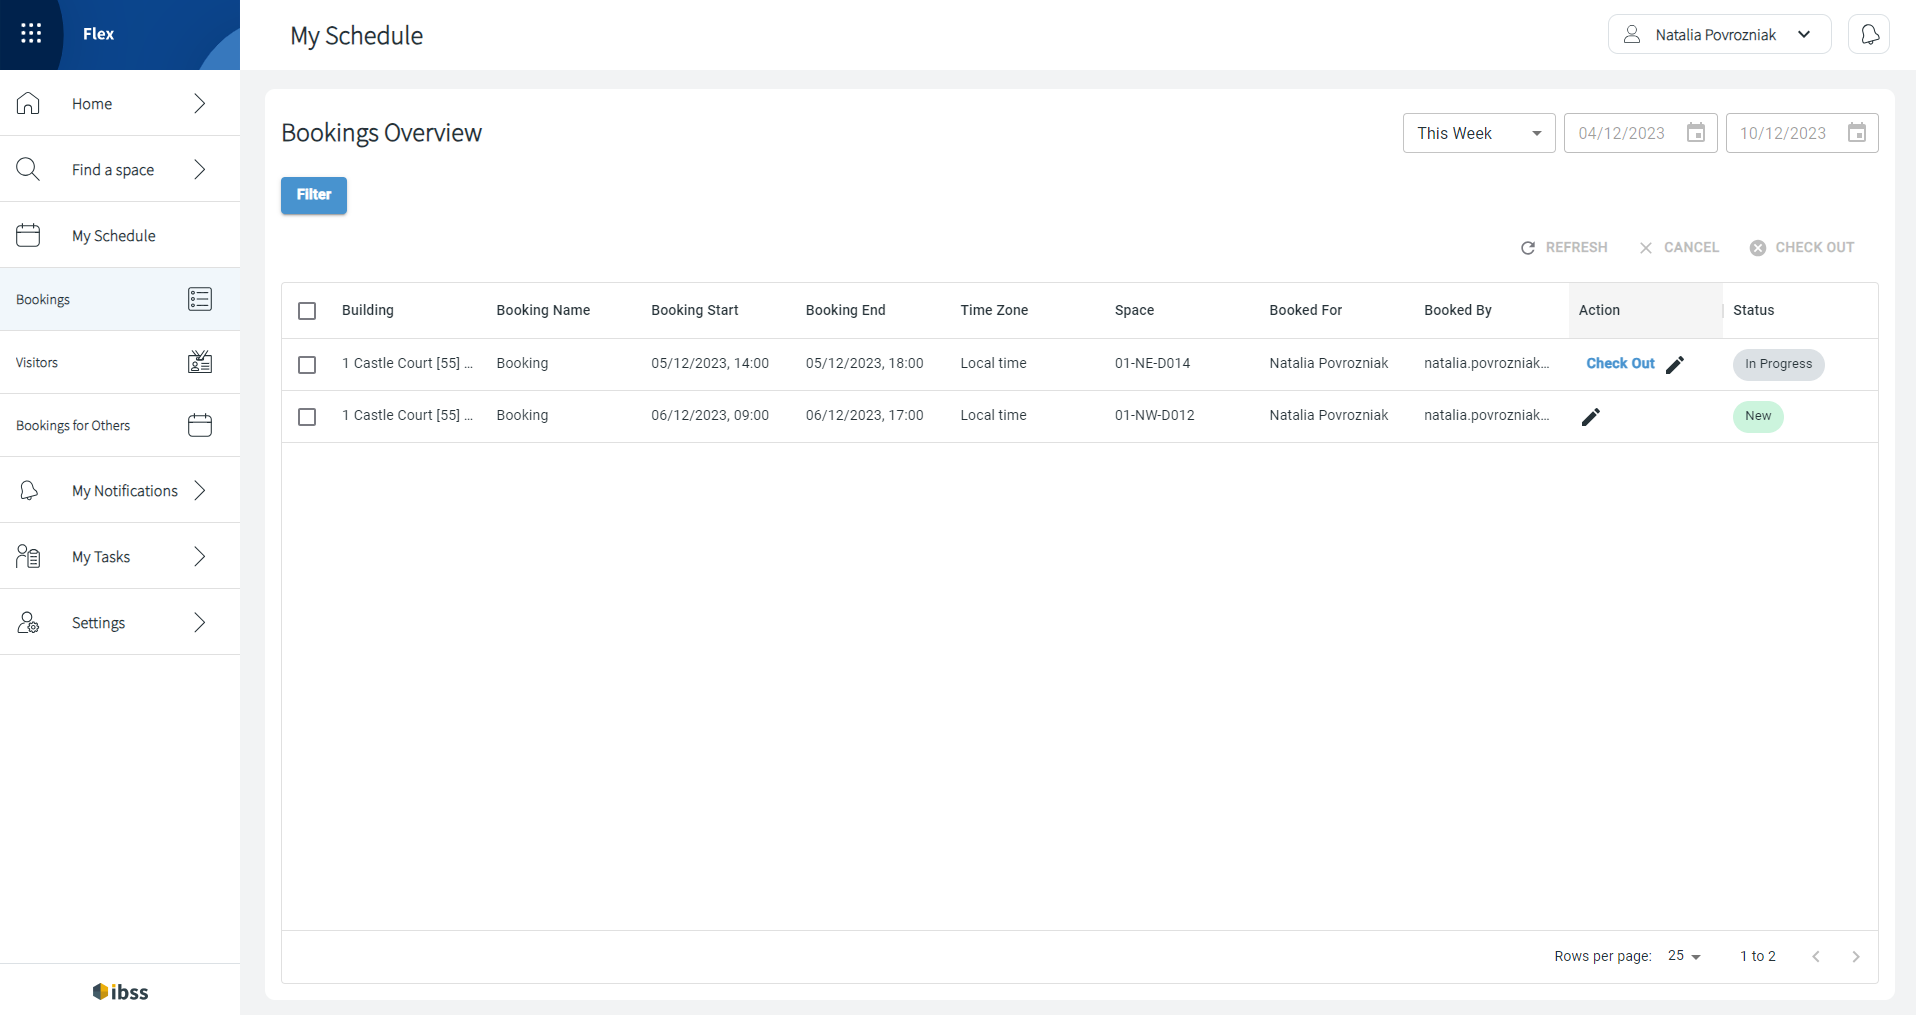
The list of results on this page are downloaded page by page. Bookings are listed in 25 rows by default, but you can change it to 50 or 100 rows to be downloaded per page.
Note: Flex shows you what row you are currently viewing out of the downloaded ones, not showing the total number of pages and rows: as on the screenshot 1 to 2 because there are two rows in the list. Click the Next arrow to continue loading more pages as needed. If no more pages are loading, it means that you've reached the end of the results list. You can go back to the loaded pages.
My Visitors
My Visitors in Flex
In IBSS apps, visitors can be invited as attendees to a space booking or just for a visit unrelated to any booking. Read more about inviting attendees in one of these articles:
If the My Visitors page is available for your role permissions, here's what you can accomplish:
- View all visitors that you invited to meetings or separately
- View their status, especially if your organisation approves or declines visits for you
- Create new visit requests
- Edit existing visit requests
- Cancel visit requests
- Import visitors list

Adding a new visitor
⚠️ First, this option must be turned on for your role in IBSS apps.
To add a new visitor that is not related to any space booking or a meeting:
|

|
| 2. You can add internal Visitor Notes. These are visible only by you and the Visitor Management team in the OneLens 360 app. | |
|
3. Most of the Host Details are automatically populated as you create the visitor. You can change host details if you have the necessary role permissions. Fill in or manage the following fields:
| |
|
4. Add Timings for the visit:
| |
| 5. Confirm by clicking Ok. This button becomes available after all mandatory fields are filled in. |
Visitor requests might need approval in your organisation. After approval or when it is not required, visitors receive your invitation and can access the building where you invited them to when they arrive. They will be using the QR code from the email invitation.
Note: Visitor passes are not security credentials. They are convenience passes designed to streamline check‑in and optionally provide temporary QR‑based entry.
If the Wallet Pass option is set up for your organisation, they will be able to add the Access Pass to their Apple Wallet or Google Wallet apps for convenience, but this is not a secure mobile credential.
Importing a list of visitors
To import a list of visitors if you have their data, click + ADD at the top of the My Visitors table.
- In the Add Visitor popup, go to the BULK UPLOAD tab.

- Download Template to ensure that your data is formatted correctly.
- Upload the file that you have prepared using the Select File button.
There are many fields in the file, but only the following are required for a successful visitor records upload:- Space_Id can be a Space ID of the main arrival location
- Node_Id is the Node ID of the building where the visitor is expected
- Visitor_First_Name Visitor_Last_Name Visitor_Email Visitor_Company
- Visit_Host_Name Visit_Host_Email
- Visit_Start_Date Visit_End_Date
- Click Upload and Proceed to start processing your data.
The file will be processed in the background, and you can check the progress on the Background Processes page. If the data is uploaded successfully, you will see the new records in the list.
Bookings for Others
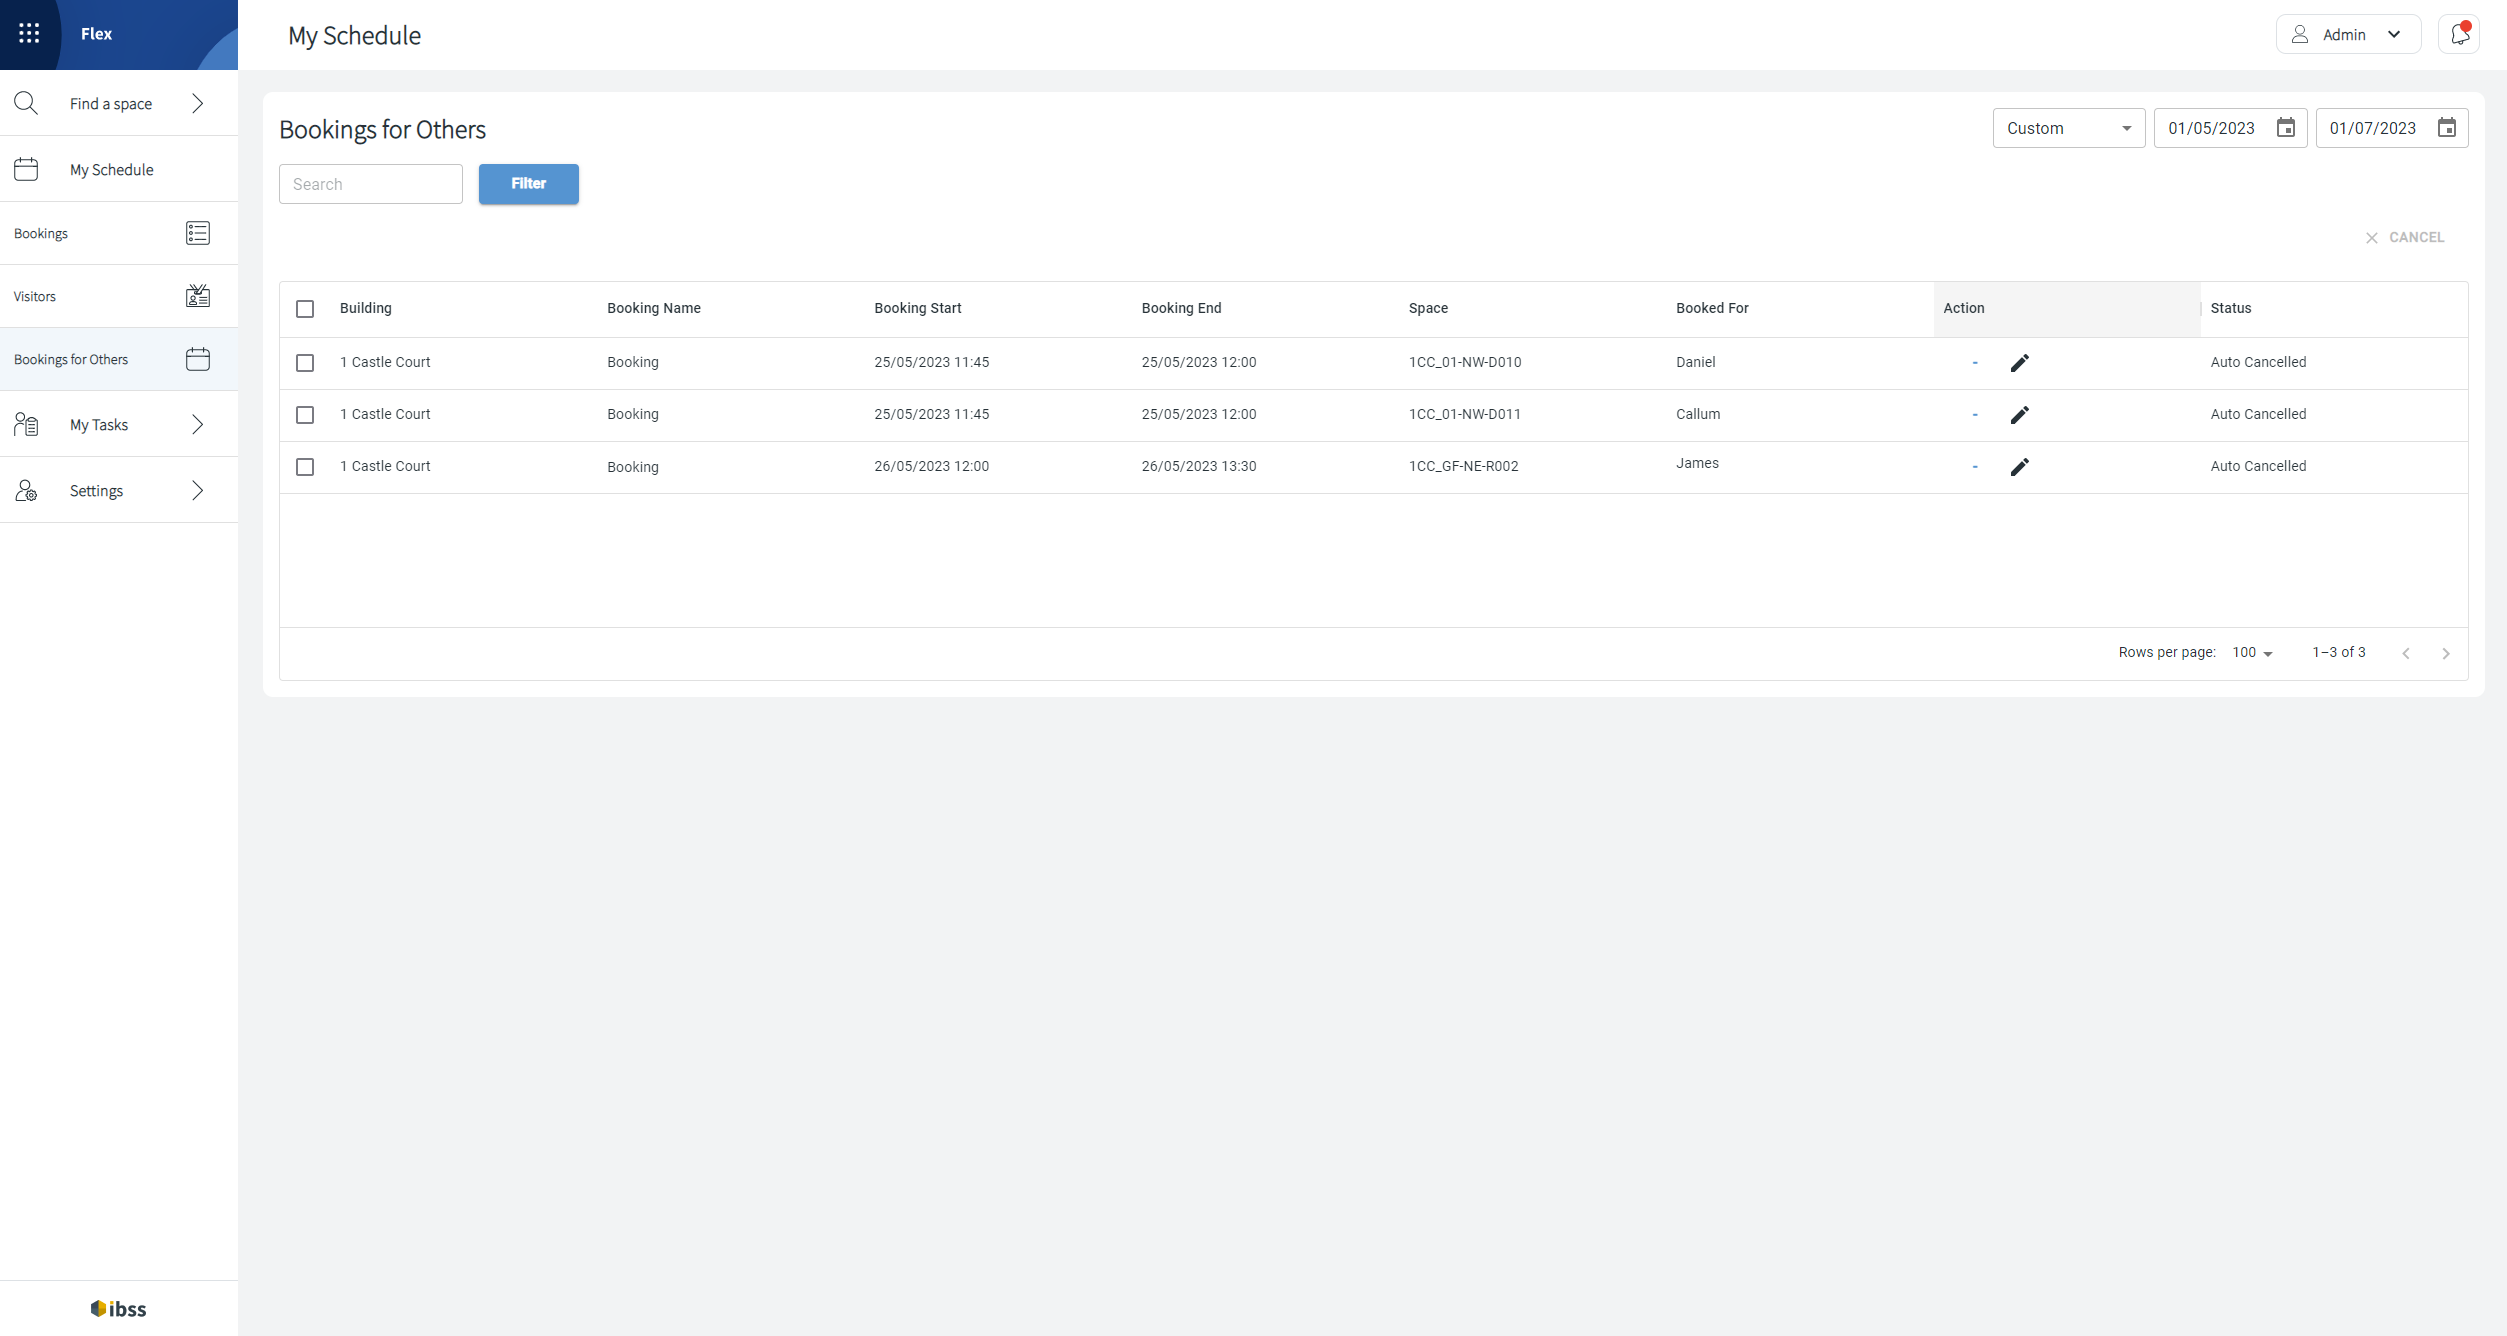
Bookings for Others in Flex
As a management assistant or administrative user, you may have the corresponding permission for your role to book spaces on behalf of other users or for guests (Guest AAD account). In this case, you will have the following:
- The Book for Someone Else? option when booking from the Simple Booking page.
- The Booking for Others page under Schedule in the main menu will list bookings that you have made for others.
Make sure that you take into account the access permissions of the user who you are booking for:
- With the Book On Behalf For permission, you are able to book for anyone in your organisation.
- Depending on what space access permissions your organisation has defined for your role and user, you will only see the spaces in search results where you are allowed to book.
- Remember that your permissions to access certain spaces will differ from the ones of other users. Check where the user is allowed to book prior to booking for them. They won't see the booking that you created for them if they don't have access to the space.
⚠️ If you are a delegate of another user to book on their behalf, the booking and booking management process is slightly different. Read more about it here:
The Bookings for Others page is a simple table page for you to:
- View the list of existing bookings and open them.
- Edit a booking after opening it.
- Cancel a booking from the main view or after opening it.
Delegate Bookings
Delegate Bookings in Flex
On this page, you will see the bookings that you created as a delegate for your primary user. If this primary user has other delegates, you will see bookings that they created for your primary too.

Read more about the Delegate function in IBSS apps here: Delegate function in Flex
👋 Share your feedback with us about this documentation. Highlight a word or a whole paragraph and click the plus icon that appears. We keep improving this knowledge base based on your comments.