

You can book a space for the nearest time. For this:
- Select the As soon as possible option.

- Add duration (To).
- Edit location (Building, Floor, Zone), Space Type if needed, and indicate Capacity if you need a meeting room.
- Click Show more search items to browse other options for the selected space type. Select from what's available, for example: linked spaces, events, AV, catering, hearing aids, resources (presentation aids), or spaces that allow conducting events (the Need Events? toggle).
Note: Equipment and catering are available to book at least 24 hours in advance and are available for meeting room bookings only. Hence, services are not available for ASAP bookings. - Click Search.

- Select a space from the search results in the middle column of the page.
ℹ️ Check the associated booking policy, space information, or space guide on top of the third column.
ℹ️ Here, you can add the space to your favourite spaces. For this, click the star in the top right corner of the space info popup. - Add booking name (mandatory) and a description (optional).
- (optional) Indicate Booking Attendance for the operational team to plan space and visitor management support accordingly.
- (optional) Indicate if you Book for Someone Else: an employee or a visitor.
- EMPLOYEE. You can select your colleague from FAVOURITES or DELEGATED BY – a colleague who delegated you the permission to book on behalf of them.
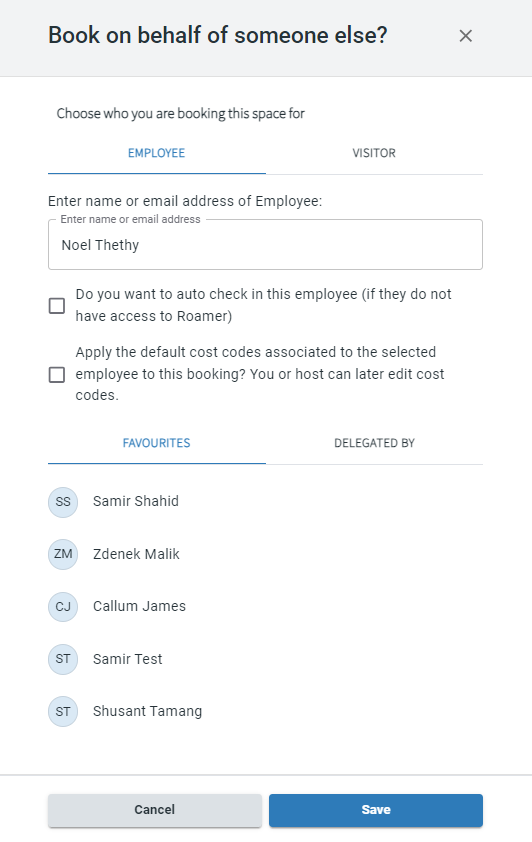
⚠️ Use checkboxes in the popup – right under the name of the employee that you indicated – to make important decisions about the booking you are making for someone else. You can:- Check in this employee automatically into the booking.
- Apply the default cost code of the selected employee.
In this case, your default cost code won't be added to the booking. Only the cost codes that are associated to the selected employee.
- Or a VISITOR. Indicate all details about your visitor and you can check them in to this booking. They will have to check in to the building separately.

- EMPLOYEE. You can select your colleague from FAVOURITES or DELEGATED BY – a colleague who delegated you the permission to book on behalf of them.
- (optional) Set booking(s) to auto check in for [user].
- (optional) Add Attendees if applicable. Mark the ones who are external visitors.
⚠️ Space capacity limits the number of attendees that you can add to a booking. With the API.Bookings.UnlimitedCapacity permission you can override the space capacity limitation. The total limitation is up to 250 attendees for a meeting.
- (optional) Indicate one or more Cost Codes if your organisation is using them. If you will be adding catering later, this cost code will be automatically assigned to catering order too. You can change the cost code for booking and for catering order later.
- Add cost codes in free text or by selecting them from a list.
- Edit the default ones if you are booking for yourself. Read the Default Cost Codes section in this article: Settings in Flex.
- Check the cost codes of the person that you book for if you selected to use their default cost codes in the previous step.
- Click Confirm booking.
⚠️ Note: There're booking policies enforced for each space within your organisation. They can limit the time for booking start to be, for example, at the exact hour or each half an hour. Because of this, booking for right now may be unsuccessful if, for example, your current time is 9:47. In this case, turn off the As soon as possible toggle and adjust timing for your booking to match booking policy requirements.
Now, you are all set and can view your booking under Schedule > My Bookings.