
Applies to app version 2023.02 with the following extensions available with next releases:
- 2024.01 Default cost codes
- 2024.02 Multiple booking without a pattern
- 2024.02 Space guides
In Flex, you can create a standard booking for your nearest working day, an ad-hoc space booking, a series of bookings with or without any pattern, and add needed services or equipment to your booking where available. For meeting room bookings, you can also choose the capacity and layout to accommodate the special needs you might occasionally have.
In Flex, there are two pages where you can make space bookings:
- Single Booking
- Advance Booking
By default, the Find a space section shows the Single Booking page first with search results based on your user preferences for the building, floor, and workspace type for today, and the booking would start at the nearest time of your working day – today (if you're booking earlier than your working day starts) or tomorrow (if it's now past your working day start time).
See also:
- About user preferences here: Settings in Flex.
- About booking on Single Booking in Flex.
- About booking on Advanced Booking in Flex.
Booking a space
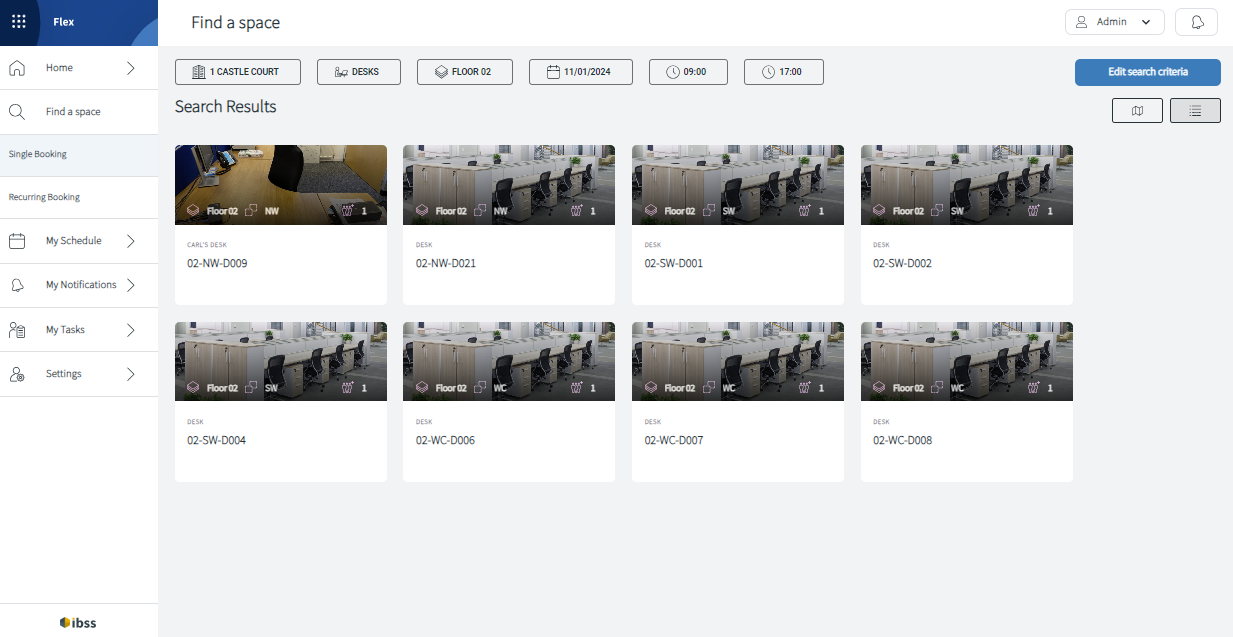
Booking a space starts with searching for an appropriate space using available search criteria, then you select one, and then confirm your booking.
Additionally, you might need to add more details to the booking if you're booking linked spaces or you might need to select alternative spaces for recurring bookings if not all occurrences have an allocated space.
Booking a space consists of the following stages in more details:
- Searching for an appropriate space.
You can view search result in list or map view. Map view is available when searching on a single floor only and if the map file has been added by your organisation.
You can edit the default search criteria if needed:- Type of space that you want to book.
- Time and date that you need it for. By default, Flex searches for spaces for your nearest working day in the building that you have set under Settings in Flex.
- Building, Floor, Zone.
- Capacity if it's for the meeting room.
- Linked Spaces if you want a specific room layout for your event.
- (available on the Advanced Booking page only) Series of bookings – recurrent or multiple without any pattern.
- Resource if you want to add hearing or presentation aids to be available in the space.
 |
Catering is available for this space after you make a booking. To add catering, confirm your booking first. |
 |
AV is available in the space |
 |
A portable hearing loop is bookable for this space |
 |
Additional presentation aids are bookable for this space |
 |
Linked space booking (combining multiple rooms) is available |
 |
This space has multiple furniture layouts available |
- Selecting the space.
✅ It's worth checking the associated space information and booking policy if available. This may impact your selection of the space.
The space may include space guides as links, too.
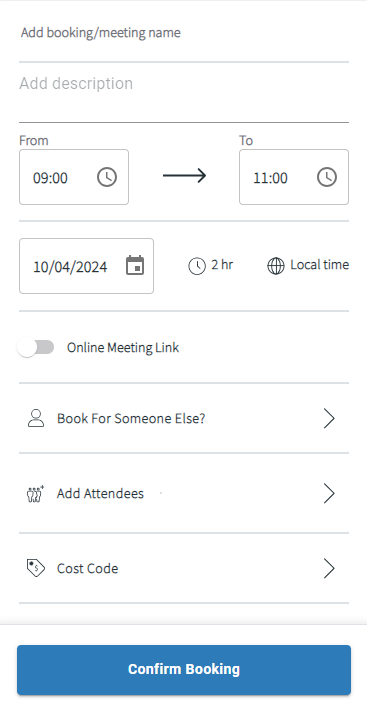
- (optional) Indicating that you book for someone else - employee of your organisation or an external visitor.
If you're booking for another employee of your organisation, you can:- Check in this employee automatically into the booking.
- Apply the default cost code of the selected employee.
⚠️ In this case, your default cost code won't be added to the booking. Only the cost codes that are associated to the selected employee.
- (optional) Adding attendees if this is booking of a meeting room with the capacity for more than 2 people.
When adding attendees, you can indicate whether they need visitor access. For this, select the corresponding checkbox and provide necessary visitor details.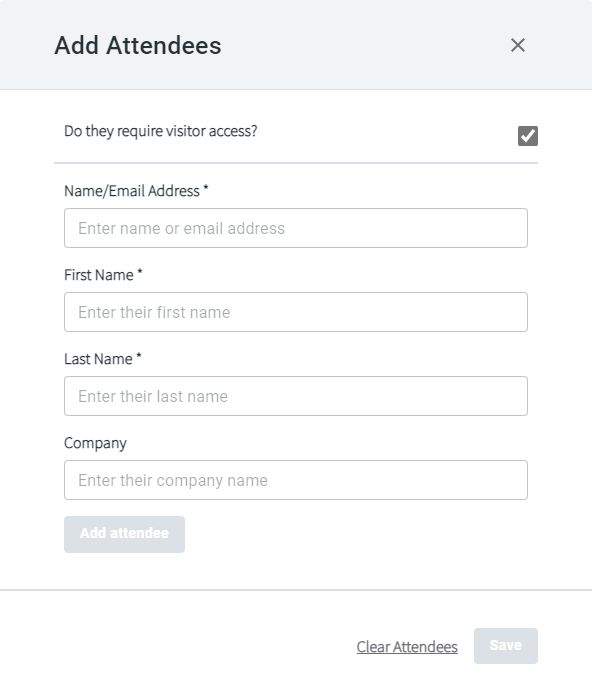
- (optional) Adding cost codes if your organisation is using them. Here, you have the following options:
- Add cost codes in free text or by selecting them from a list.
- Edit the default ones if you are booking for yourself.
- Check the cost codes of the person that you book for if you selected to use their default cost codes in the previous step.
- (optional) Adjusting for linked spaces if applicable.
Read more about linked spaces in Flex here: Booking linked spaces in Flex - Confirming your booking.
- Adding services if applicable after your booking is confirmed. You can add services – equipment (hearing or presentation aids) or catering to your booking if the space allows it and there's sufficient time left for preparation. To have services available in the space that you have booked, make sure to select these criteria during search.
Read more about single bookings here: Single booking in Flex
Read more about advance bookings here: Advance booking in Flex
Booking approval
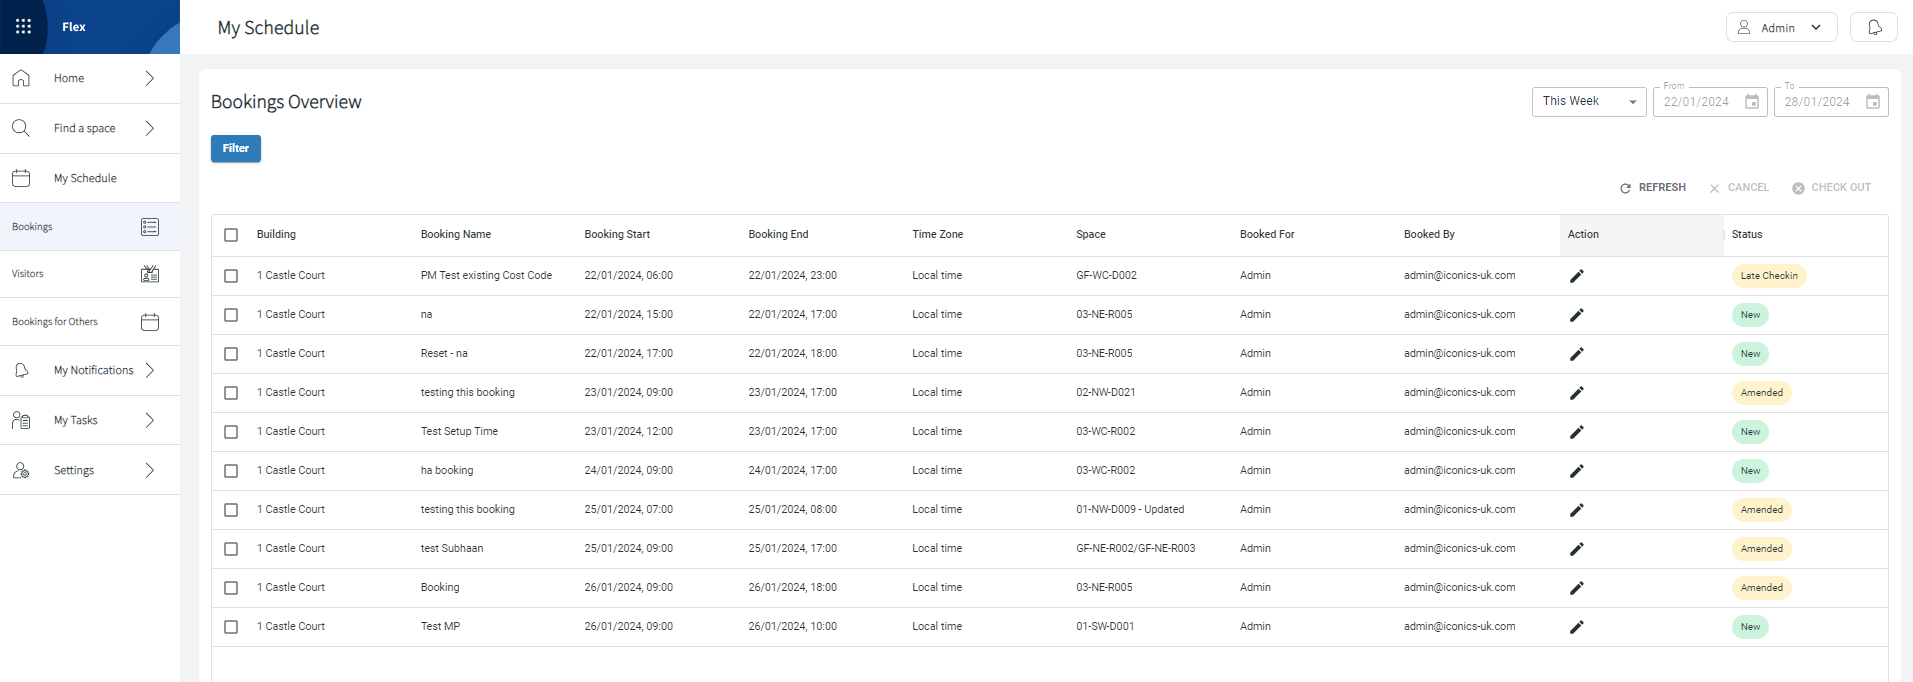
Some spaces may have an approval flow enforced by your organisation in the corresponding booking policy. Typically, these spaces are high-value boardrooms or other unusual spaces within your building. After you make a booking of such space, you will see your booking status still as New in green, just like other bookings under My Schedule > Bookings. Meanwhile, the responsible person will make a decision whether to approve or decline your booking. You will receive a corresponding notification about this.
After you've made a booking
You can modify your bookings. Read more about this here: Modifying a booking in Flex
Checking in
When you have a space booking, make sure to check in before your meeting within the allowed early check-in period that is set by your organisation. Also, mind the automatic checkout of the space if you don't check in.
You can check in to your bookings or to bookings made on your behalf. For this:
- On the My Schedule > Bookings page, click the pencil icon next to the upcoming booking that you want to check in.
- Click the Check In button on the left under the space details.
Checking out and cancelling
After your meeting or if you've finished your meeting early, remember to check out of the space to make it available to others.
If you don't need the booking any longer, make sure to cancel it and free up space for someone else. Go to My Schedule > Bookings, select the needed booking, and click CANCEL in the top right corner of the table with your bookings.
👋 Share your feedback with us about this documentation. Highlight a word or a whole paragraph and click the plus icon that appears. We keep improving this knowledge base based on your comments.