
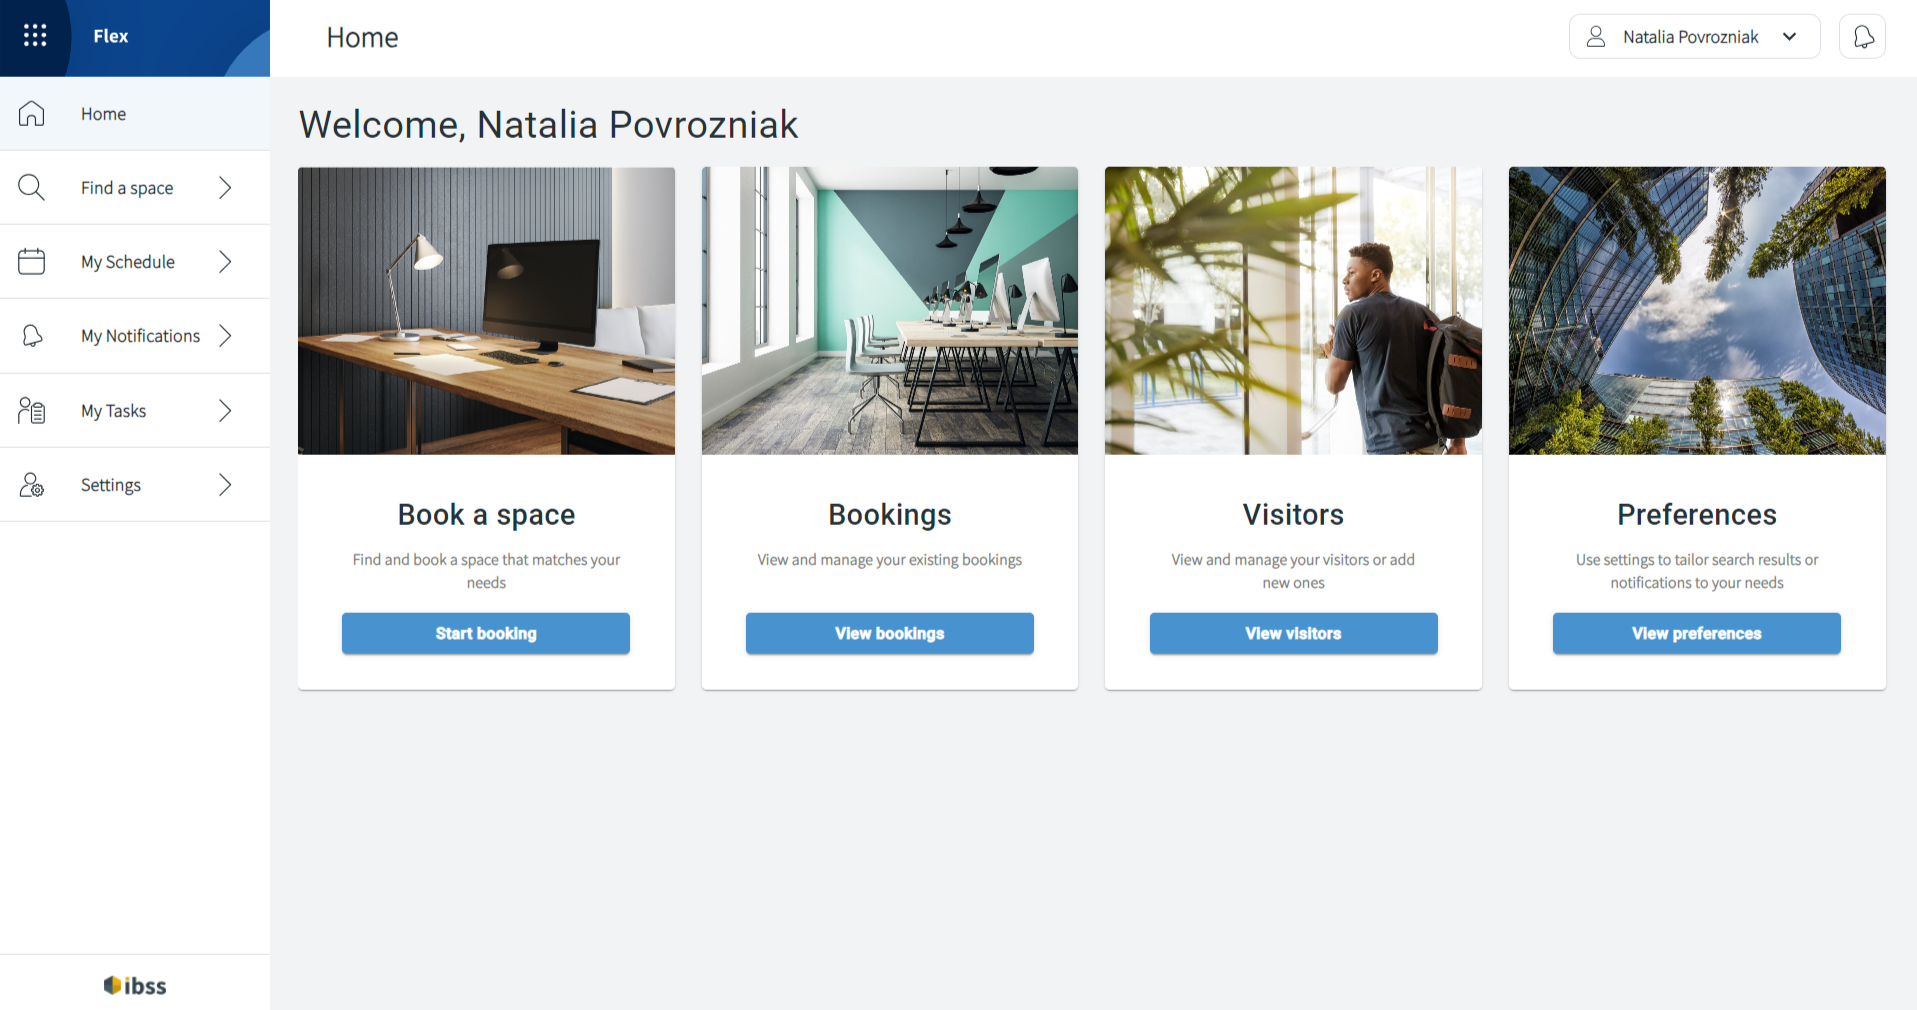
Flex welcomes you on the home page after you log in.
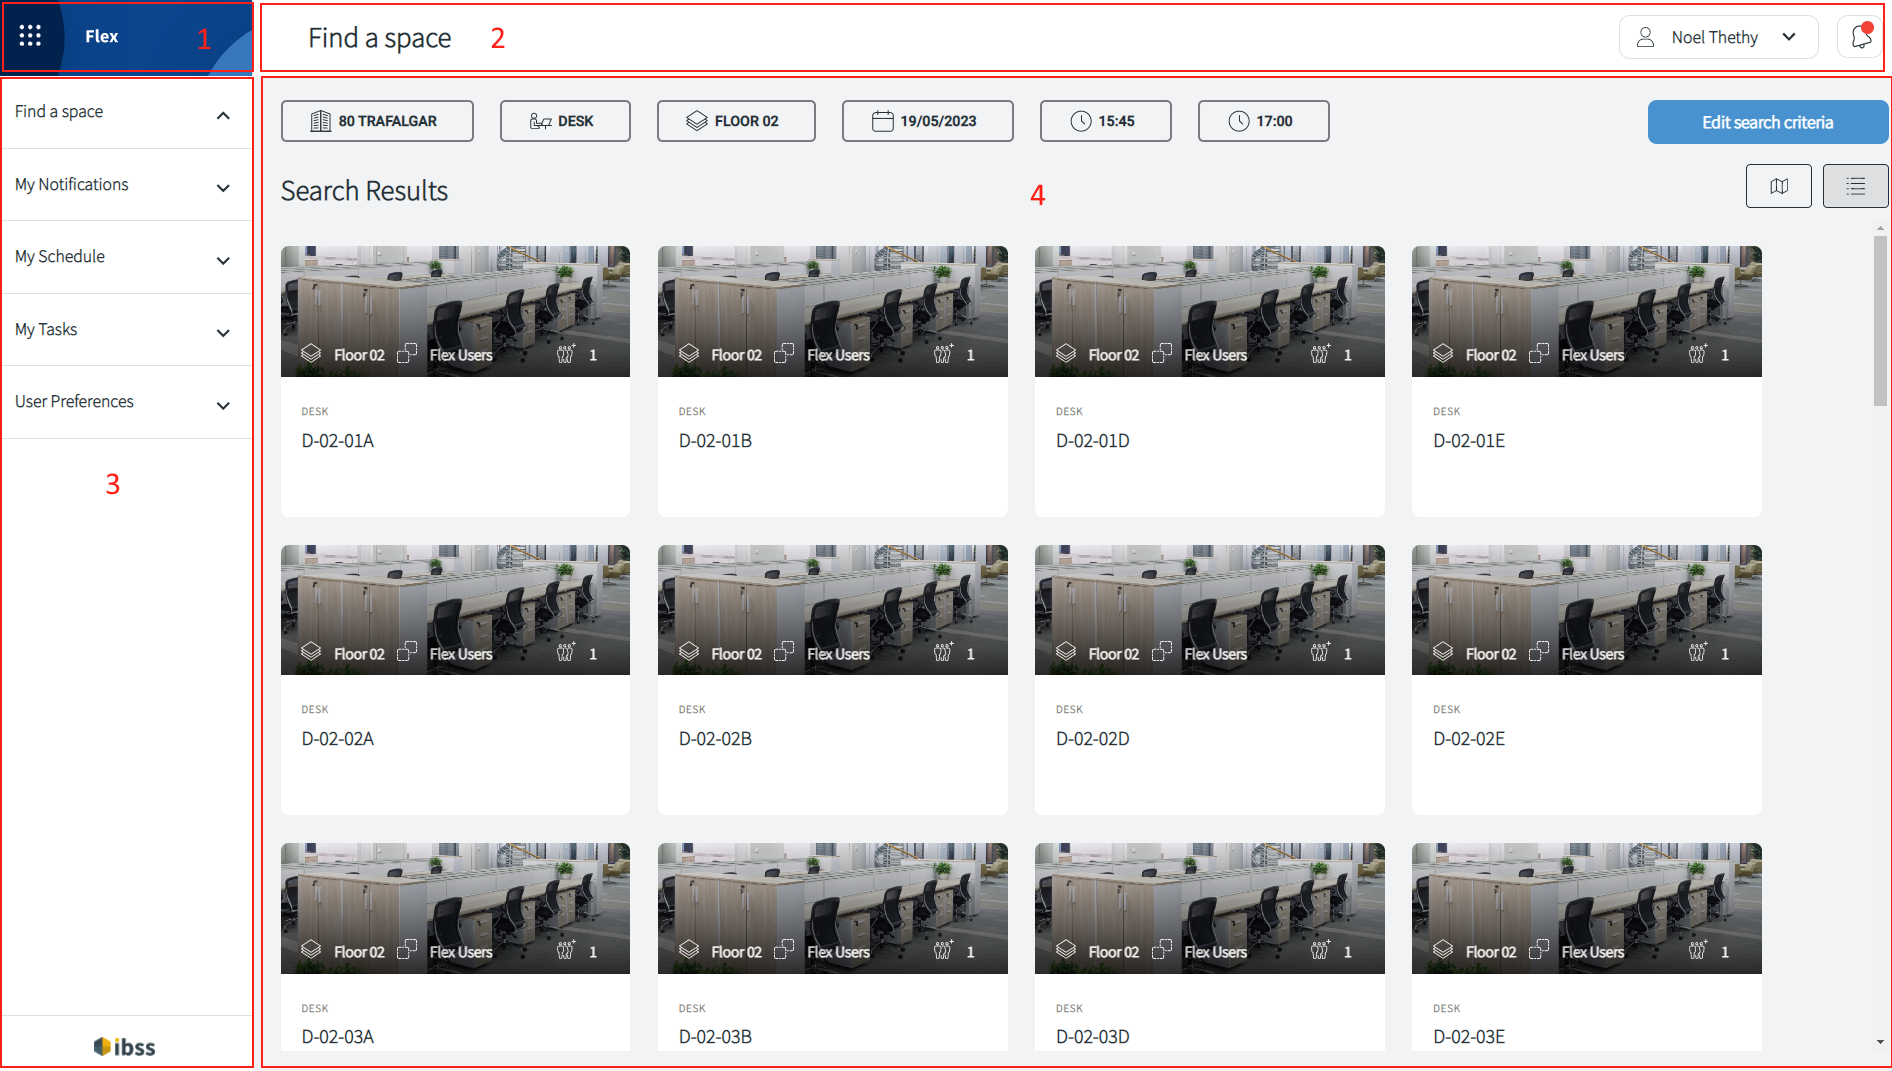
The Flex interface has the following key areas:
| Section | Description |
| 1 - Application selector | The Application selector shows you which of the Hub applications you are currently in. Clicking the grid of dots will show what other IBSS apps you may have access to. For some users, this may just be the single application, but for others this could include access to the OneLens Operations interface or the Administration portal. |
| 2- Application header |
The application header will dynamically include the title for any page you are on and it will give you access to the Your Profile drop-down, where users can choose to log out, select an alternative interface language, or change the theme currently selected. The notification icon will also indicate if you have any unread notifications. Click the icon to view the My Notification page. |
| 3 - Application menu | The application menu will allow you to navigate the various other pages in the app. Not every user will necessarily have the same menu items on display as this is tied to the roles and permissions of their account. |
| 4 - Content panel | The content panel provides the main area for interaction within the apps. This may be a list of available spaces, the booking interface, or other interfaces relevant to the part of the application your are in. |
The combination of available sections in Flex depends on your user role permissions that are set by your organisation.
There are the following pages in Flex:
- Find a space
- Single Booking
- Advanced Booking
- Find a colleague
- Schedule View
- My Schedule
- Bookings
- Visitors
- Bookings for Others
- My Notifications
- My Tasks
- Settings
- System Notifications
- Workplace Preferences
- Account Settings
- Default Cost Codes
- Delegate Permissions
- Delegate Access
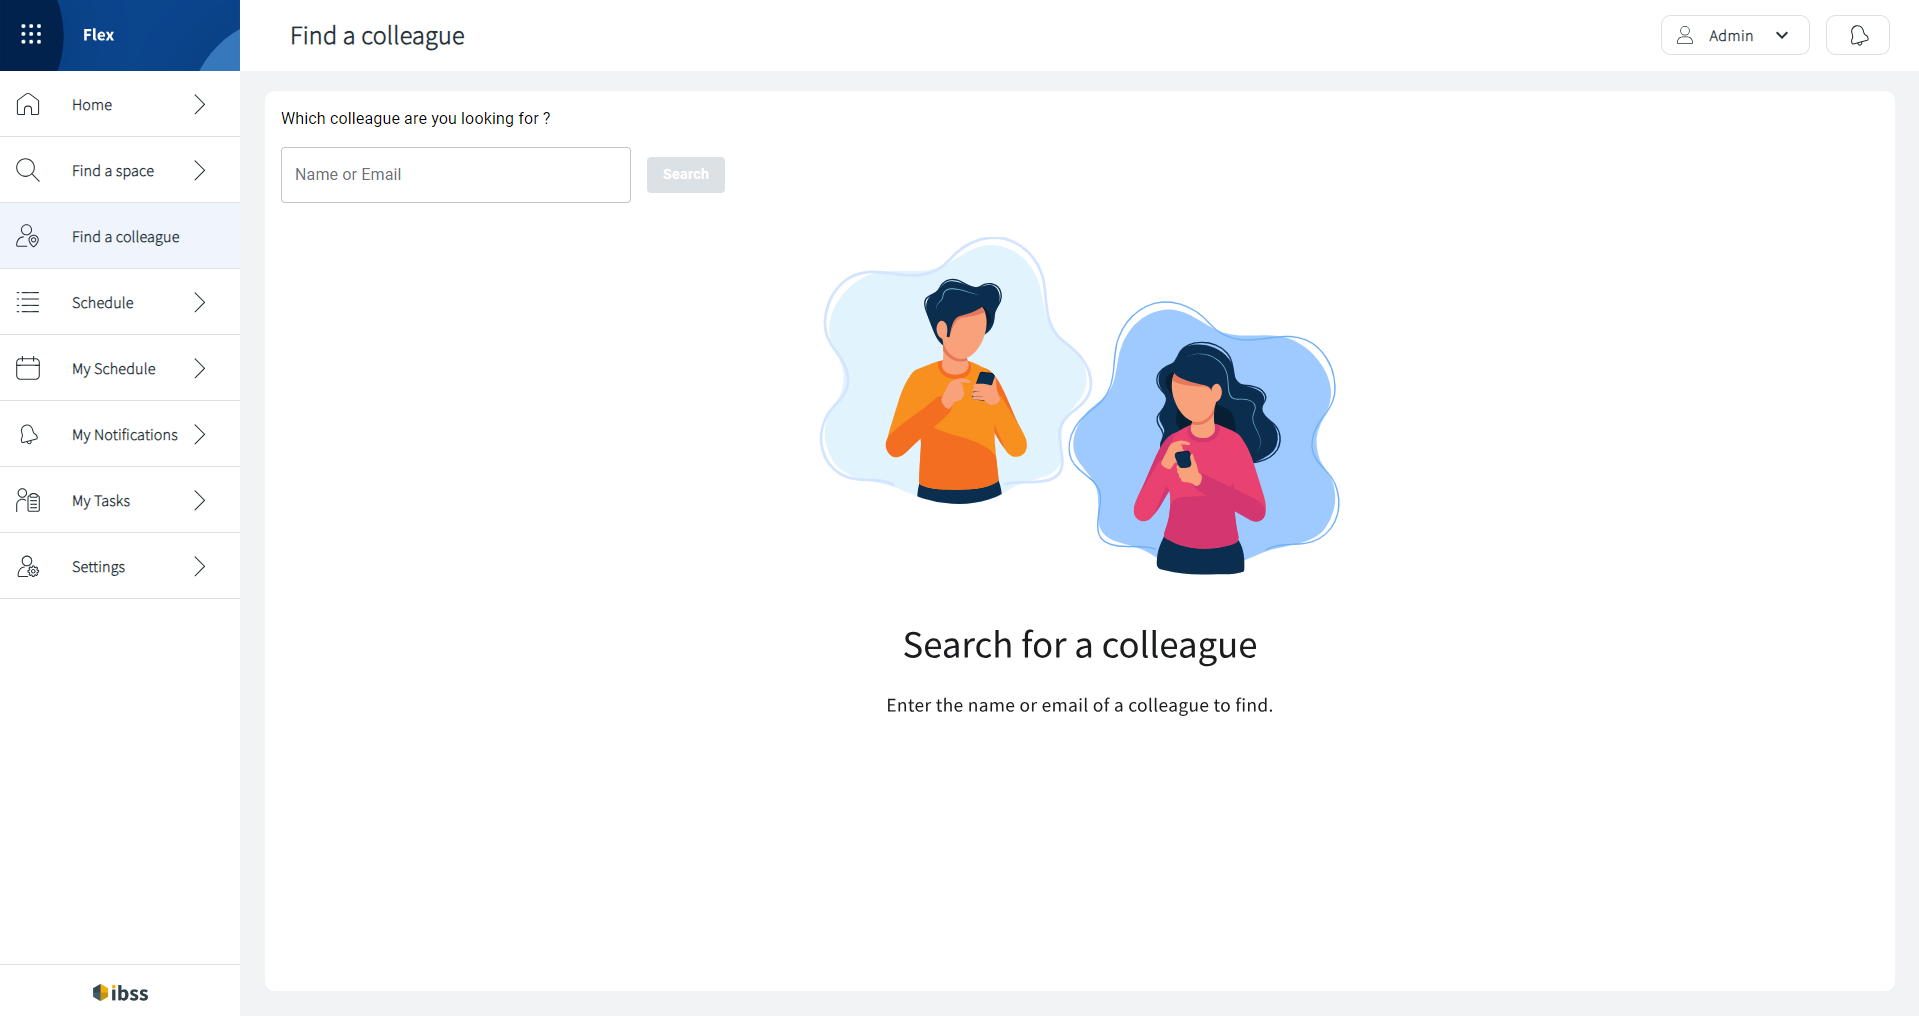
Find a space
In the Find a space section, you start creating your new workspace bookings - both single ones or advance bookings that involve recurrency or linked spaces.
Search for a space in Flex
To book a space, you need to find an appropriate space first. Go to the Find a space section – either Single Booking or Advanced Booking page – and enter all relevant details about the space that you need:
- Type of space that you want to book
- Time that you need it for: as soon as possible or a certain time range
- Date
- Building
- Floor
- Zone
- Capacity if it's for the meeting room
- Linked Spaces if you want a specific room layout for your event
- Recurrence
- Resource if you want to add hearing or presentation aids to be available in the space
- Other options: temperature and sound
Click Search to view available rooms that correspond to your search criteria. To narrow down your search, edit search criteria.
View search results
You can also view the results in a map view by changing the view option in the upper right corner.
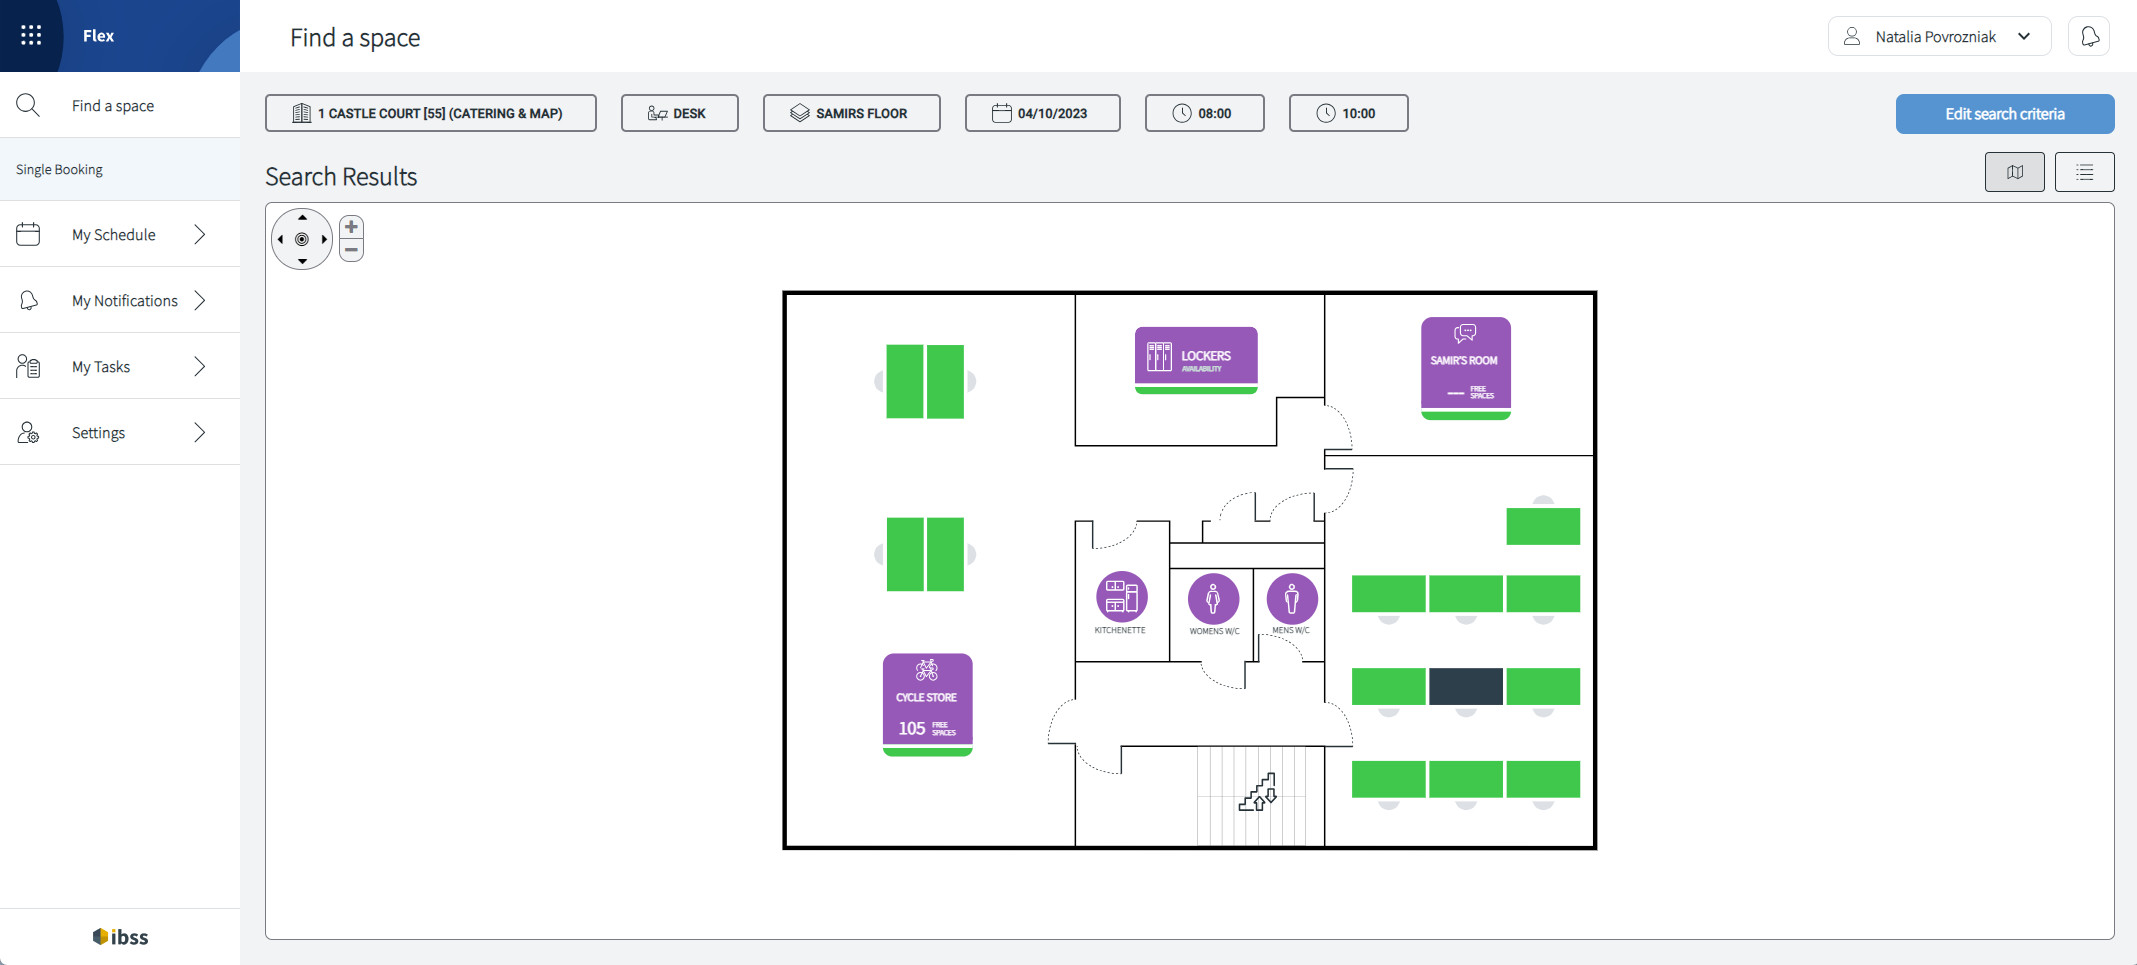
Search results include icons that denote what features are available for a space on the search result tiles:
 |
Catering is available for this space after you make a booking.
|
 |
AV is available in the space
|
 |
A portable hearing loop is bookable for this space
|
 |
Additional presentation aids are bookable for this space
|
 |
Linked space booking (combining multiple rooms) is available
|
 |
This space has multiple furniture layouts available
|
Edit search criteria
To narrow down your search, edit search criteria. The tags along the top of the page denote what filter options are being used to show available spaces in the list or on the map.
To edit search criteria, click the blue Edit search criteria button in the top right and edit filters.
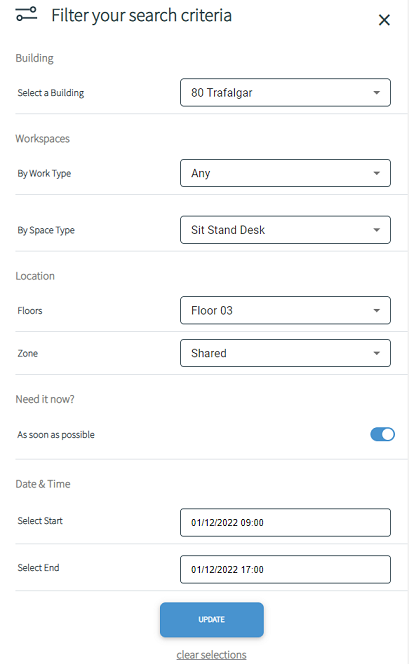
Options include:
- Selecting your building
- Selecting a work type (Desk Work, Formal Meetings etc.)
- Selecting a space type (Desks, Meeting Rooms, Focus Booths etc.)
- Selecting a floor
- Selecting a zone within the building
- Selecting the desired date and times the space is required
Find a colleague
Find your colleague
In Flex, you have a separate menu item for colleague finding within your organisation to book next to them or organise your work accordingly.
Note: You are able to find only those colleagues who have set it in Flex or Roamer that their bookings are visible to others in your organisation.
On the Find a colleague page, you can:
- Enter the name or email of a colleague. You can start searching after you enter at least three characters of the name or email address.
- See a list of people associated to the name who have also opted in to location sharing.
- Click a View link next to colleague names, select a date to view their future bookings. Here, you'll see the popup with two sections:
- Left-hand side is a calendar date selector.
- Right-hand side is a list of booking associated to your colleague.
- Click a date in the calendar view to fetch any bookings where the selected colleague is the host. The dark blue circle indicates the current day that you selected.
- Click OK or close the popup to exit viewing booking details of your colleague.
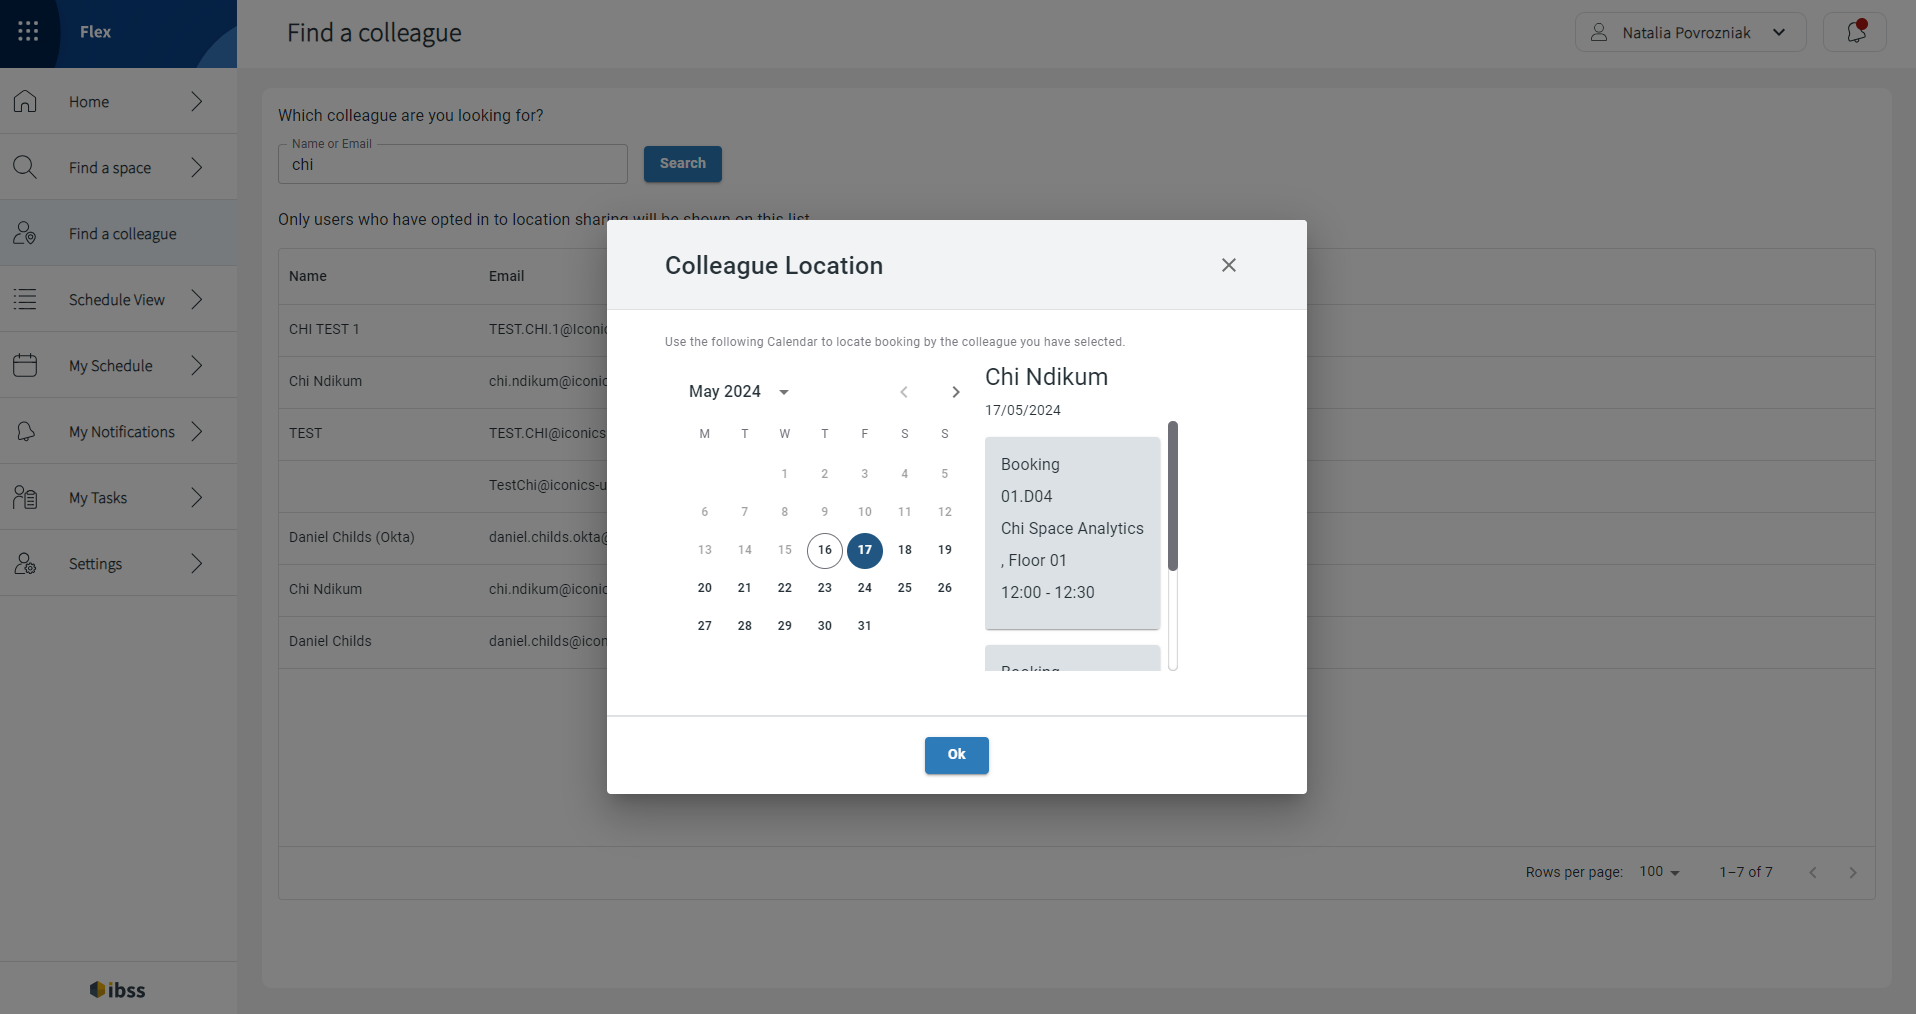
With this information, you can now book next to your colleague or meet them before or after their scheduled appointments as you'll know where to find them in the building.
Schedule View
Space Schedule
Applies to app version 2024.01 onwards.
In Flex, you can view availability of spaces within your building in a calendar view. This helps to find free slots of a certain space that you want and create a single booking. The timeline starts at the building office hours.
Under Schedule View, use filters to narrow down your search, view details of existing bookings on the selected day in the listed spaces, and view free slots that you can book directly from this page.
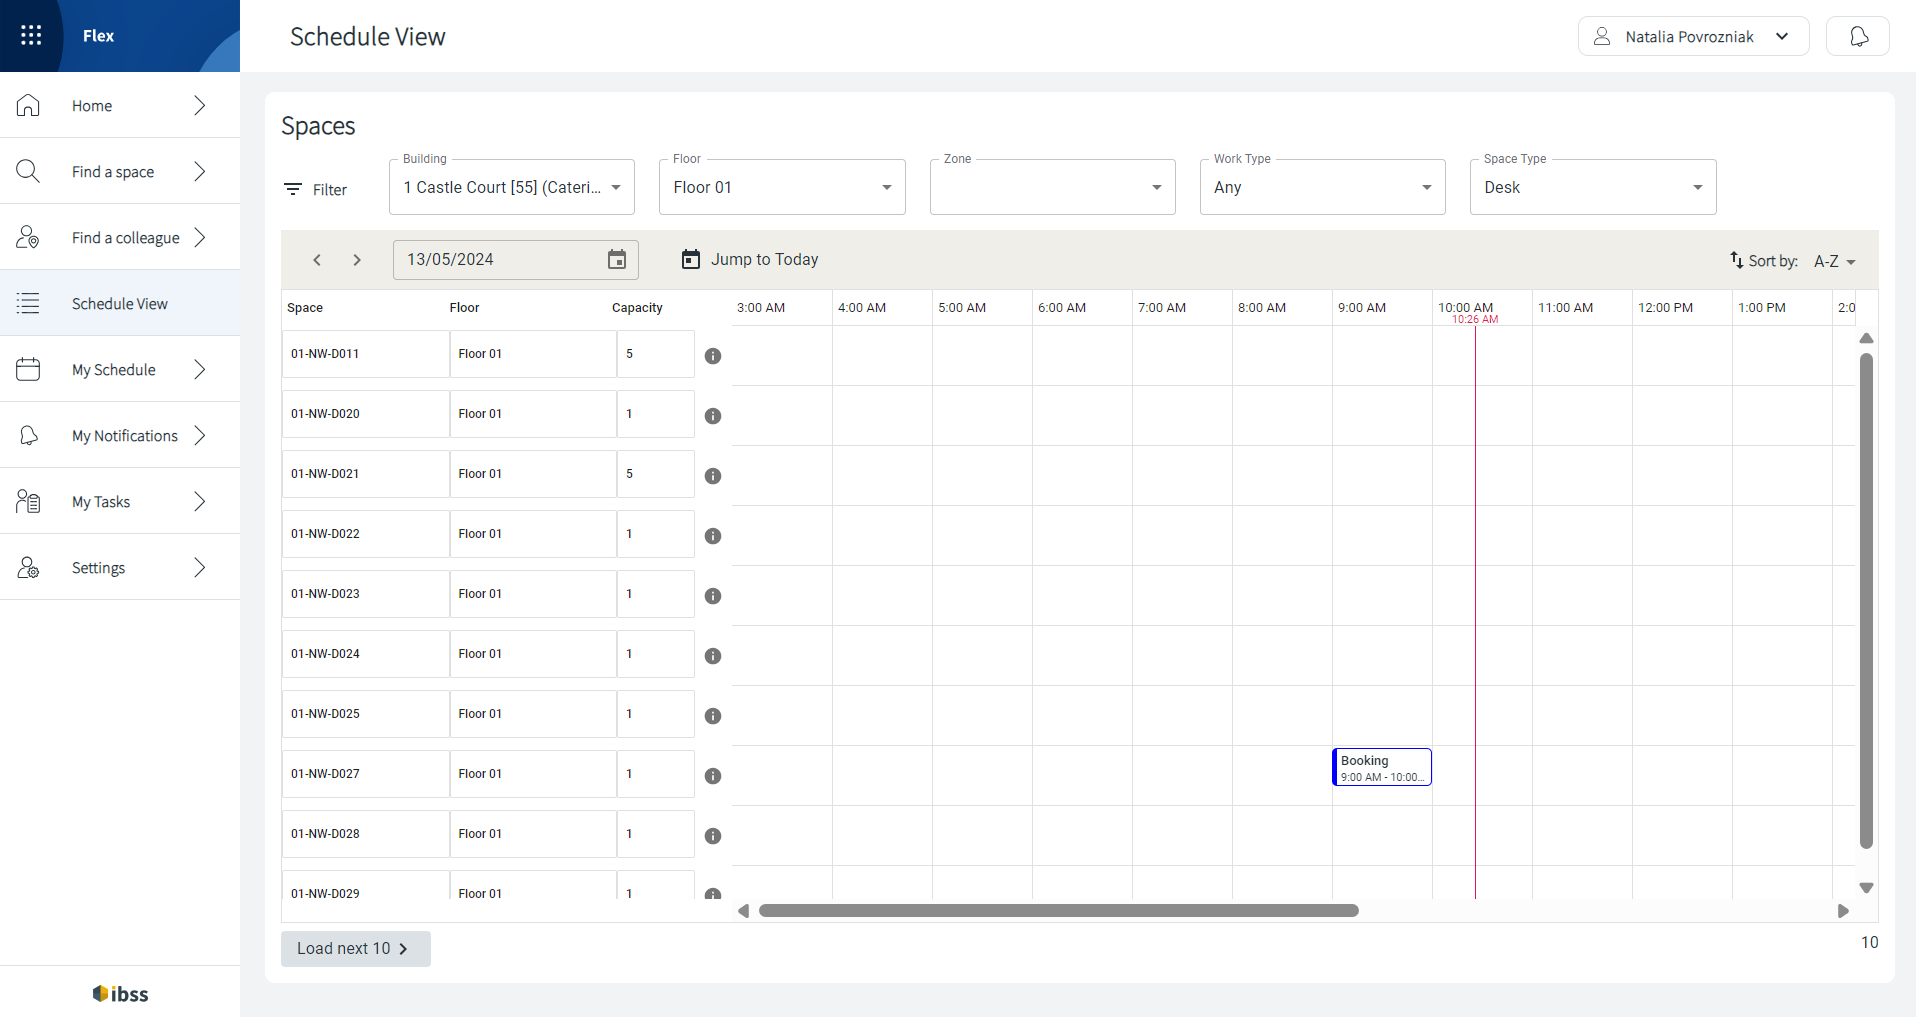
View available spaces and existing bookings
By default, you'll see space list of 10 spaces for today's date in your preferred building, floor, and zone. Space list is on the left side of the page. The rest of the page is dedicated to time slots with existing bookings in the selected spaces and free time slots that means that the space is available for booking. Read more about setting your preferences in Flex here: Settings in Flex.
⚠️ You'll see only those spaces that are enabled for you to book. Spaces that have limited permissions for bookings won't be displayed for you.
In the top right corner of the table with the spaces listed, you can use the Sort by: A-Z or Sort by: Z-A filters.
⚠️ Note that the sorting works for the first 50 search results that don't have to be displayed on the page. Sorting also shrinks the list of displayed results back to initial 10 result in the selected alphabetical order. Add 10 more spaces to the list every time you click Load next 10 > at the bottom of the schedule view.
Filtering
- Use filters to view other spaces, where the exact building and floor must be specified, then, you can search by any zone, work type, and space type.
- Use arrows below filters to switch between dates.
- Use calendar dropdown to select a specific date.
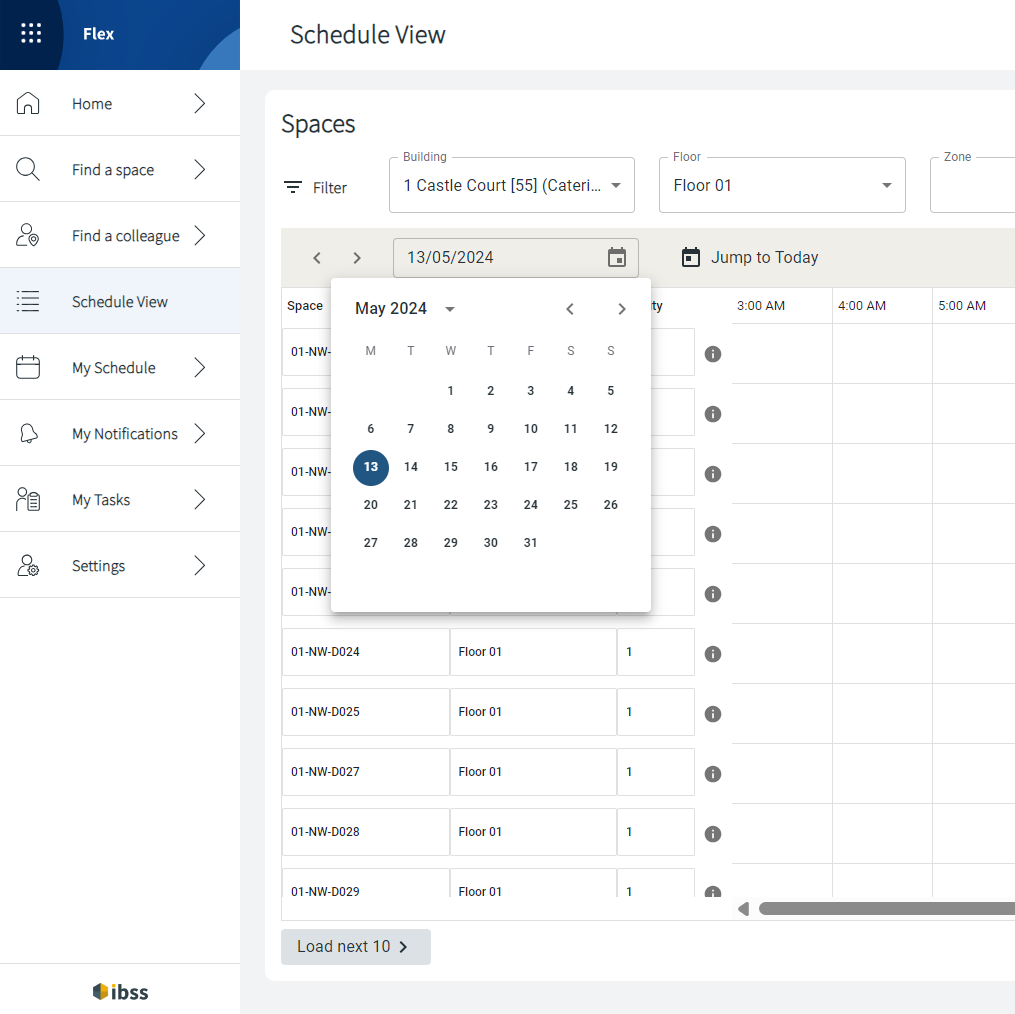
- Use the Jump to Today button to open Schedule View for the current date.
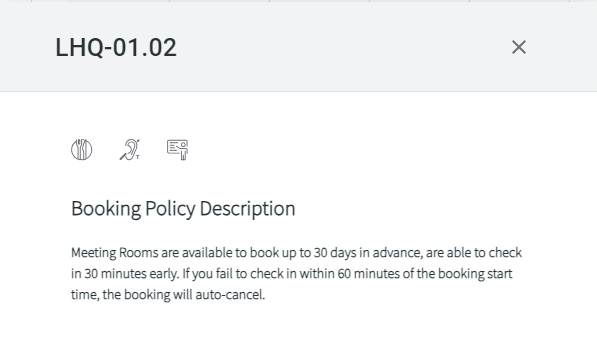
Space information. Click the information icon next to the space name to view:
- Services and equipment available in the space, displayed with icons.
- Booking Policy Description.
- Additional space information if available.
Existing bookings. Click any booking that you see in the schedule view to:
- View information of bookings of others: host name, date, time, number of attendees.
Note: If your colleague has restricted their location sharing, host name will be displayed as Anonymous. - View same information of your own bookings along with the View link and Edit and Delete buttons. Clicking any of these buttons takes you to the Update booking page to make changes or delete this booking.

Colours of the existing bookings have the following meaning:
- Outlined Green – your own or someone else's booking
- Outlined Red – ongoing bookings of others
- Solid Grey – cancelled
Make a new booking
In Schedule View, do this to create a new space booking:
- Click one available slot for the space that you currently see on screen. If you click any slot and change date and time later, the slot might not be available for booking.
- Click the blue Create a booking button.
Now, you're redirected to the Single Booking page with the desired space selected and ready to be booked. - Adjust details as needed.
- Click Confirm Booking.
Read more about options on the Single Booking page here: Single booking in Flex
My Schedule
The My Schedule section has three pages:
- Bookings
- Visitors
- Bookings for Others
Bookings
On the Bookings page, you can:
- Edit existing bookings
- Cancel bookings
- Check in or out of bookings
Note: Checking in to a booking via Flex is security controlled by your organisation. Due to the business policy, it may not be possible to check in to bookings remotely in Flex.
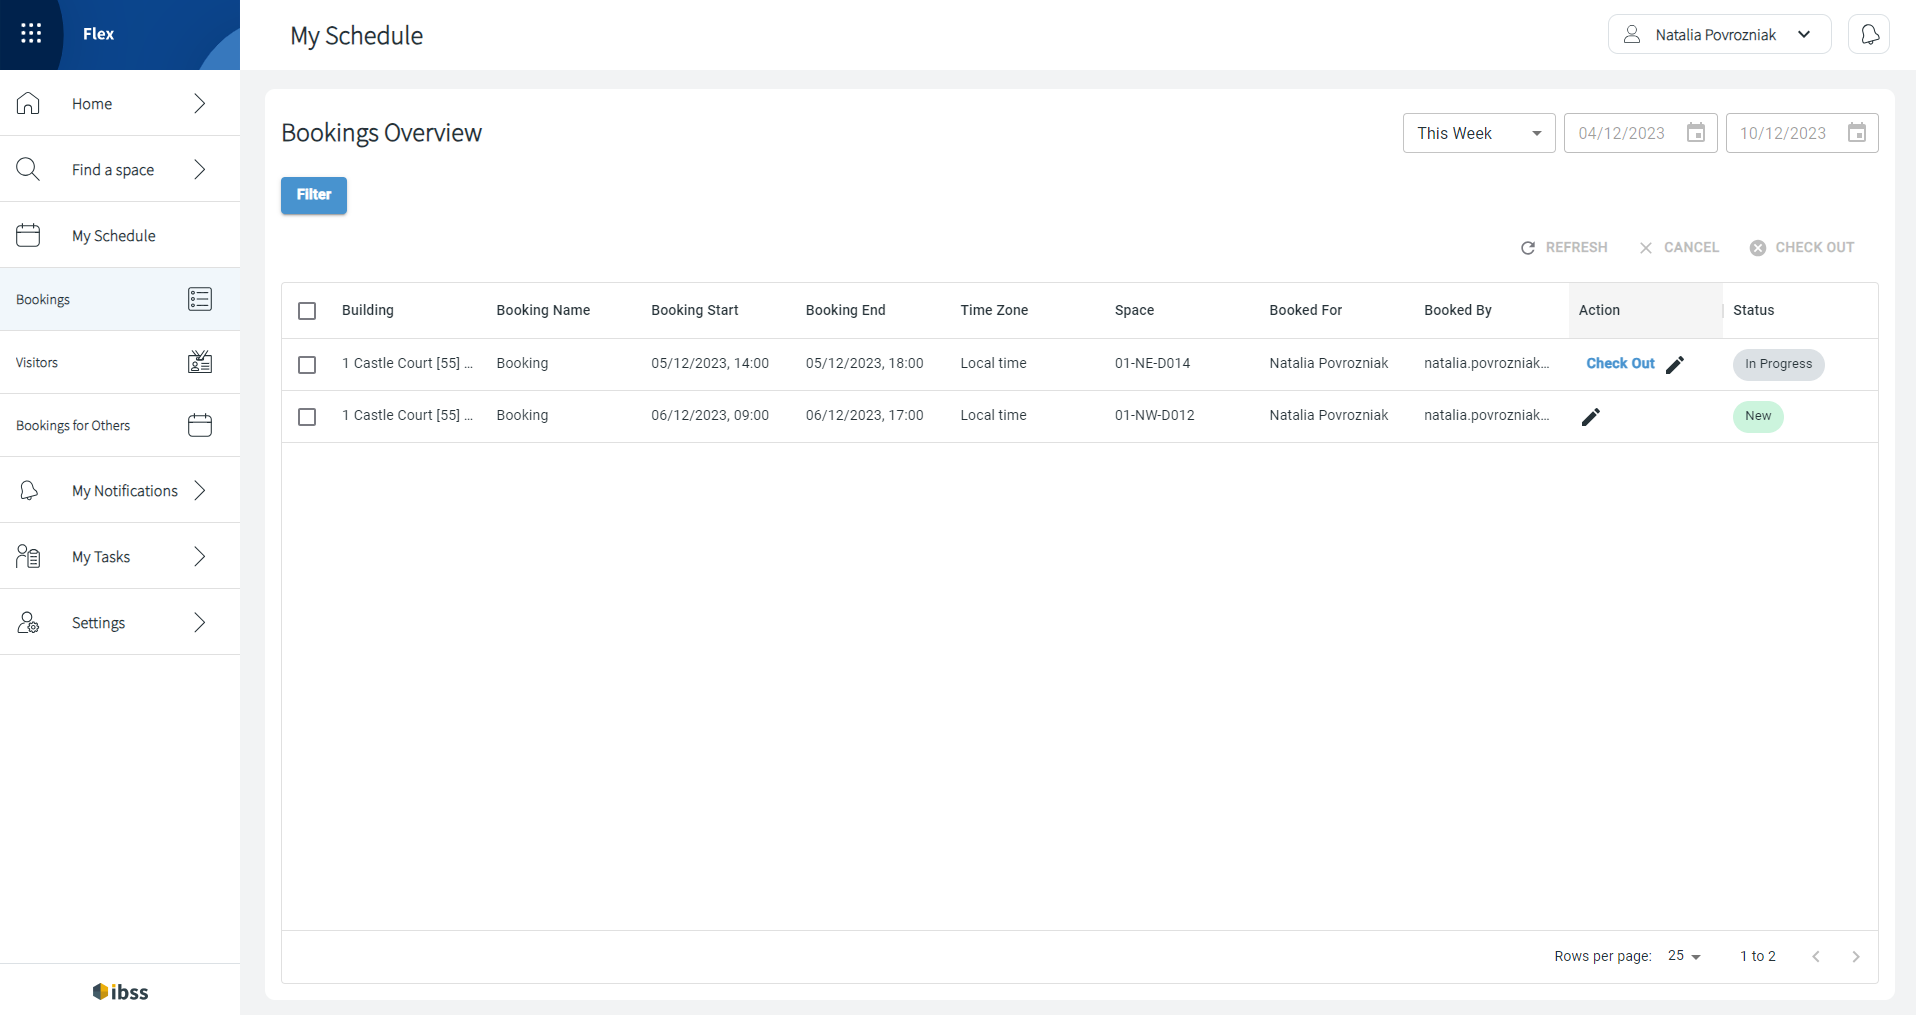
The list of results on this page are downloaded page by page. Bookings are listed in 25 rows by default, but you can change it to 50 or 100 rows to be downloaded per page.
Note: Flex shows you what row you are currently viewing out of the downloaded ones, not showing the total number of pages and rows: as on the screenshot 1 to 2 because there are two rows in the list. Click the Next arrow to continue loading more pages as needed. If no more pages are loading, it means that you've reached the end of the results list. You can go back to the loaded pages.
Visitors
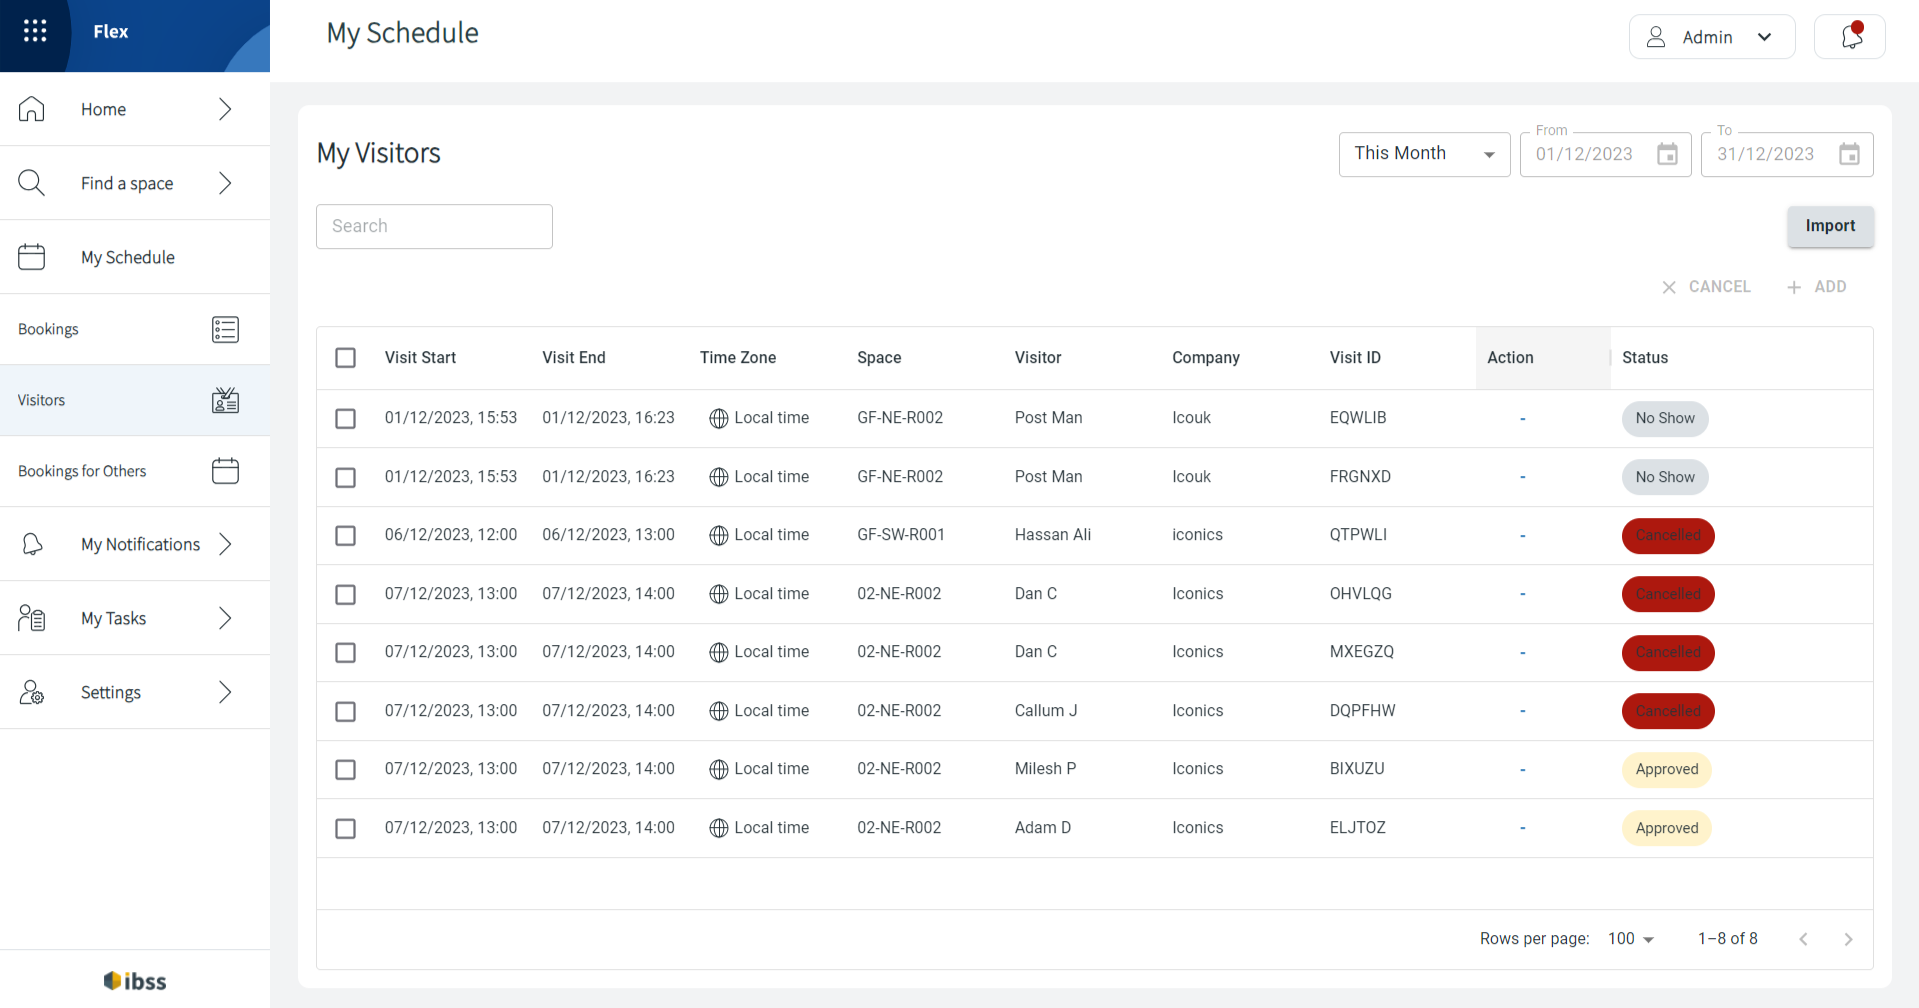
The My Visitors page allows you to:
- Create new visit requests
- Edit existing visit requests
- Cancel visit requests
- Export or import visitors list
Bookings for Others
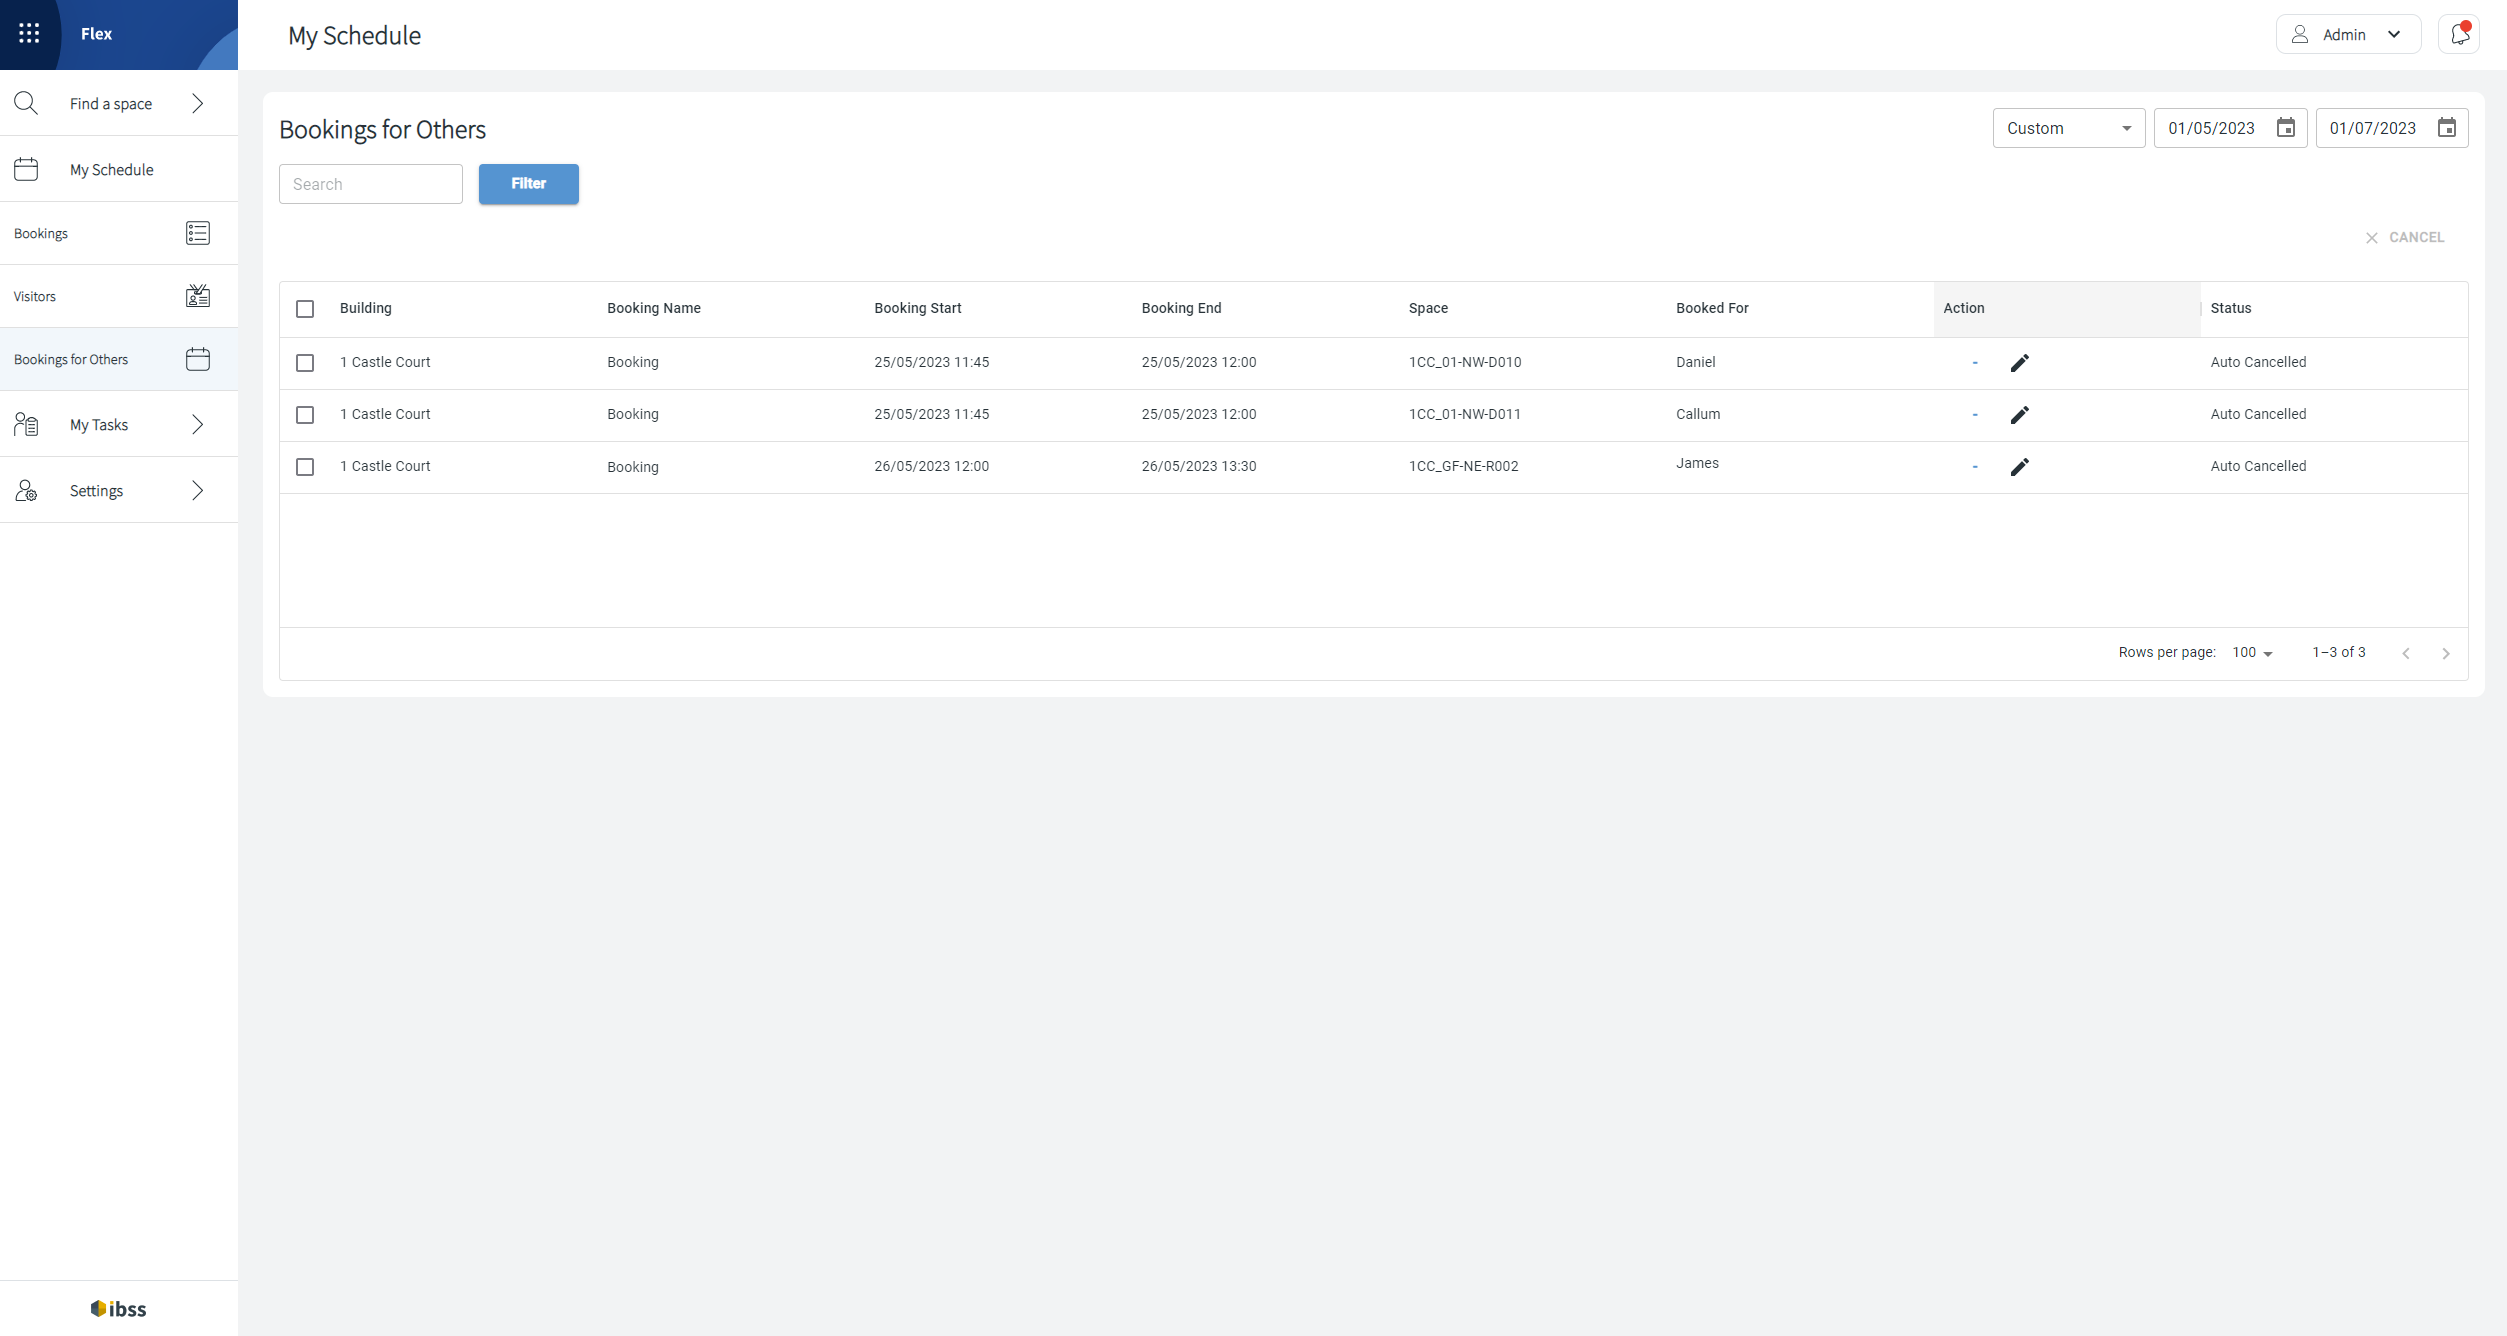
As a management assistant or administrative user, you may have the option to book spaces on behalf of other users. In this case, you will see a section which shows bookings that you have made for others.
Similar to the Bookings section, here you can:
- Edit existing bookings
- Cancel bookings
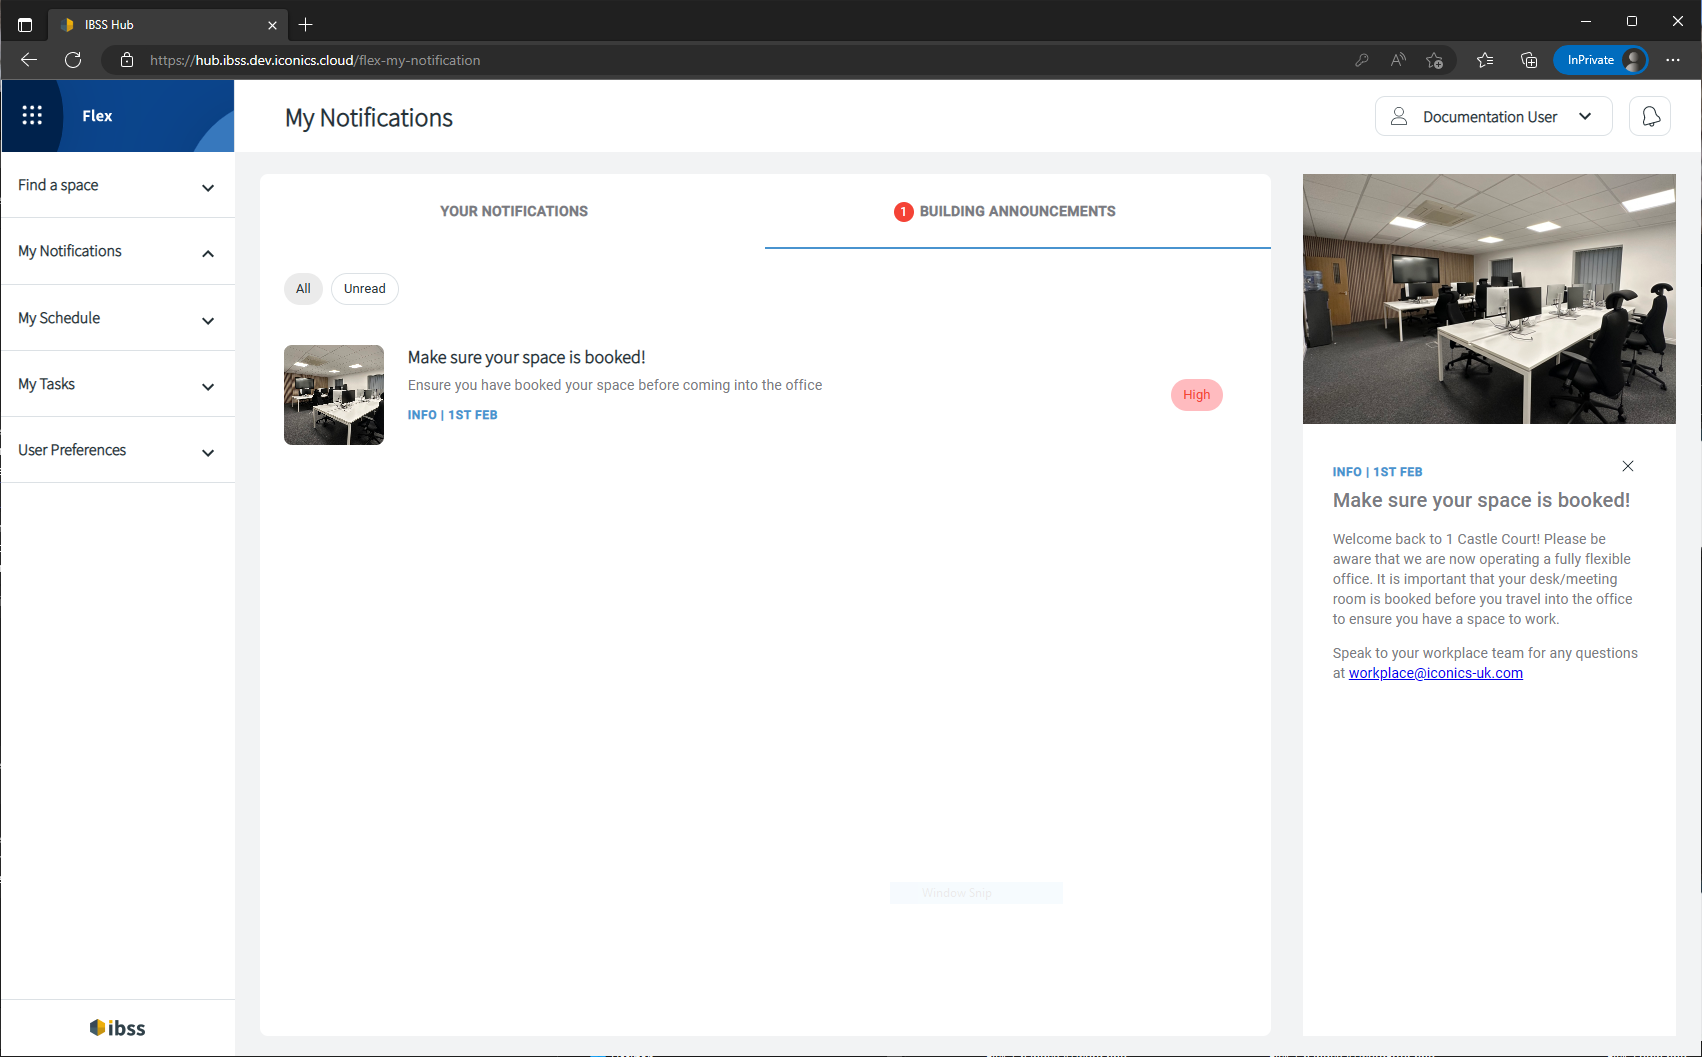
My Notifications
My Notifications in Flex
Applies to Version 1.14.4 or later
The My Notifications section hosts your user specific notifications such as booking, visitor, and task notifications as well as general building notifications. Click between tabs to see notifications that apply to you.
You can access the My Notifications page from the bell at the top right corner or from the My Notifications menu on the left.
My Tasks
Using Flex - My Tasks
📌 Applies to app version 2023.02 or later
👋 Share your feedback with us about this documentation. Highlight a word or a whole paragraph and click the plus icon that appears. We keep improving this knowledge base based on your comments.
In Flex, you can raise tasks that are associated with a room or desk booking or for any space that is identified in your building. A task can be related to equipment issues, needed cleaning anywhere you've noticed, or issues within the temperature or lighting.
The Tasks Raised page under the My Tasks section allows you to create new service requests and cancel an open service request that you created previously.
For long lists of created tasks, use search field or filter to search tasks by status as well as define the date range to search for needed tasks.
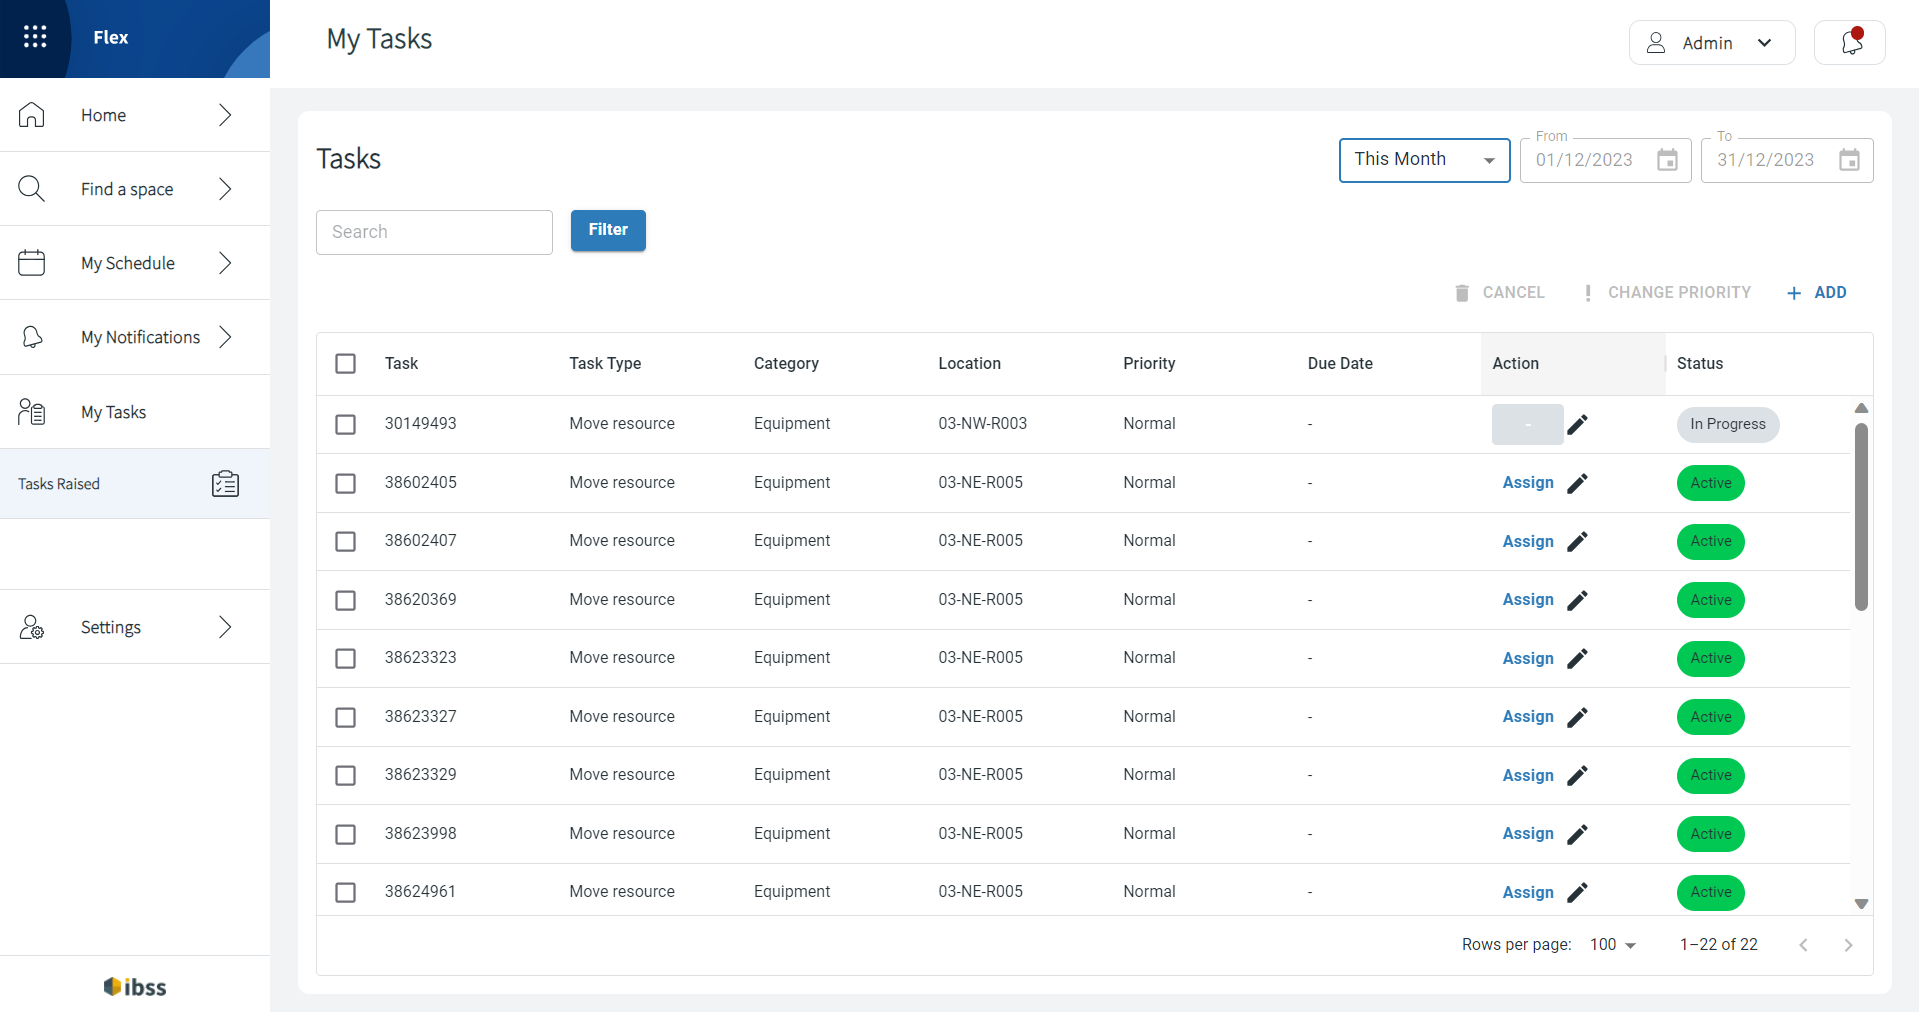
To create a new task for the responsible team to resolve, do the following:
- In the top right corner, click + ADD.
- Fill in the details about the issue that you are reporting: Building, Floor, Spaces, Categories, Task Type, and Description.
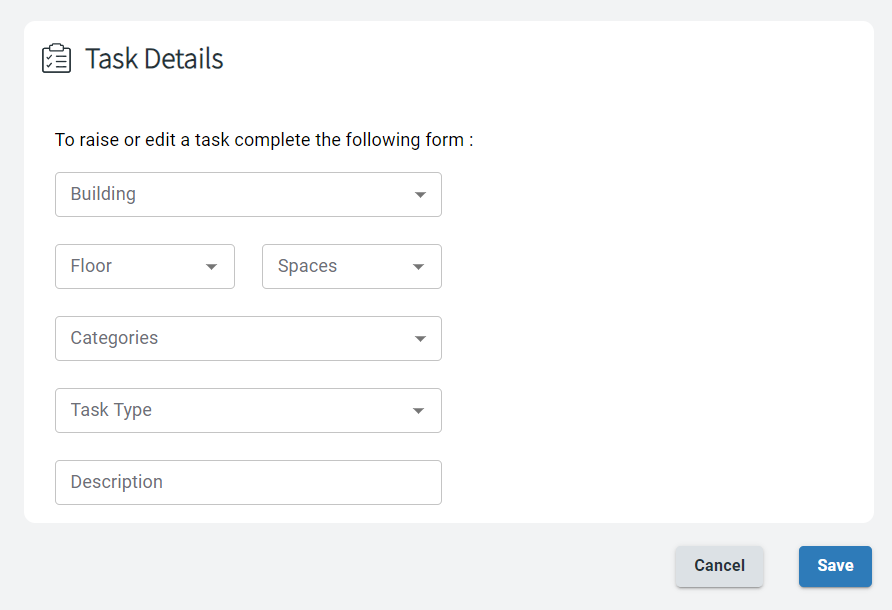
- Click Save to send the task to the responsible team to sort it.
The responsible team will receive a notification about the new task to resolve.
Settings
Using Flex - User Preferences
Applies to app version 2023.02 with the following features added in the next releases:
- 2024.01 Default Cost Codes
- 2024.01 Delegate Permissions and Delegate Access
- 2024.02 New Visitor Details page
- 2024.02 Default Filter under Search Results
In Settings you can customize notifications, workplace preferences, and settings for your account.
⚠️ Remember to save all your settings separately.
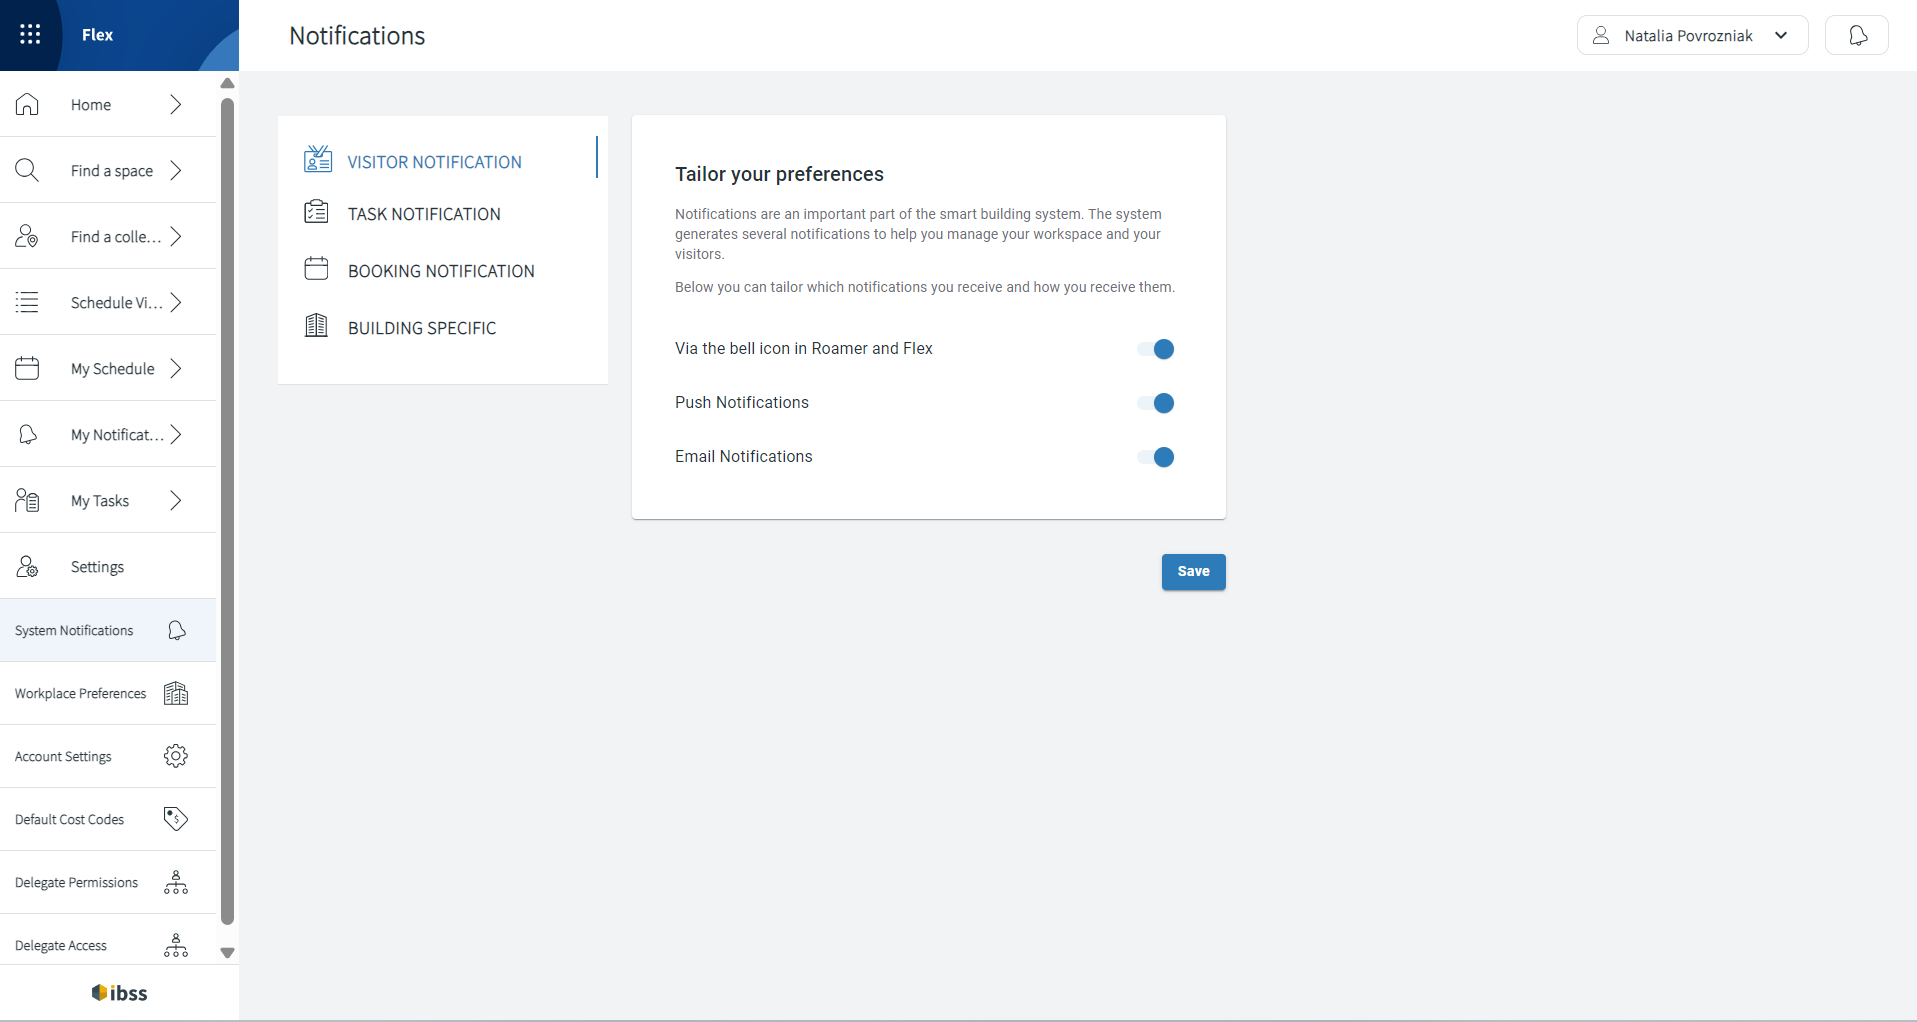
System Notifications
This section allows you to define which personal notifications you will receive. It is broken down into 4 sections:
- Visitor Notifications
- Task Notifications
- Booking Notifications
- Building Specific (Announcements)
Visitor Notifications
Examples of these are:
- When an invited visitor has been approved
- When an invited visitor has checked in at the reception or arrived
Task Notifications
Examples of these are:
- When a new task has been raised or assigned to you (for resolvers)
- When a task you have raised has been set in-progress (for general users)
- When a task you have raised has been completed (for general users)

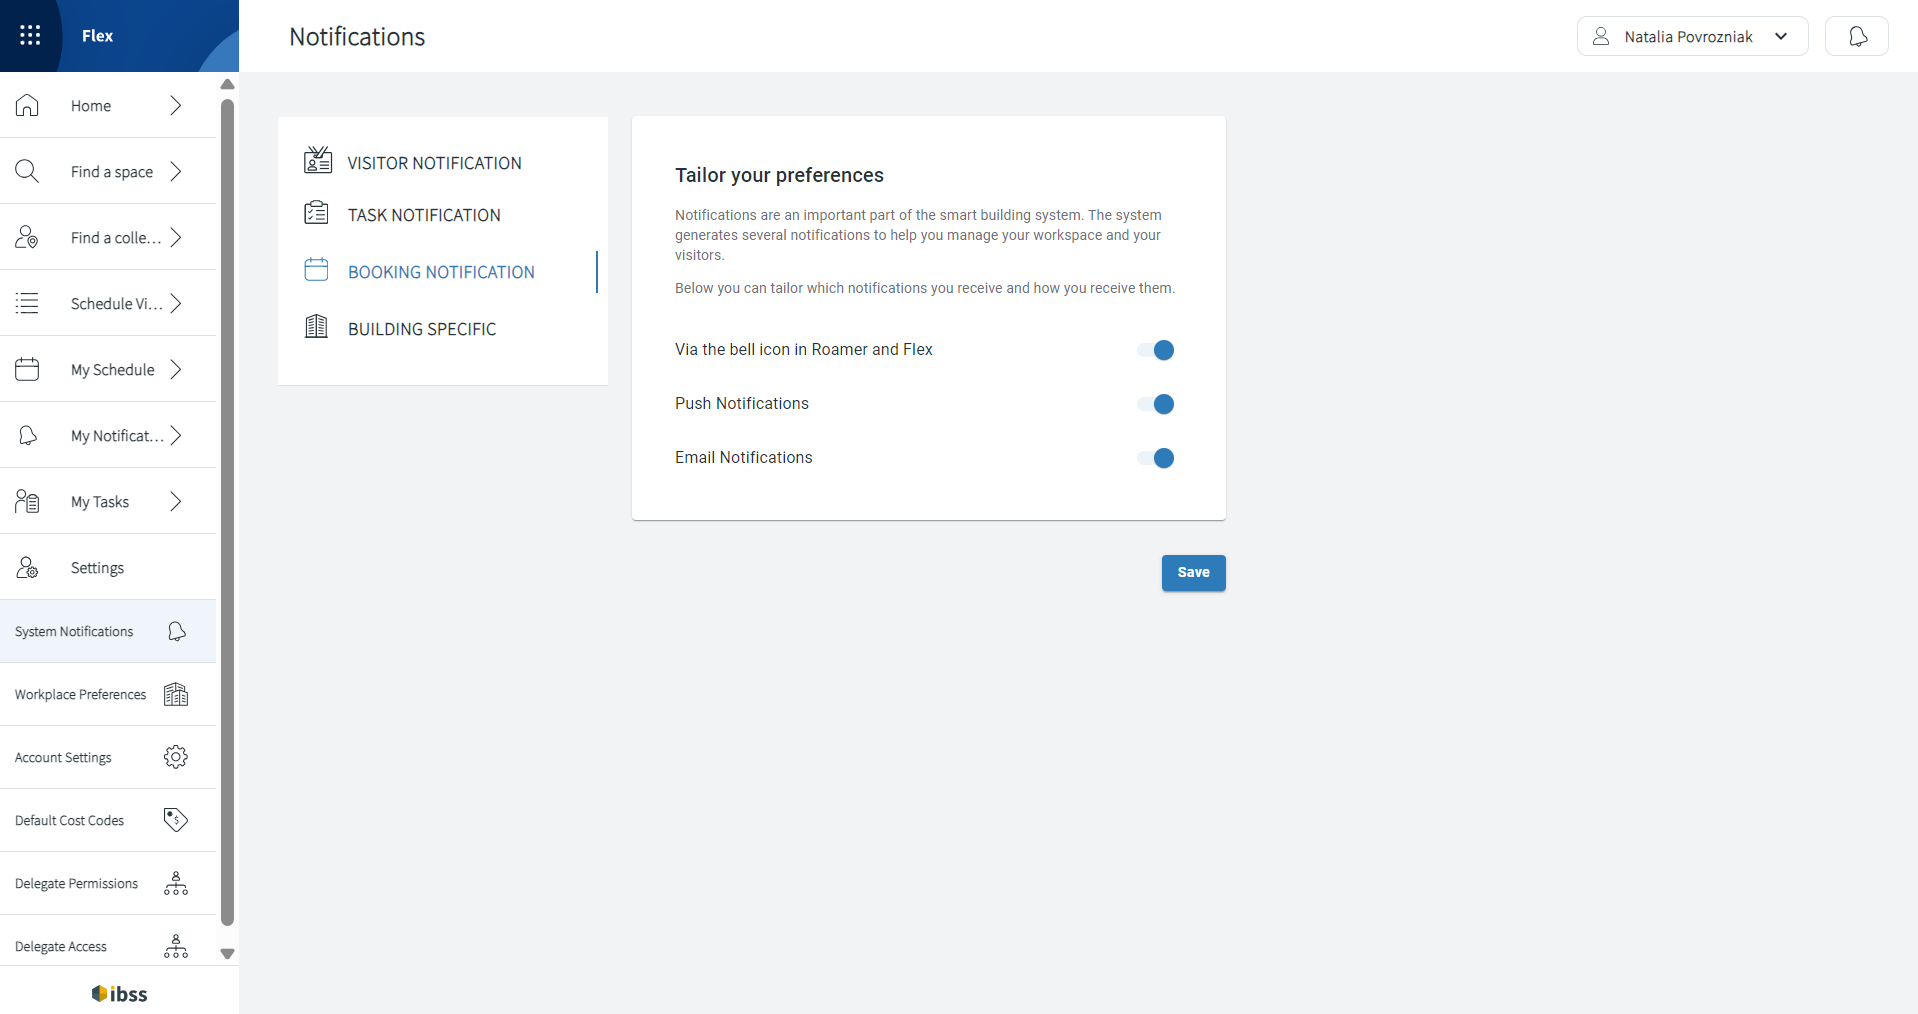
Booking Notifications
Examples of these are:
- When you create a new booking, confirming the date and time
- When a booking is ready to check in
- When a booking is about to be cancelled due to policy settings
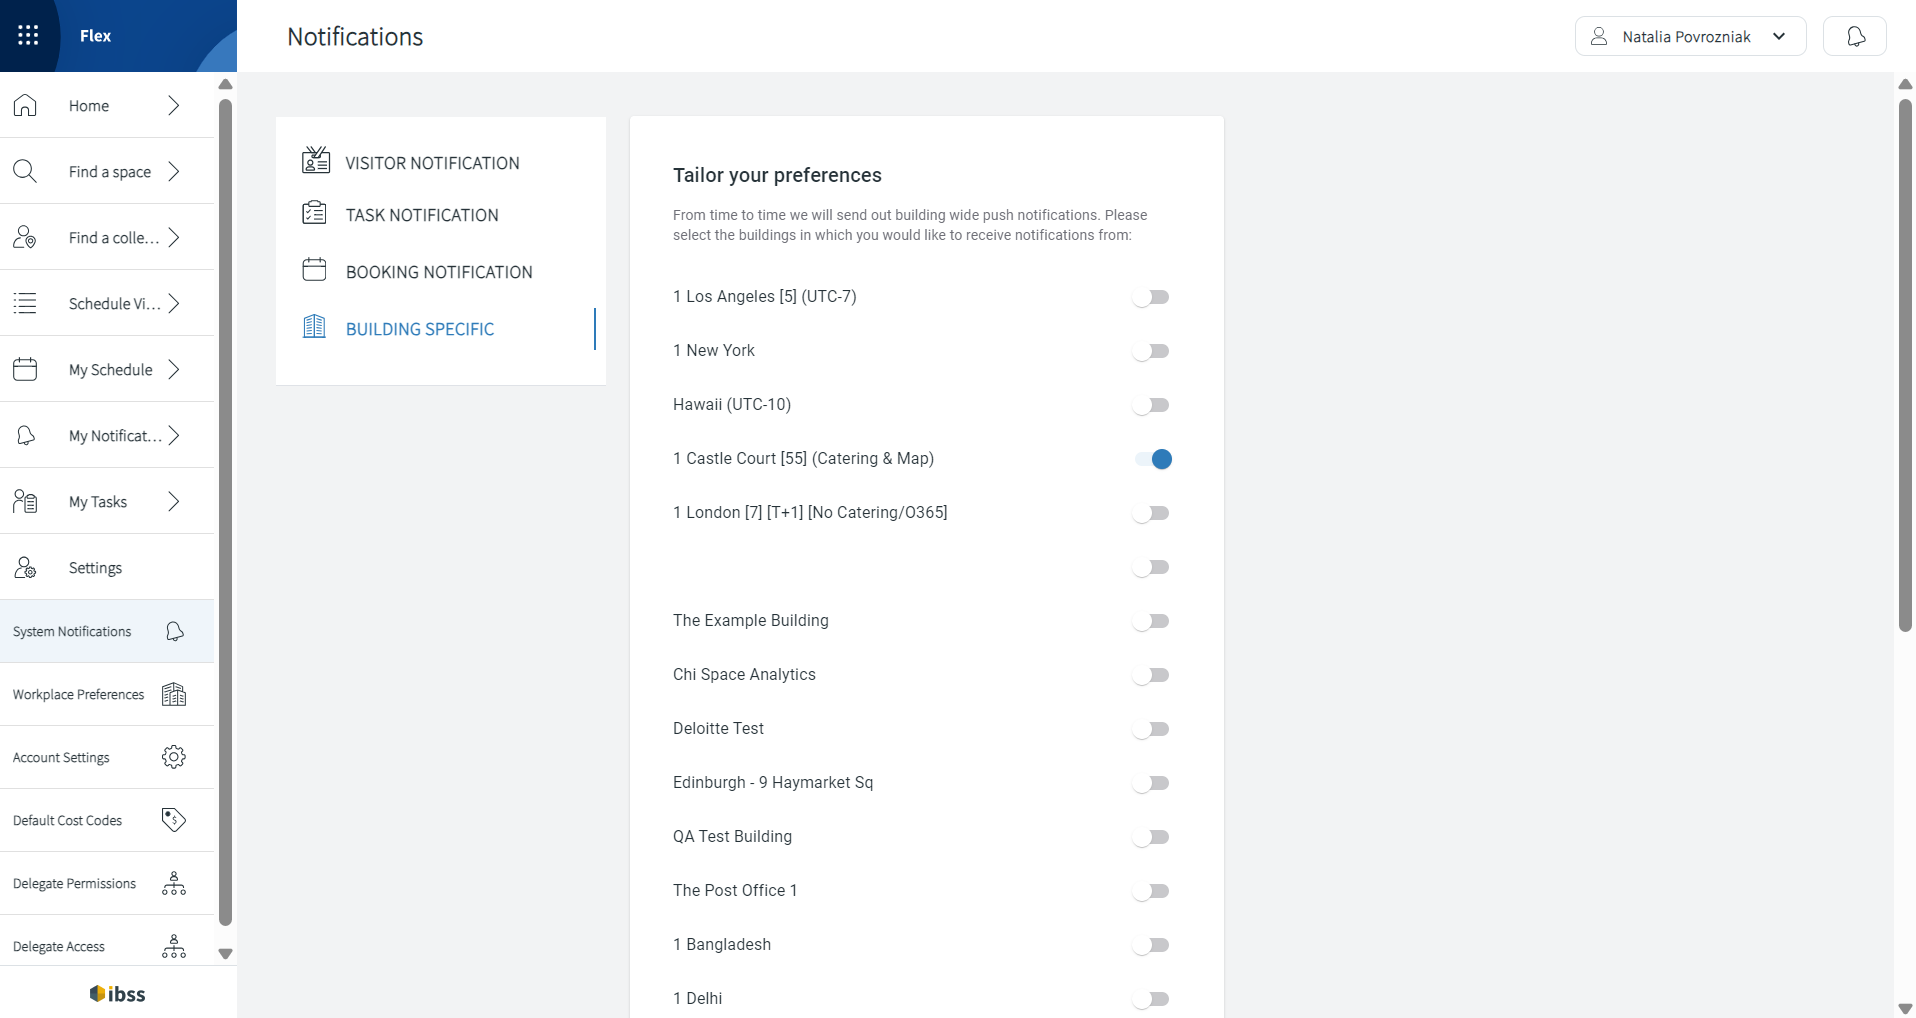
Building Specific
This section allows you to define which building notifications you will receive. These notifications are sent by your business' facility management team. Some examples may include:
- Details of any upcoming events
- Details of any health and safety procedures
- Details of travel advice or any building related issues
You may select for what buildings you wish to receive building notifications if your company has a portfolio of many different buildings.
Workplace Preferences
The Workplace section allows you to define preferences for your workplace. This includes:
Building
- Your default building: what building is loaded by default in IBSS applications
- Your preferred floor for the selected building: what floor is used automatically in searches in IBSS applications
- Your preferred zone.

Working Day
Your working start and end times. These times will be used by default when searching for a space.
⚠️ Pay attention to whether you set the time at AM or PM.
Search Results
- Select whether you want the space search results to be shown in a list view or map view.
- If you have access to OneLens 360, you can select the Default Filter that you want to be used for your building on the Booking Dashboard and Booking List pages.

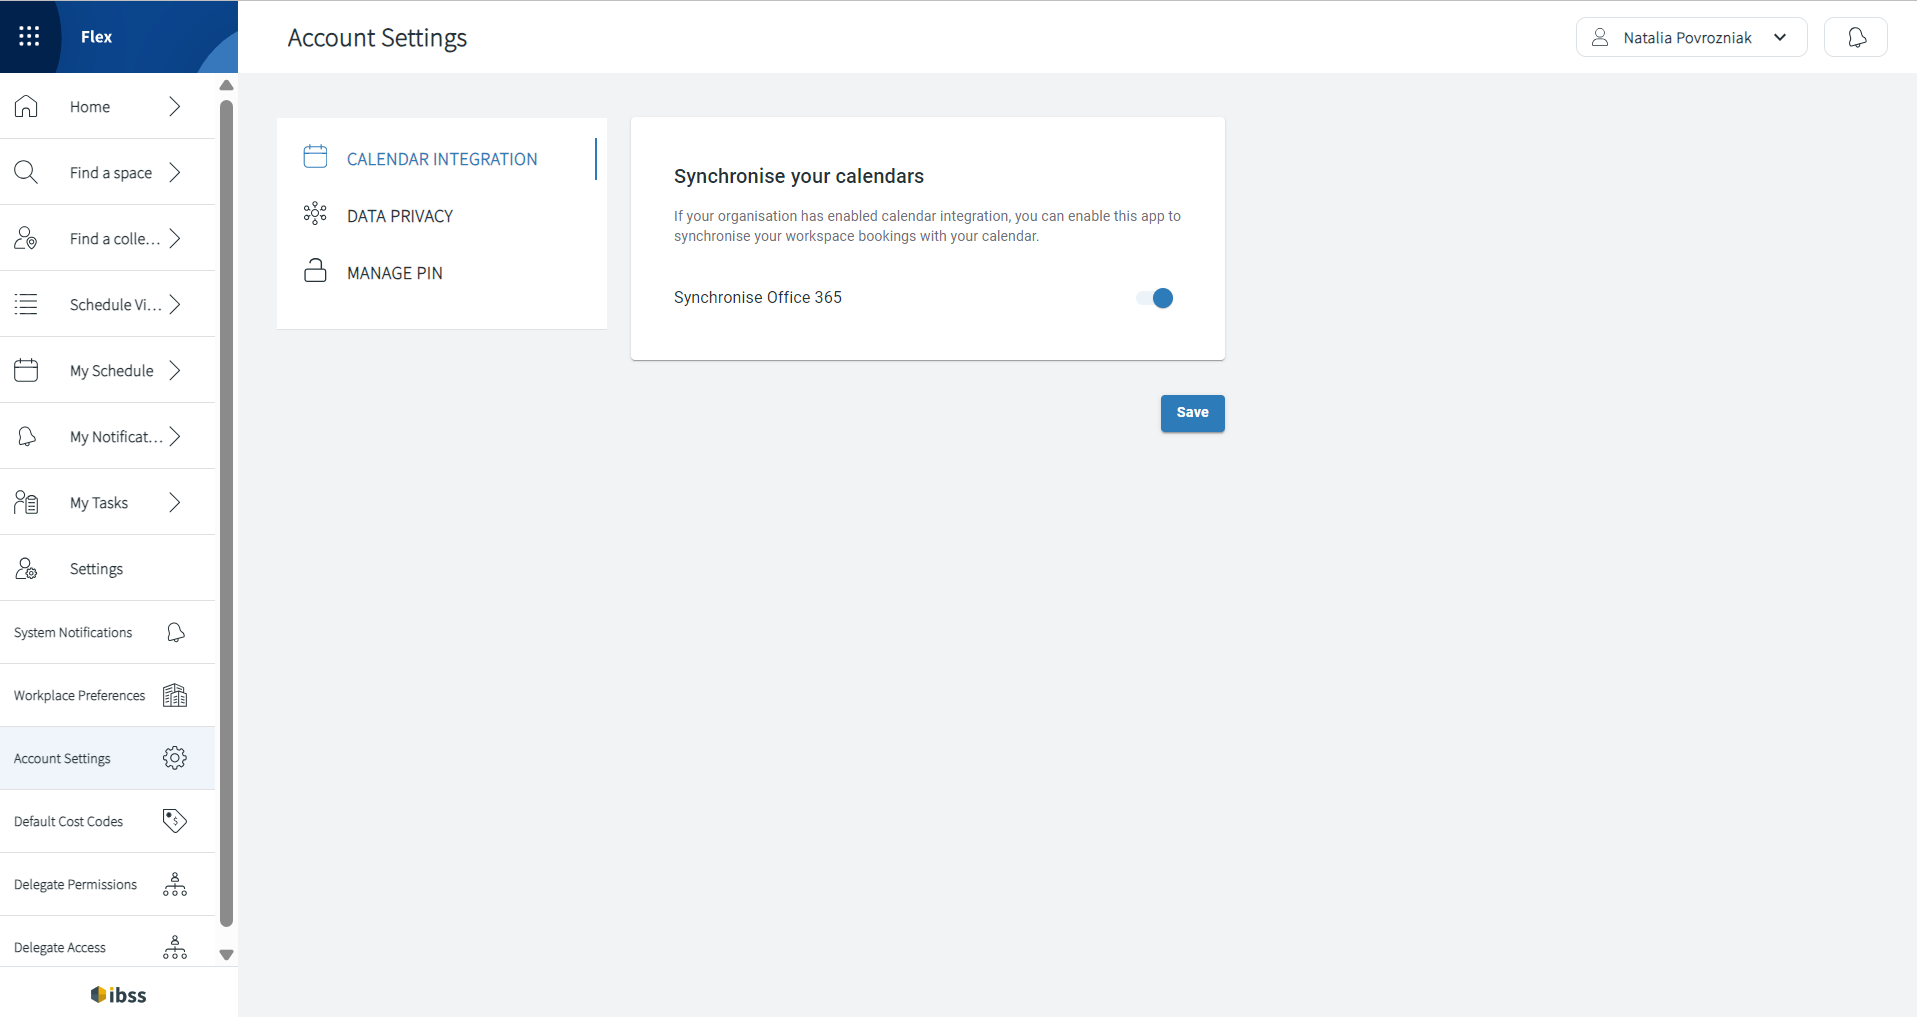
Account Settings
The account settings section allows you to define core account preferences, for example:
Calendar Integration
Allows to view IBSS bookings in O365 if this is set by your organisation.
Data Privacy
You can allow colleagues to search for your booked location(s) in IBSS apps or stay anonymous.
Manage PIN
Set or change the PIN that you use to log in to the Inspire Kiosk application. Read more in this article: Setting up a user PIN in Flex to check in on Inspire tablets.
Default Cost Codes
Your organisation chooses to use cost codes for bookings and catering orders or not. If they use cost codes, these may be free-form and predefined ones.
There are no default cost codes for free-form type of cost codes.
If your organisation is using predefined cost codes, you'll see two sections where you need to select one or more default cost codes to use the most frequently.
Note: You can always change the default cost code to a different one when making a booking or adding catering orders.
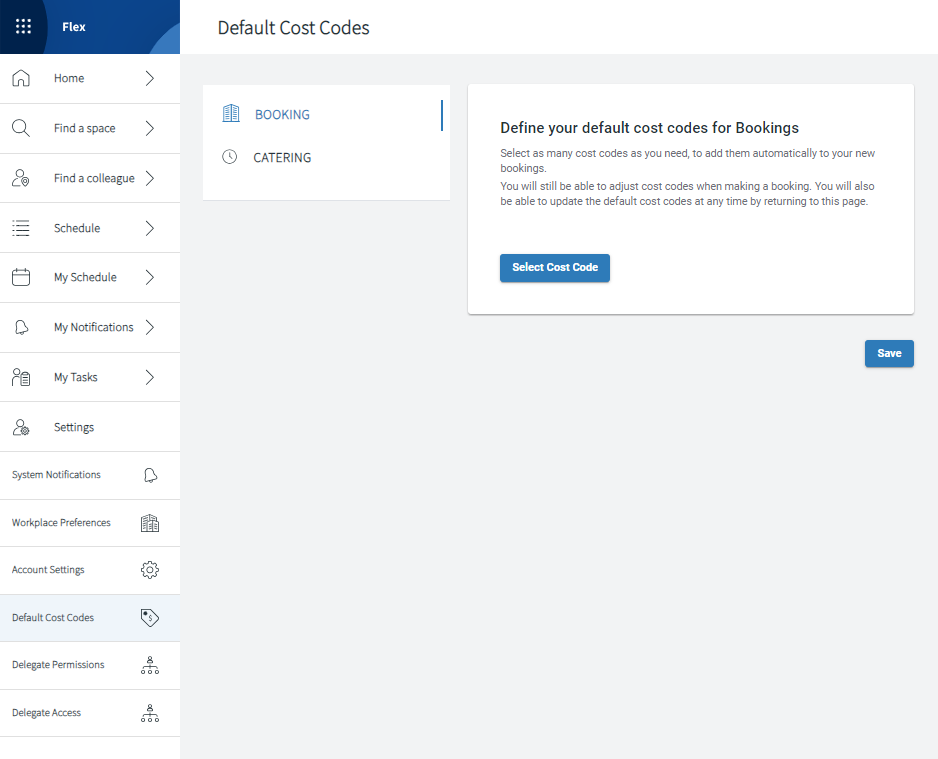
To define your default cost code(s) for your future space bookings, do the following:
- In Flex under Settings > Default Cost Codes > BOOKING, click Select Cost Code.
- Select one or more needed cost codes to be your default ones for space bookings.
- Use one arrow to move it to the right.
Or use the double arrow to move all cost codes to the right and assign them as your default ones. - Set apportioning for the cost codes. The total amount must equal 100%. You can define any apportioning in integer numbers for your default cost codes. You can change apportioning later during bookings.
- Click Add to confirm.
To define your default cost code(s) for your future catering orders, complete the same steps under CATERING section as in BOOKING.
Delegate Permissions and Delegate Access
Delegate function to book on your behalf
Applies to app version 2024.01 onwards.
To allow other users to book on your behalf or add visitors without handling the AAD role permissions, the IBSS system offers more flexibility with the Delegate functionality.
How it works
- Your organisational admin enables this function for you in Admin Portal.
- You appoint your colleagues as your delegates to create bookings on your behalf.
Under Settings, you will have the following pages:
- Delegate Permissions to grant delegate access to others on your behalf.
- Delegate Access to handle permissions granted to you.
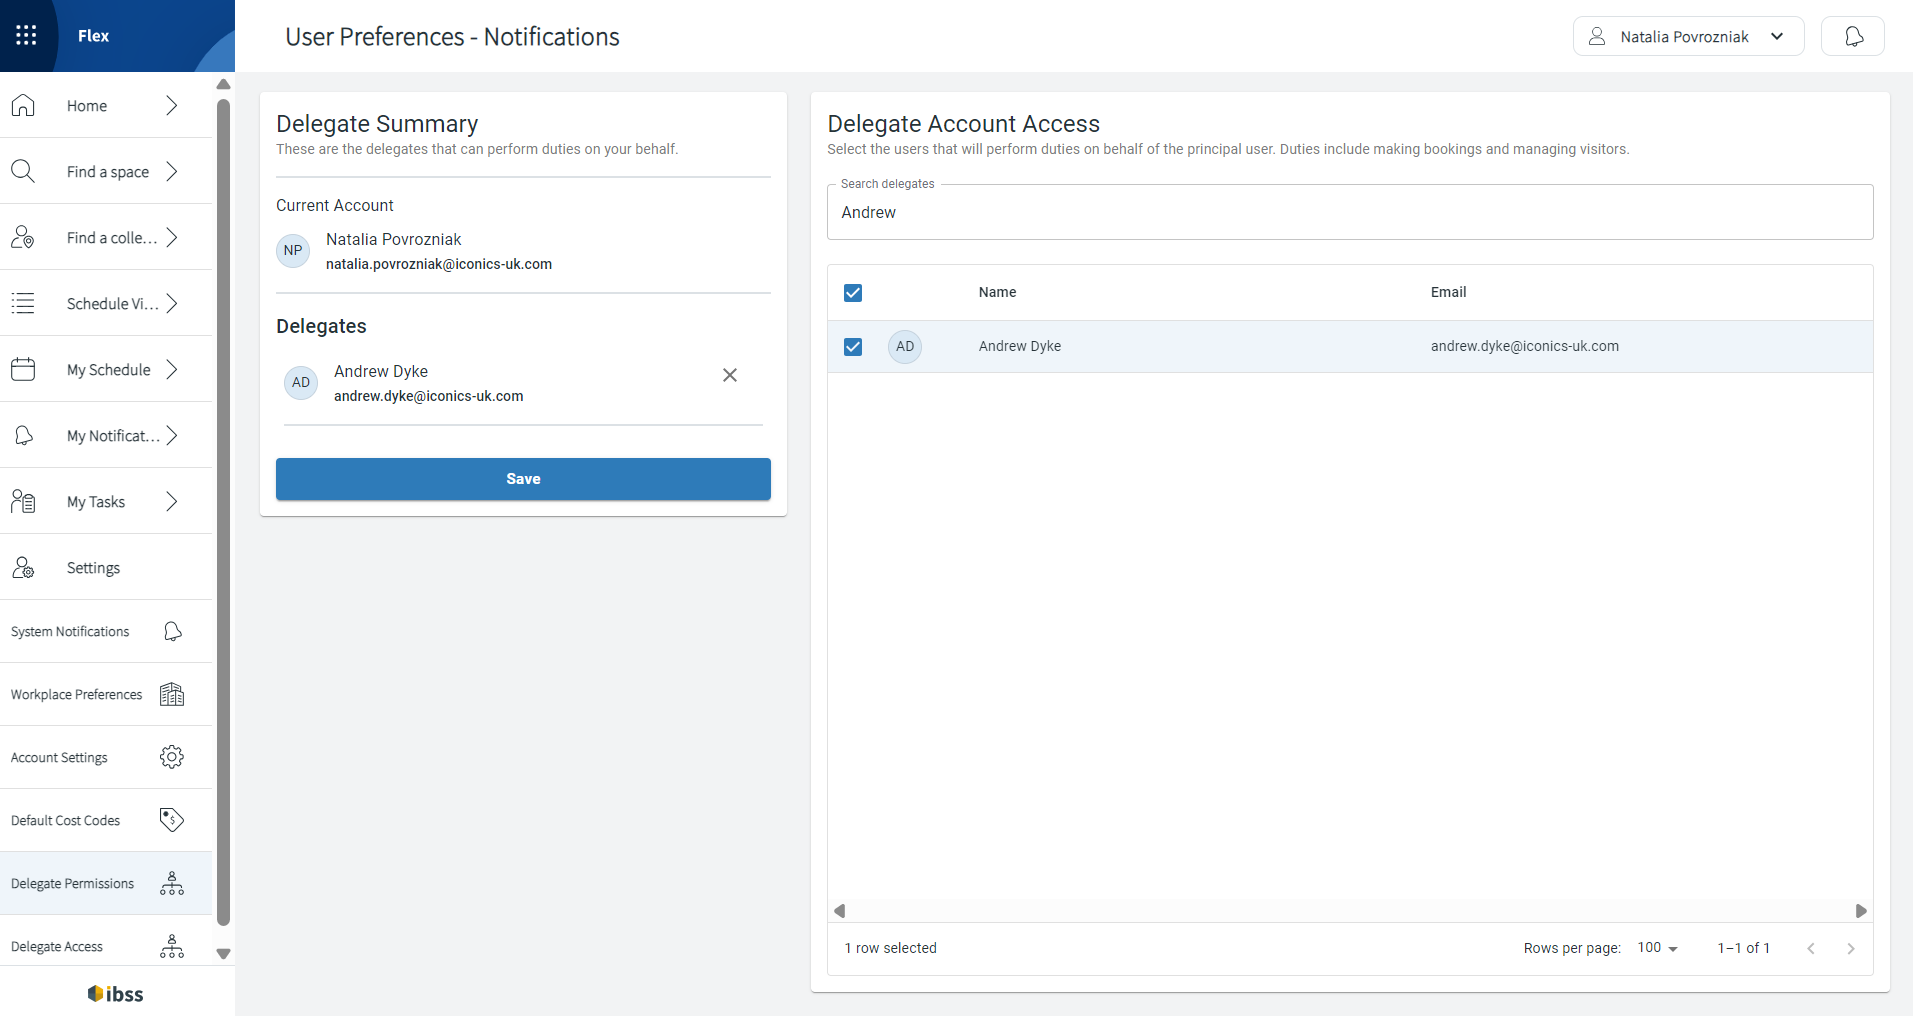
Delegate Permissions
On this page, you manage delegate permissions for employees to act on your behalf: book spaces or add visitors.
⚠️ Make sure that the level of permissions of who you choose to be your delegate is the same or higher than yours:
- Your delegate has to be allowed to view and book spaces that you are allowed to view and book.
- Your delegate should mind their elevated booking permissions if they are allowed to book more spaces than you are. This means that you won't see their bookings on your behalf if they book spaces for you that aren't defined for your role.
Example
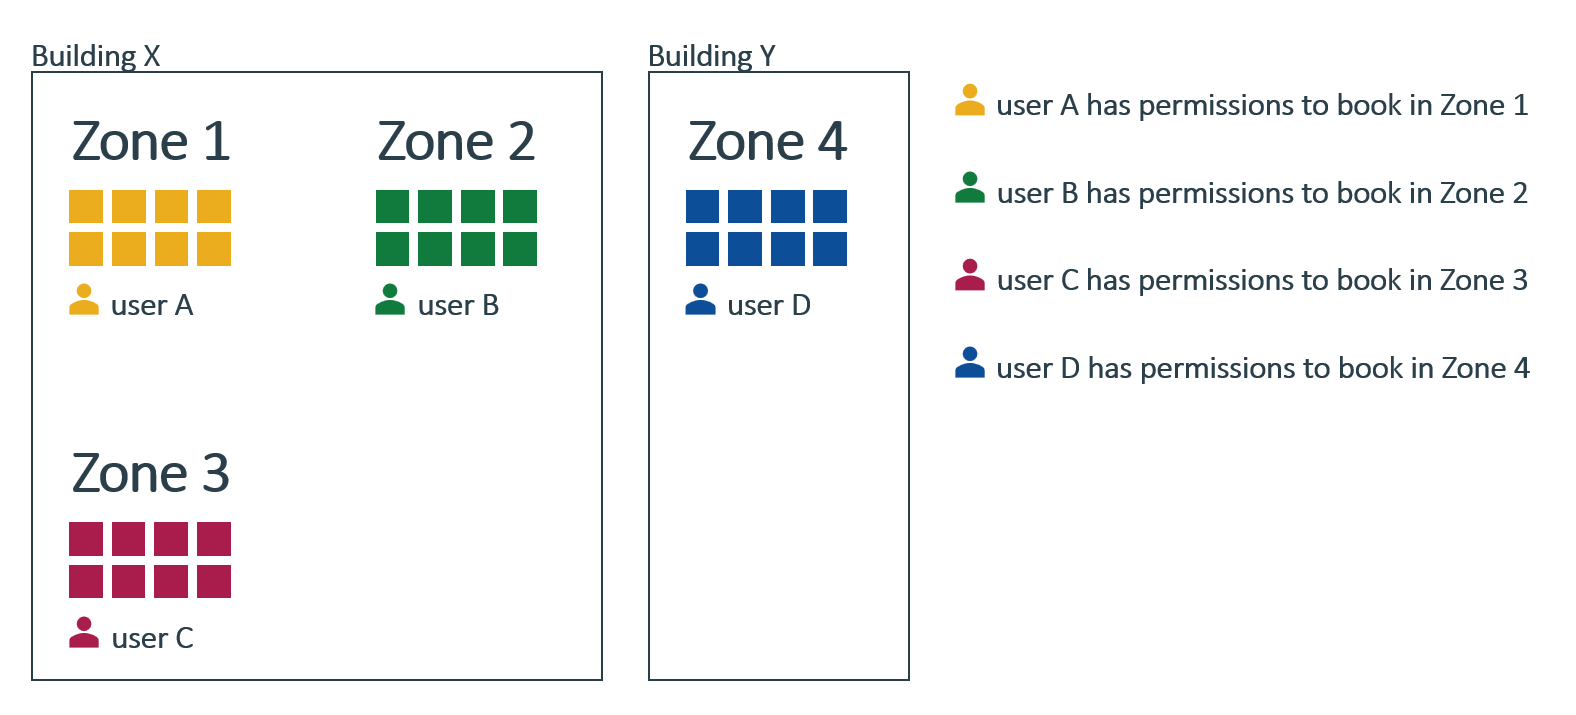
| Condition | Required permissions |
|---|---|
| If user A delegates to user C, and user C wants to book a desk for user A. |
 User C needs permissions to book in Zone 1 and Zone 3. |
| If user B delegates to user C, and user C wants to book a desk for user B. |
User C needs permissions to book in Zone 2 and Zone 3. |
| If user A and B delegate to user C, and user C wants to book a desk for user A in Zone 1 and for user B in Zone 2. |
User C needs permissions to book in Zone 1, Zone 2, and Zone 3. |
| If user D has the permission to book in Building Y and delegates to user C, who originally has the permission to book in Building X, and user C wants to book a desk for user B in Building Y. |
User C needs permissions to book in Building Y and in Zone 4, and keeps their original permissions for Zone 3. |
⚠️ Note:
- The system is checking permissions of user C. User C requires permissions to book a space for other users in other zones.
- When user C is searching for a space, the spaces that are returned are all the spaces that user C has access to.
⚠️ Mind that your delegates don't see all your bookings or bookings made for you by others. They only have permission to set you as a booking host.
✅ If you have required permissions to view this page within your Flex menu items, you are able to:
- See the list of your delegates.
- Assign delegate users.
- Remove delegate users who were assigned previously (by you or your admin).
To add a colleague as your delegate:
- On the right, search for the employee who you want to grant delegate permissions to.
- Select the checkbox next to their name to add and save in delegates' list.
Note: You can add one or more persons as your delegates. Selected users will be remembered between searches. - Save your selection.
Your delegates will now have a separate tab on the popup that opens when they select the Book for Someone Else? option.

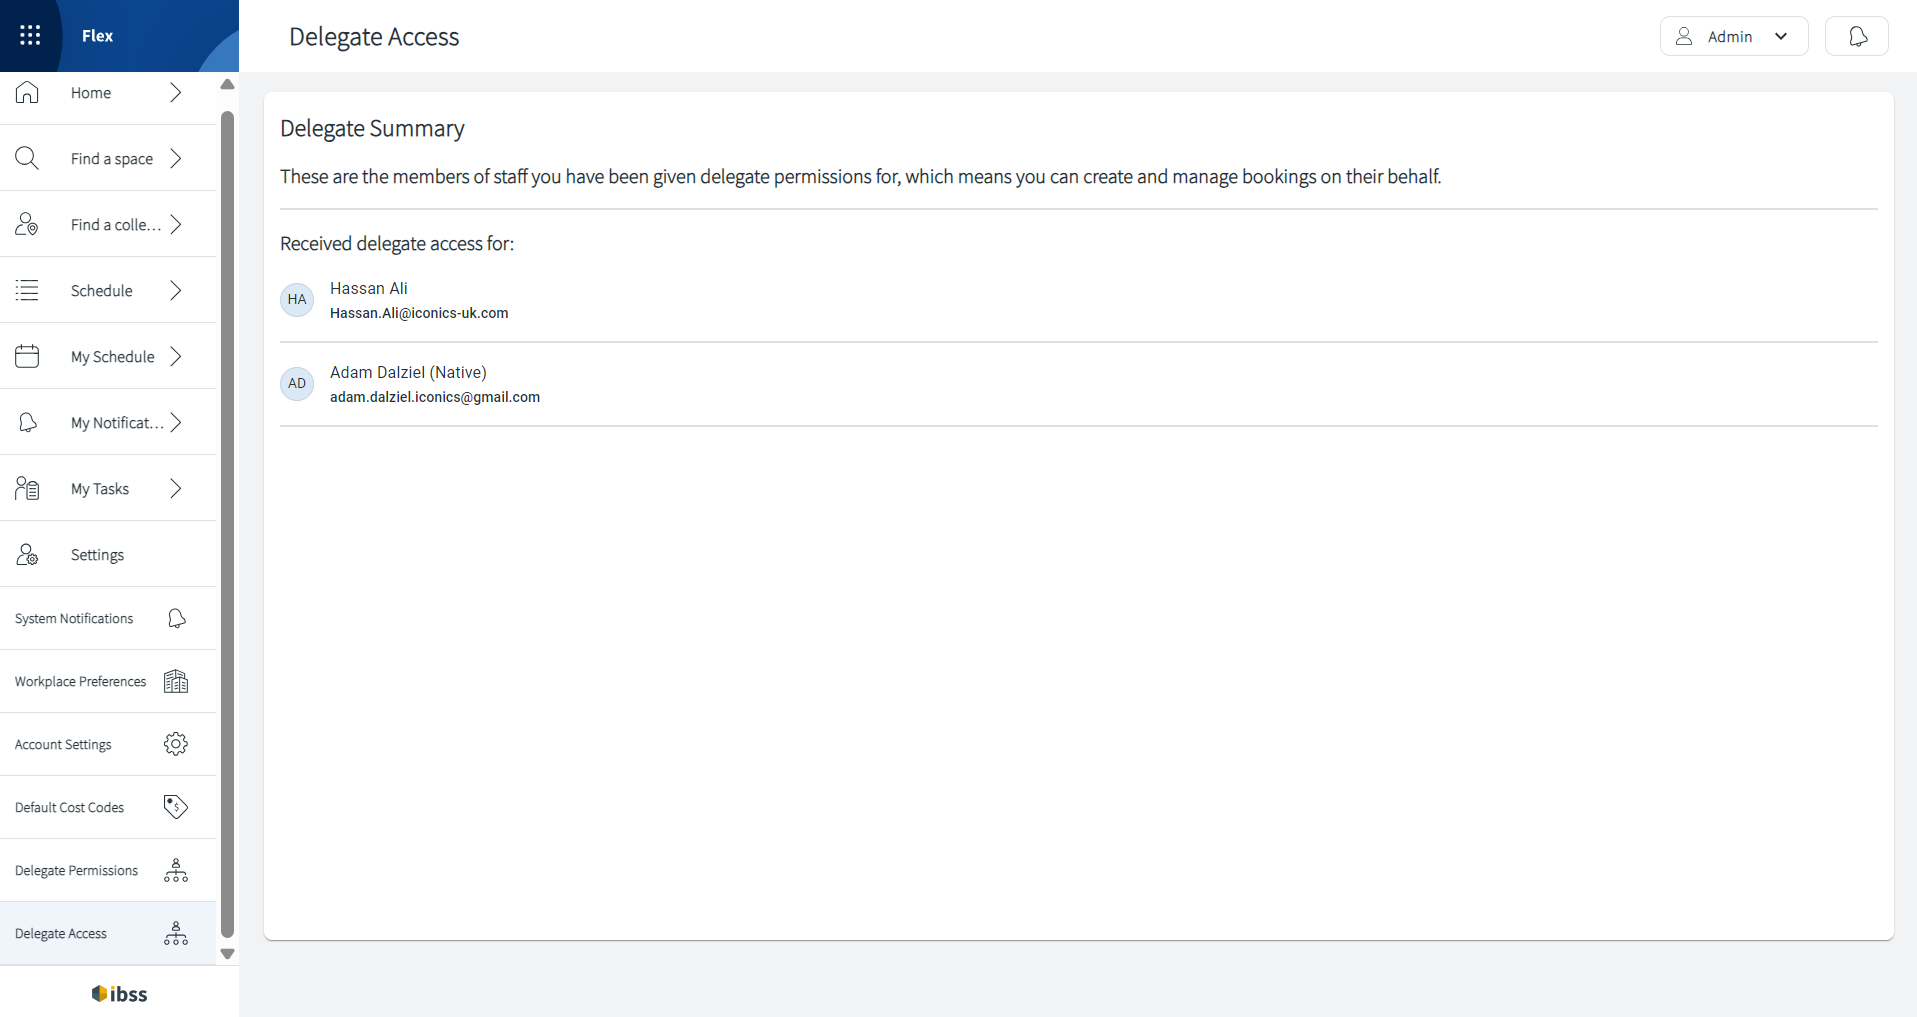
Delegate Access
Here, you can view the list of colleagues who granted their delegate permissions to you.
✅ With these permissions, you can make bookings and invite visitors on behalf of them.
⚠️ Make sure that you respect the level of permissions of who you book for, meaning that you book only those spaces within the zones where your delegator is also allowed to book. Otherwise, they won't see the booking that you've made on behalf of them.
❌ You cannot remove delegate access permission that was granted to you. Only your admin can do this for you or the person who has granted this permission to you in the first place.
👋 Share your feedback with us about this documentation. Highlight a word or a whole paragraph and click the plus icon that appears. We keep improving this knowledge base based on your comments.